M
McIvan
Guest
Just for a bit of light relief, I knocked out a Thunderbolt to try out some more natural metal finish products....putting it through the airbrush this time over a Mr Surfacer undercoat, instead of brush painting.
Mr Surfacer is a lacquer in which liquid putty has been dissolved. It comes in 500, 1000 and 1200 grades, the higher the grade the smaller the putty grains. You paint it onto a model to fill very small gaps or scratches, but apparently you can use it prime a model as well.
You may remember when I did the Harvard Trainer the aluminium finish kept rubbing off when touched. I had applied it straight over the plastic as per the technique I was trying. It worked, but I ended up sealing it with Future to keep it from rubbing off. Didin't have much adhesion to the model.
So it seemed to me that a primer first would be a good idea....and Mr Surfacer should hopefully provide a good grip for the metal....being a liquid putty...as well as getting good adhesion to the plastic (being a lacquer...and lacquers will melt into plastic).
So I sprayed Surfacer 1000 two nights ago...quite apprehensive about it I was too. Lacquer thinners are potent stuff, and I don't have a decent extraction system set up because I'm working (spraying, anyway) with harmless acrylics.
Being a chicken, I gave some other mediums a try on some foil...mixing it with window cleaner, alcohol based thinner, and turpentine. No dice...it just curdled up. So I used lacquer thinner from the local hardware store, thinned about 50/50.
First up I got all these wispy threads coming out of the brush and draping off the edges and protruding pieces such as guns of my aircraft. In addition the airbrush clogged up real quick. Increasing the pressure partially solved this but it still wasn't great..
I tipped a bunch of the mixture out and added more thinner....probably got down to 75% thinner or three parts thinner to one part surfacer. That was probably a little too thin in retrospect....but it solved the problem. Mr Surfacer now sprayed on beautifully. The only problem from my view was that fumes were going everywhere (forgetting I still had my pressure up high) and I was getting bloody worried that they'd spark off the computer power supply, so I finished things off as quickly as possible.
It was a definite learning experience......the lessons being that Mr Surfacer requires quite a heavy thinning. Beautiful result though. I think, however, that I will get a proper extractor fan paint booth before using it again. I had a household fan behind me and an open window, but it was still overpowering, and not something you want to be breathing or impregnating into the walls even if you do have a respirator.
The wispy bits when it hadn't been thinned enough simply brushed aside like cobwebs...no problem at all. I had been worried they would cause major problems.
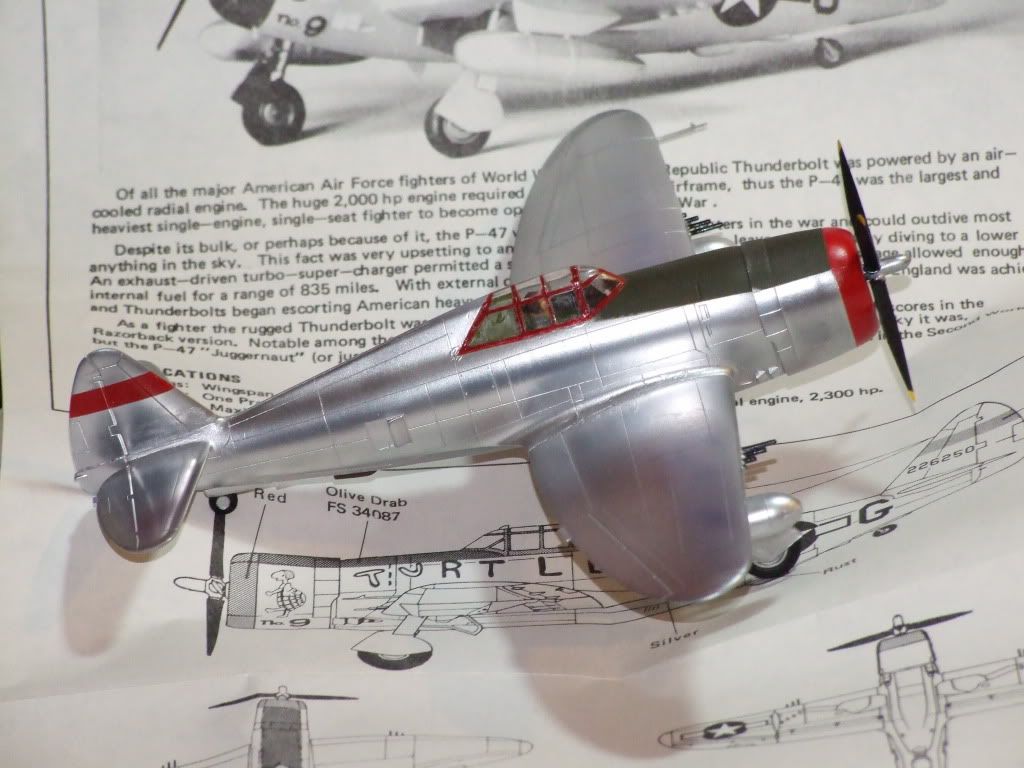
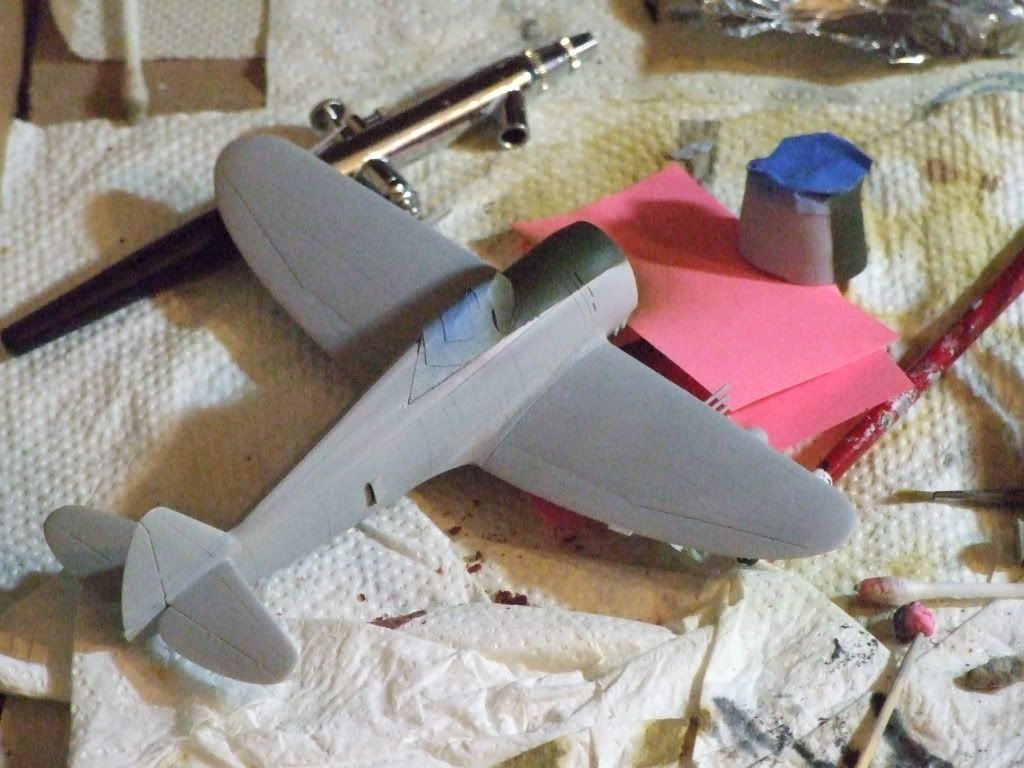
Here's the beast primed.
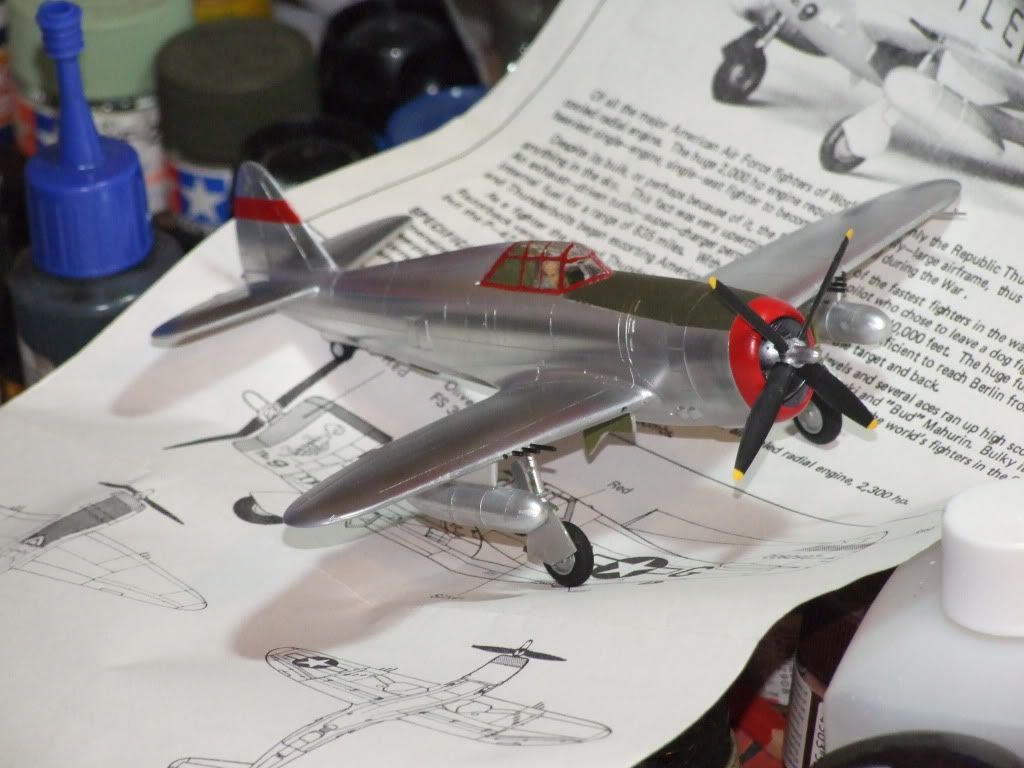
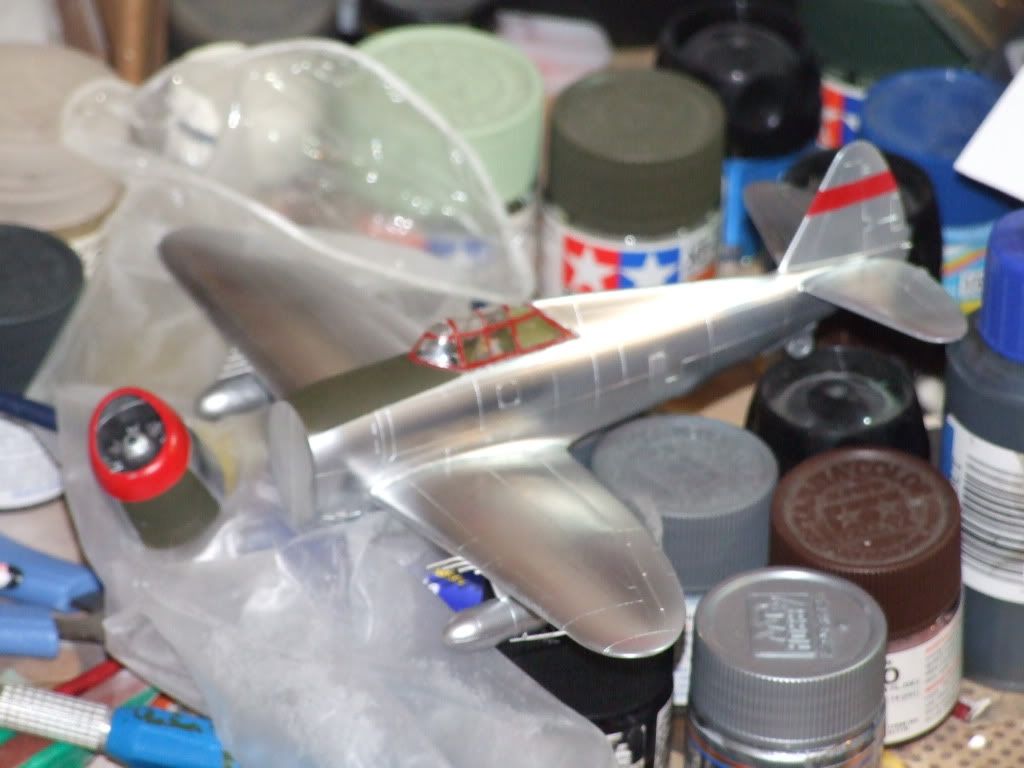
Next we put on the Mr Metal Color Aluminium. This is another lacquer based paint. You can throw it at the model mixed with other things.....I did a test with window cleaner (ammonia base) and it sort of works, but it's not the best and puddles badly. So I primed it with lacquer thinner and kept the pressure right down. It behaved pretty well once I sorted out the lowest pressure that would still suck paint from the bowl and kept the paint flow at a minimum....went on smooth (albeit slow) without causing too much in the way of fumes (until I got a little impatient later on and unwisely opened up the paint flow).
After painting I let it dry, and then started buffing....first with cotton buds, then with a piece of old cloth.
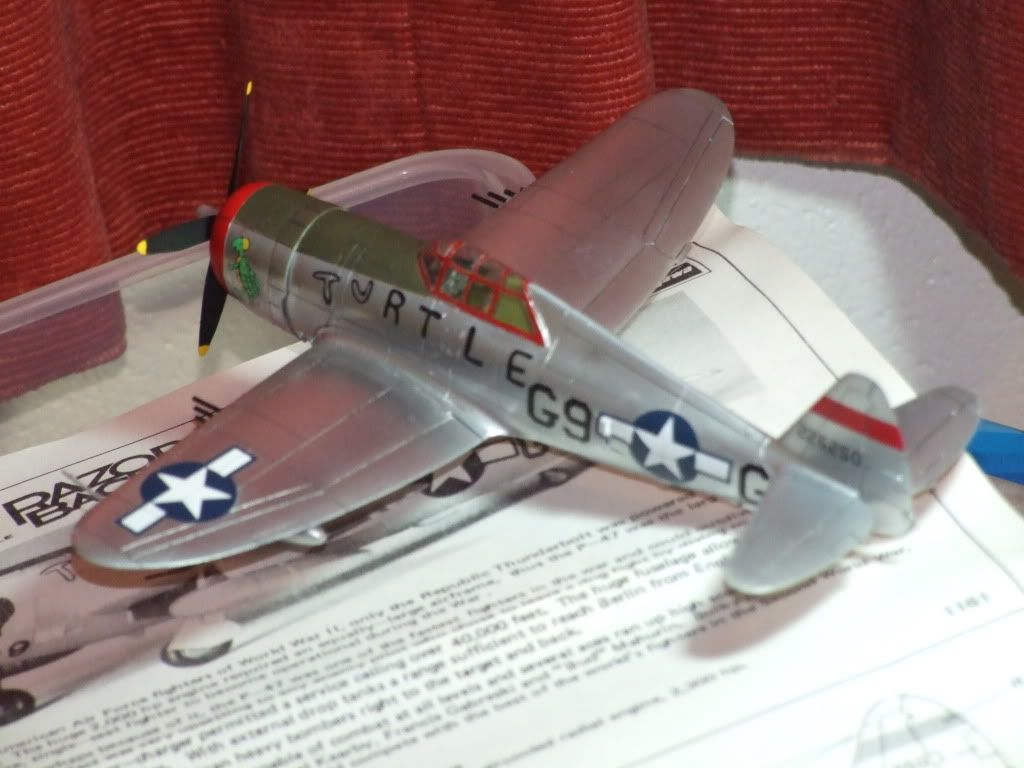
At the moment it looks like so:
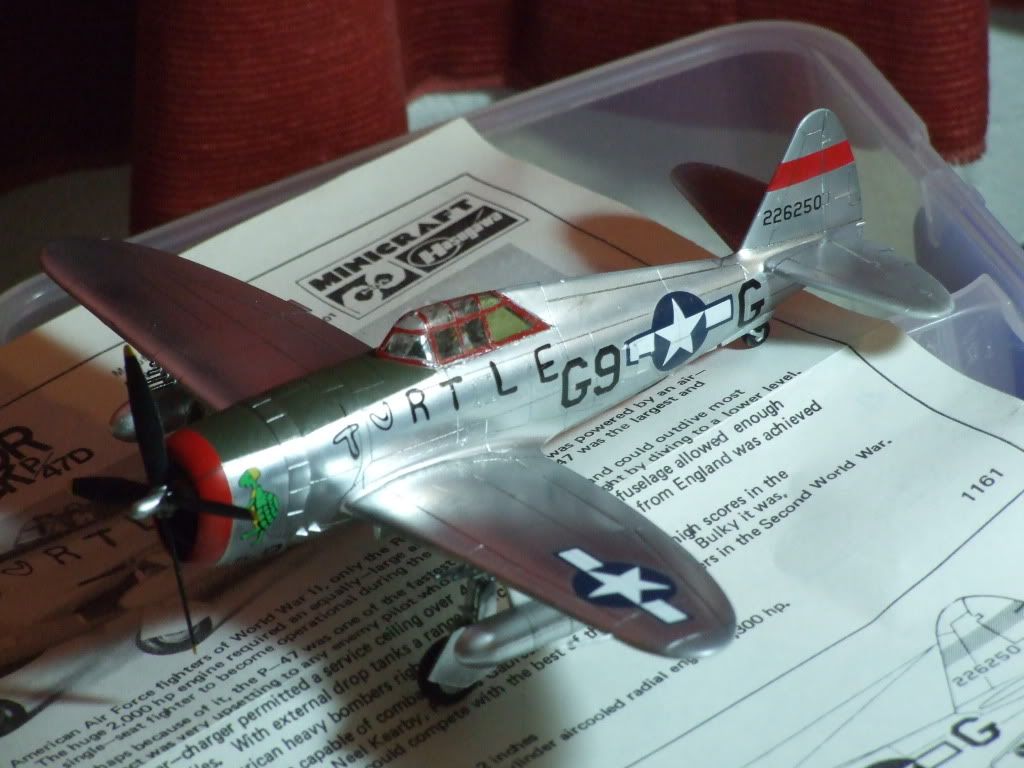
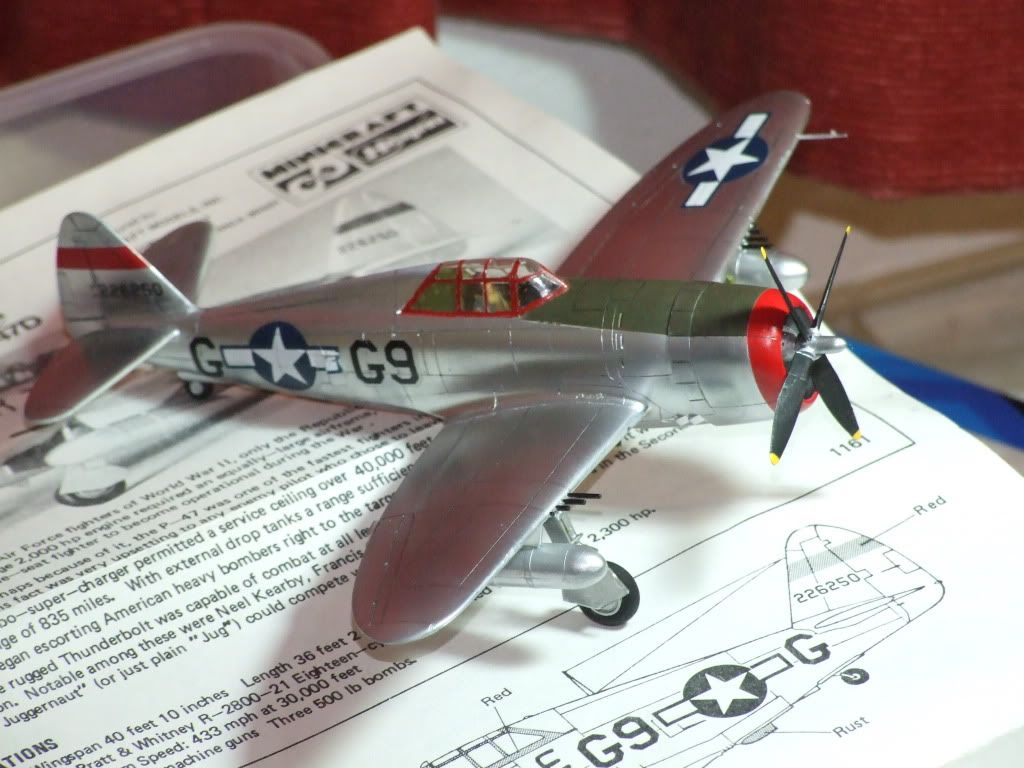
Going to let it sit and cure for the next three days, then attach the undercarriage and start some touch up painting...
Mr Surfacer is a lacquer in which liquid putty has been dissolved. It comes in 500, 1000 and 1200 grades, the higher the grade the smaller the putty grains. You paint it onto a model to fill very small gaps or scratches, but apparently you can use it prime a model as well.
You may remember when I did the Harvard Trainer the aluminium finish kept rubbing off when touched. I had applied it straight over the plastic as per the technique I was trying. It worked, but I ended up sealing it with Future to keep it from rubbing off. Didin't have much adhesion to the model.
So it seemed to me that a primer first would be a good idea....and Mr Surfacer should hopefully provide a good grip for the metal....being a liquid putty...as well as getting good adhesion to the plastic (being a lacquer...and lacquers will melt into plastic).
So I sprayed Surfacer 1000 two nights ago...quite apprehensive about it I was too. Lacquer thinners are potent stuff, and I don't have a decent extraction system set up because I'm working (spraying, anyway) with harmless acrylics.
Being a chicken, I gave some other mediums a try on some foil...mixing it with window cleaner, alcohol based thinner, and turpentine. No dice...it just curdled up. So I used lacquer thinner from the local hardware store, thinned about 50/50.
First up I got all these wispy threads coming out of the brush and draping off the edges and protruding pieces such as guns of my aircraft. In addition the airbrush clogged up real quick. Increasing the pressure partially solved this but it still wasn't great..
I tipped a bunch of the mixture out and added more thinner....probably got down to 75% thinner or three parts thinner to one part surfacer. That was probably a little too thin in retrospect....but it solved the problem. Mr Surfacer now sprayed on beautifully. The only problem from my view was that fumes were going everywhere (forgetting I still had my pressure up high) and I was getting bloody worried that they'd spark off the computer power supply, so I finished things off as quickly as possible.
It was a definite learning experience......the lessons being that Mr Surfacer requires quite a heavy thinning. Beautiful result though. I think, however, that I will get a proper extractor fan paint booth before using it again. I had a household fan behind me and an open window, but it was still overpowering, and not something you want to be breathing or impregnating into the walls even if you do have a respirator.
The wispy bits when it hadn't been thinned enough simply brushed aside like cobwebs...no problem at all. I had been worried they would cause major problems.
Here's the beast primed.
Next we put on the Mr Metal Color Aluminium. This is another lacquer based paint. You can throw it at the model mixed with other things.....I did a test with window cleaner (ammonia base) and it sort of works, but it's not the best and puddles badly. So I primed it with lacquer thinner and kept the pressure right down. It behaved pretty well once I sorted out the lowest pressure that would still suck paint from the bowl and kept the paint flow at a minimum....went on smooth (albeit slow) without causing too much in the way of fumes (until I got a little impatient later on and unwisely opened up the paint flow).
After painting I let it dry, and then started buffing....first with cotton buds, then with a piece of old cloth.
At the moment it looks like so:
Going to let it sit and cure for the next three days, then attach the undercarriage and start some touch up painting...


")