E
edde
Guest
My first PMEB in maybe 8 years! I've had fun playing against the AI but thought it was about time I had a go against a human opponent. I’m expecting quite a steep learning curve with this so was after a player who would be happy to do a bit of an AAR, that way I get to learn a bit quicker rather than just by my mistakes. Cargol has gone one step further and we will be posting our AARs on the forum, so please feel free to comment on anything I do, say what you would have done, a bit of constructive criticism if you know what I mean.
A medium sized meeting engagement, don’t know the map, random weather. I didn’t mind which side by Cargol was kind enough to let me choose….so Brits it was.
Please comment on things as they go, ask questions. Just no spoilers in here if you are reading his AAR at the same time! There is obviously a lot more going on in my head than I've written down so ask away.
Assemble Forces
To be honest I’m still getting used to choosing my own troops and spending points efficiently, most of my games in the past have been the campaigns or single missions.
First step was to change the experience to Veteran and +1 Leadership, then to be honest I clicked ‘suggestion’ a few times. A few clicks later and Parachute Company, a couple of Sextons and some Shermans popped up. Not a bad mix but in need of some Artillery so I deleted one of the Shermans and a platoon of inf (I think) and went for a couple of Mortar sections and two TRPs. The antitank section has a Forward Observer party, not sure if that’s linked to the Mortars but I guess I’ll have to wait and see. If not then hopefully the increased leadership will come into play for HQ units to call things in a bit quicker. Like I said…I’m learning here.
Still a few points left over so some subtle changes to experience and leadership of a few key units (sniper, tanks and HQ teams) and all my points are used.
I’m hoping that the balance of force will work well. Arty of size small enough to be called in quick yet big enough to damage his men on the ground. I’ve found you need bigger things to take out vehicles, it takes too long to call in which just won’t work for a human opponent. Shemans pretty standard all rounders, the Sextons something a bit different I’m not sure I would have chosen myself, but hey, I like to have something a bit different in the mix.
Now just to see which map we are on and what the weather is like.

Setup Phase
Rain! Well that’s the first thing I hear as soon as it loads. Now I can see what I’ve spent my points on, overall a nice balanced mix I’m thinking. I now see I’ve no dedicated MG sections, nevermind, the MG’s on the armour will have to handle things. As luck would have it the HT has an extra PIAT and ammo in it so I allocate that to one of the platoons that doesn’t have one. Overall though, a lot of PIAT’s around (maybe too many but we’ll see).

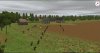
The Map
The key features as I see them are the hill on the left where the dirt track almost touches my start area. Good cover for troops and less chance of bogging for vehicles.
Another feature is the large muddy field on my right flank. Avoid that with vehicles and too open for infantry to stay alive long.
There is a grassy field between him and the town.

The view from his end and the routes I think he’ll take.

From above you can see more buildings my side of the town and it being more open on his. Not sure how that will pan out. (for some reasons all the trees disappeared on this shot)

My plan/setup
Load the HT up with the FO and sniper, that to charge up the hill along the road and park behind a building and unload the FO and sniper who’ll make their way to good vantage points. 2 Platoon to quick forward alongside road for the first two turns and pause. After that maybe down through town depending on what happens. This will be my main thrust into town with the other infantry in reserve/holding the centre/my right flank.

The two Shermans and one Sexton to follow the HT, at the crest of the hill to get into positions beside the buildings with their focus on my left flank. There seems to be good FOV down to where I think Cargol may move vehicles/inf shielded by some trees. Also places a TRP down on my left flank. No arty planned as yet, we agreed none on setup zones, I think I’ll wait to see what happens keep my options open for calling it in as soon as I spot any movement. My final TRP on his edge of town.

Using the houses as cover I should have a pretty good control of the left flank, also a couple of good FOV’s down the centre if I need to pop out for a few shots.
The other half of the infantry move up the centre, take position and see what happens. The other Sexton to move forward over the muddy ground (risky I know) and check the FOV over the muddy field. If not good then I’ll move forward some more.
The DAC to make a very cheeky dash along the flank, hopefully he’ll cause some confusion.
 
His plan (I think)

Armour along the road as it is well shielded on his left flank by trees. Maybe inf up the middle or more likely along the right shielded by the trees.
I’m hoping my DAC will cause him to pause on the left. The Sexton there sit back and FOV permitting lob some shells his way. Fingers crossed his right flanks goes for the either the gap in the trees or he goes up the centre and my Shermans make it in position to be ready for him
 
Turn 1 results

So far so good, my armour all made it onto the road and only a slight hiccup when the HT became bogged for a second. All infantry on their way fine.
DAC heading along the right flank nicely and the Sexton on the right flank in it’s first position to check LOS over the muddy field.
Turn 1 orders
Most units have orders that still need to be finished. The HT will be at its drop-off point before the end of this turn so I plot the destinations for the three groups of passengers. Sniper out on the left flank, FO with by wall with view on the middle TRP and the HQ unit pushing forward into a building in the centre. I now realise this will leave the HT with only a driver and nobody on the .50 so order the HQ support unit up closer take over.
The Sexton on the right has an ok LOS as far as the centre buildings but not a very wide FOV so I hunt him forward a bit. DAC continues on the right flank, making a sharp left turn in through the trees about three quarters of the way along.
No sign of any enemy. Maybe the inf will spot some end of this turn when they get into position.
A medium sized meeting engagement, don’t know the map, random weather. I didn’t mind which side by Cargol was kind enough to let me choose….so Brits it was.
Please comment on things as they go, ask questions. Just no spoilers in here if you are reading his AAR at the same time! There is obviously a lot more going on in my head than I've written down so ask away.
Assemble Forces
To be honest I’m still getting used to choosing my own troops and spending points efficiently, most of my games in the past have been the campaigns or single missions.
First step was to change the experience to Veteran and +1 Leadership, then to be honest I clicked ‘suggestion’ a few times. A few clicks later and Parachute Company, a couple of Sextons and some Shermans popped up. Not a bad mix but in need of some Artillery so I deleted one of the Shermans and a platoon of inf (I think) and went for a couple of Mortar sections and two TRPs. The antitank section has a Forward Observer party, not sure if that’s linked to the Mortars but I guess I’ll have to wait and see. If not then hopefully the increased leadership will come into play for HQ units to call things in a bit quicker. Like I said…I’m learning here.
Still a few points left over so some subtle changes to experience and leadership of a few key units (sniper, tanks and HQ teams) and all my points are used.
I’m hoping that the balance of force will work well. Arty of size small enough to be called in quick yet big enough to damage his men on the ground. I’ve found you need bigger things to take out vehicles, it takes too long to call in which just won’t work for a human opponent. Shemans pretty standard all rounders, the Sextons something a bit different I’m not sure I would have chosen myself, but hey, I like to have something a bit different in the mix.
Now just to see which map we are on and what the weather is like.
Setup Phase
Rain! Well that’s the first thing I hear as soon as it loads. Now I can see what I’ve spent my points on, overall a nice balanced mix I’m thinking. I now see I’ve no dedicated MG sections, nevermind, the MG’s on the armour will have to handle things. As luck would have it the HT has an extra PIAT and ammo in it so I allocate that to one of the platoons that doesn’t have one. Overall though, a lot of PIAT’s around (maybe too many but we’ll see).
The Map
The key features as I see them are the hill on the left where the dirt track almost touches my start area. Good cover for troops and less chance of bogging for vehicles.
Another feature is the large muddy field on my right flank. Avoid that with vehicles and too open for infantry to stay alive long.
There is a grassy field between him and the town.
The view from his end and the routes I think he’ll take.
From above you can see more buildings my side of the town and it being more open on his. Not sure how that will pan out. (for some reasons all the trees disappeared on this shot)
My plan/setup
Load the HT up with the FO and sniper, that to charge up the hill along the road and park behind a building and unload the FO and sniper who’ll make their way to good vantage points. 2 Platoon to quick forward alongside road for the first two turns and pause. After that maybe down through town depending on what happens. This will be my main thrust into town with the other infantry in reserve/holding the centre/my right flank.
The two Shermans and one Sexton to follow the HT, at the crest of the hill to get into positions beside the buildings with their focus on my left flank. There seems to be good FOV down to where I think Cargol may move vehicles/inf shielded by some trees. Also places a TRP down on my left flank. No arty planned as yet, we agreed none on setup zones, I think I’ll wait to see what happens keep my options open for calling it in as soon as I spot any movement. My final TRP on his edge of town.
Using the houses as cover I should have a pretty good control of the left flank, also a couple of good FOV’s down the centre if I need to pop out for a few shots.
The other half of the infantry move up the centre, take position and see what happens. The other Sexton to move forward over the muddy ground (risky I know) and check the FOV over the muddy field. If not good then I’ll move forward some more.
The DAC to make a very cheeky dash along the flank, hopefully he’ll cause some confusion.
 
His plan (I think)
Armour along the road as it is well shielded on his left flank by trees. Maybe inf up the middle or more likely along the right shielded by the trees.
I’m hoping my DAC will cause him to pause on the left. The Sexton there sit back and FOV permitting lob some shells his way. Fingers crossed his right flanks goes for the either the gap in the trees or he goes up the centre and my Shermans make it in position to be ready for him
 
Turn 1 results
So far so good, my armour all made it onto the road and only a slight hiccup when the HT became bogged for a second. All infantry on their way fine.
DAC heading along the right flank nicely and the Sexton on the right flank in it’s first position to check LOS over the muddy field.
Turn 1 orders
Most units have orders that still need to be finished. The HT will be at its drop-off point before the end of this turn so I plot the destinations for the three groups of passengers. Sniper out on the left flank, FO with by wall with view on the middle TRP and the HQ unit pushing forward into a building in the centre. I now realise this will leave the HT with only a driver and nobody on the .50 so order the HQ support unit up closer take over.
The Sexton on the right has an ok LOS as far as the centre buildings but not a very wide FOV so I hunt him forward a bit. DAC continues on the right flank, making a sharp left turn in through the trees about three quarters of the way along.
No sign of any enemy. Maybe the inf will spot some end of this turn when they get into position.


")