M
McIvan
Guest
A little while back, as I was waiting for oil washes on the Crusader to dry, I dragged out a second hand purchase of a 1/72 Harvard Trainer (also known, apparently, as a "Texan").
It had already been 2/3 put together...the cockpit tub and seats were in, the fuselage halves joined and the wings on....and whoever had done it had really stuffed up the fit, or maybe it was just an 'orrible kit, I dunno. Anyway, they'd slathered the putty on thick, and there was no easy way of getting it as smooth as it needed to be....because Harvard Trainers are mostly aluminium, and if there's one finish guaranteed to show the minutest of imperfections, it's a natural metal finish. Even if I did spend the requisite hours on smoothing it all out, I still would have been left with lots of engraved surface detail vanishing mysteriously as it approached the wing roots.
I didn't pay much for it, so I didn't terribly much care, and decided to use it as a tutorial for the new generation of buff-able metallics, which I'd never used before. Back when I was a kid, you had a choice of silver or silver....none of this fancy "dark aluminium" or chrome or "polished aluminium" colours. Anyways, I had a pot of Mr Metal Colour Aluminium to try out.
Now, the technique I'd heard about actually involves a brush finish....not an airbush at all. It had best be a disposable brush too, as it gets ruined for anything but this particular technique. The idea is to use a big brush, put paint on a section of bare plastic, and then drive the brush tip first into the paint and stir it around and around. The metal pigment gets into all the splayed bristles and starts to dry, as does the paint on the model albeit a little slower. For a while nothing happens....but then the paint on the model starts to dry and it is being buffed as it dries by a paintbrush loaded with metallic pigment, coming up to an absolutely beautiful finish....I was stoked. Being lazy, I soon worked out that you can ignore the paint for a while until it gets close to drying (not long at all) and then buff it to save the effort of feeling like you're involved in interminably stirring a very small pot.
Problem no.1:
After admiring this for a while, and feeling pretty chuffed with myself, I picked it up to look it over closely. Putting it down, I noticed my fingertips were covered in silver......not exactly the most robust finish. So I gave it a spray of Klear varnish. The model was so smooth and shiny the varnish collected in little beads and wouldn't cover until I'd sprayed quite a lot on....it ended up pooling a bit on the underside, which is annoying. Bah. Secondly, the Klear actually took the lustre out of the paint.....still looked good, just not a glossy pristine metal finish. After a short viewing I decided I preferred this as it looked a lot more like aluminium in every day use rather than some spiffy tarted up plane.
Problem no.2:
So ok, we've varnished it up and its safe to handle. Time to do the anti-glare panel and some black stripes on the wings. Did a good job on the masking, if I say so myself, and sprayed black. Comes time to remove the tape and even the lowest tack tape is lifting Klear and bits of the underlying aluminium (and, incidentally, bits of my black stripes with it). Grrr.....there's very little adhesion between the mettallic pigments and either the plane OR the varnish on top.
Redo the metallics, but the lifted areas show patchily (natural metal finishes show EVERY imperfection, remember), and redo the Klear, with a thicker coat. Touch up the black areas with a brush.
Here is a picture of the Harvard at this point....
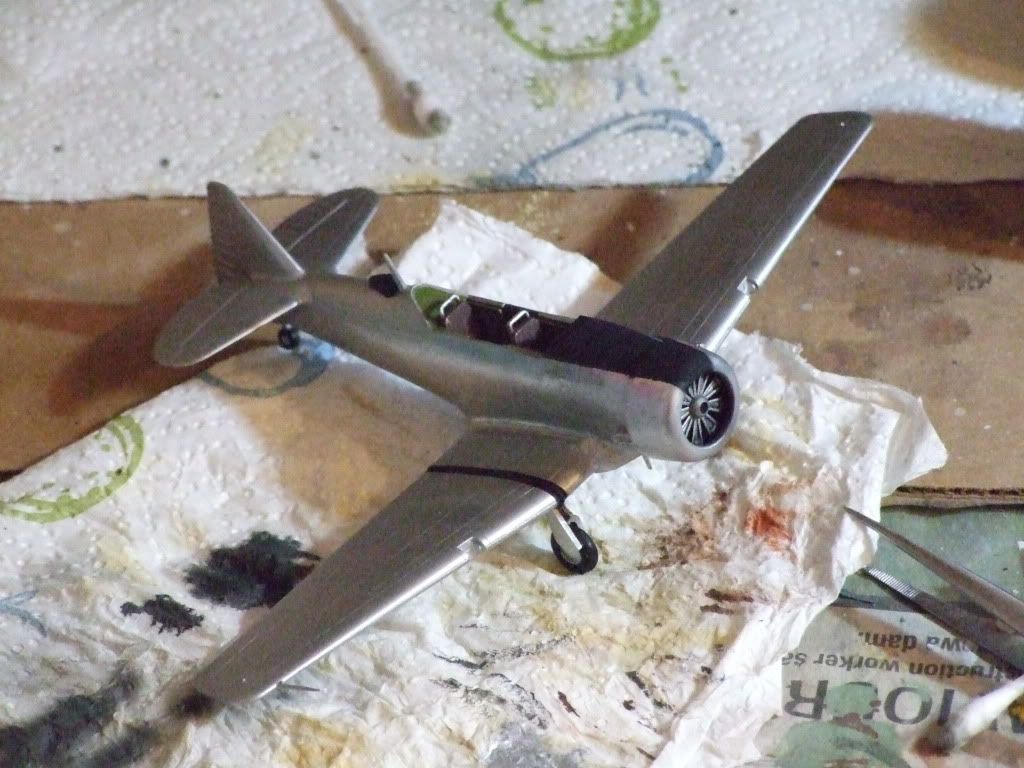
Next time I give this a go I will use a primer first.....we really do need something for the aluminium to grab onto or, lovely as it looked, it's just a menace. Gloss black is apparently very good as a metallic primer....needs to be a nice smooth surface to buff on. I'll follow that up with thicker or multiple coats of varnish to get a good strong seal that can hopefully withstand some masking tape.
Problems no.3:
Time to mask up the canopy. Boy there's a lot of panels...and the ribs inbetween aren't very well defined.....it's hard to see them under the tape that I'm trying to mask with so I can cut out the frame. Give that up after doing a few panels only, and try a bottle of masking fluid to cover the rest....that's a fair bit easier because I can see what I'm doing.
Ok....brush on the aluminium, start scrubbing away with the brush. Yeah, I should have seen this one coming...the scrubbing/buffing motion of the brush is lifting the tape and/or masking fluid and getting aluminium on the perspex areas of the canopy. Stop that, don't worry about buffing, just let it dry. You can't really tell. But you CAN tell there's aluminium on the clear areas. I moisten a cotton bud with turpentine and start removing the unwanted metal. Which goes fine as far as removing aluminium paint goes. It's only half an hour later that I happen to look it over and find that the turpentine has attacked the plastic somewhat, resulting in foggy rough patches where the cotton bud has been. Sigh.
There's nothing for it but to press on, so the canopy and other glass bits get affixed, decals attached and various bits touched up. I've chosen a colour scheme for the People's Liberation Army in China in WWII...the other scheme is Korean war and I'm a WWII man where possible...besides it ain't often you get a PLA Chinese scheme. Unfortunately the damage to the canopy renders it very much a bottom shelf model.
Two pictures of the finished item (apart from panel line washes.....I may try highlighting panel lines with graphite from a soft pencil, which apparently goes quite well with metallic finishes).....and preview shot of the next project in front, already mostly put together and awaiting procurement of some replacement axles (those in the kit being long gone for some reason).....I have a feeling that a couple of paper clips will be liberated from the office tomorrow : )
Kind of an ugly plane, really!
It had already been 2/3 put together...the cockpit tub and seats were in, the fuselage halves joined and the wings on....and whoever had done it had really stuffed up the fit, or maybe it was just an 'orrible kit, I dunno. Anyway, they'd slathered the putty on thick, and there was no easy way of getting it as smooth as it needed to be....because Harvard Trainers are mostly aluminium, and if there's one finish guaranteed to show the minutest of imperfections, it's a natural metal finish. Even if I did spend the requisite hours on smoothing it all out, I still would have been left with lots of engraved surface detail vanishing mysteriously as it approached the wing roots.
I didn't pay much for it, so I didn't terribly much care, and decided to use it as a tutorial for the new generation of buff-able metallics, which I'd never used before. Back when I was a kid, you had a choice of silver or silver....none of this fancy "dark aluminium" or chrome or "polished aluminium" colours. Anyways, I had a pot of Mr Metal Colour Aluminium to try out.
Now, the technique I'd heard about actually involves a brush finish....not an airbush at all. It had best be a disposable brush too, as it gets ruined for anything but this particular technique. The idea is to use a big brush, put paint on a section of bare plastic, and then drive the brush tip first into the paint and stir it around and around. The metal pigment gets into all the splayed bristles and starts to dry, as does the paint on the model albeit a little slower. For a while nothing happens....but then the paint on the model starts to dry and it is being buffed as it dries by a paintbrush loaded with metallic pigment, coming up to an absolutely beautiful finish....I was stoked. Being lazy, I soon worked out that you can ignore the paint for a while until it gets close to drying (not long at all) and then buff it to save the effort of feeling like you're involved in interminably stirring a very small pot.
Problem no.1:
After admiring this for a while, and feeling pretty chuffed with myself, I picked it up to look it over closely. Putting it down, I noticed my fingertips were covered in silver......not exactly the most robust finish. So I gave it a spray of Klear varnish. The model was so smooth and shiny the varnish collected in little beads and wouldn't cover until I'd sprayed quite a lot on....it ended up pooling a bit on the underside, which is annoying. Bah. Secondly, the Klear actually took the lustre out of the paint.....still looked good, just not a glossy pristine metal finish. After a short viewing I decided I preferred this as it looked a lot more like aluminium in every day use rather than some spiffy tarted up plane.
Problem no.2:
So ok, we've varnished it up and its safe to handle. Time to do the anti-glare panel and some black stripes on the wings. Did a good job on the masking, if I say so myself, and sprayed black. Comes time to remove the tape and even the lowest tack tape is lifting Klear and bits of the underlying aluminium (and, incidentally, bits of my black stripes with it). Grrr.....there's very little adhesion between the mettallic pigments and either the plane OR the varnish on top.
Redo the metallics, but the lifted areas show patchily (natural metal finishes show EVERY imperfection, remember), and redo the Klear, with a thicker coat. Touch up the black areas with a brush.
Here is a picture of the Harvard at this point....
Next time I give this a go I will use a primer first.....we really do need something for the aluminium to grab onto or, lovely as it looked, it's just a menace. Gloss black is apparently very good as a metallic primer....needs to be a nice smooth surface to buff on. I'll follow that up with thicker or multiple coats of varnish to get a good strong seal that can hopefully withstand some masking tape.
Problems no.3:
Time to mask up the canopy. Boy there's a lot of panels...and the ribs inbetween aren't very well defined.....it's hard to see them under the tape that I'm trying to mask with so I can cut out the frame. Give that up after doing a few panels only, and try a bottle of masking fluid to cover the rest....that's a fair bit easier because I can see what I'm doing.
Ok....brush on the aluminium, start scrubbing away with the brush. Yeah, I should have seen this one coming...the scrubbing/buffing motion of the brush is lifting the tape and/or masking fluid and getting aluminium on the perspex areas of the canopy. Stop that, don't worry about buffing, just let it dry. You can't really tell. But you CAN tell there's aluminium on the clear areas. I moisten a cotton bud with turpentine and start removing the unwanted metal. Which goes fine as far as removing aluminium paint goes. It's only half an hour later that I happen to look it over and find that the turpentine has attacked the plastic somewhat, resulting in foggy rough patches where the cotton bud has been. Sigh.
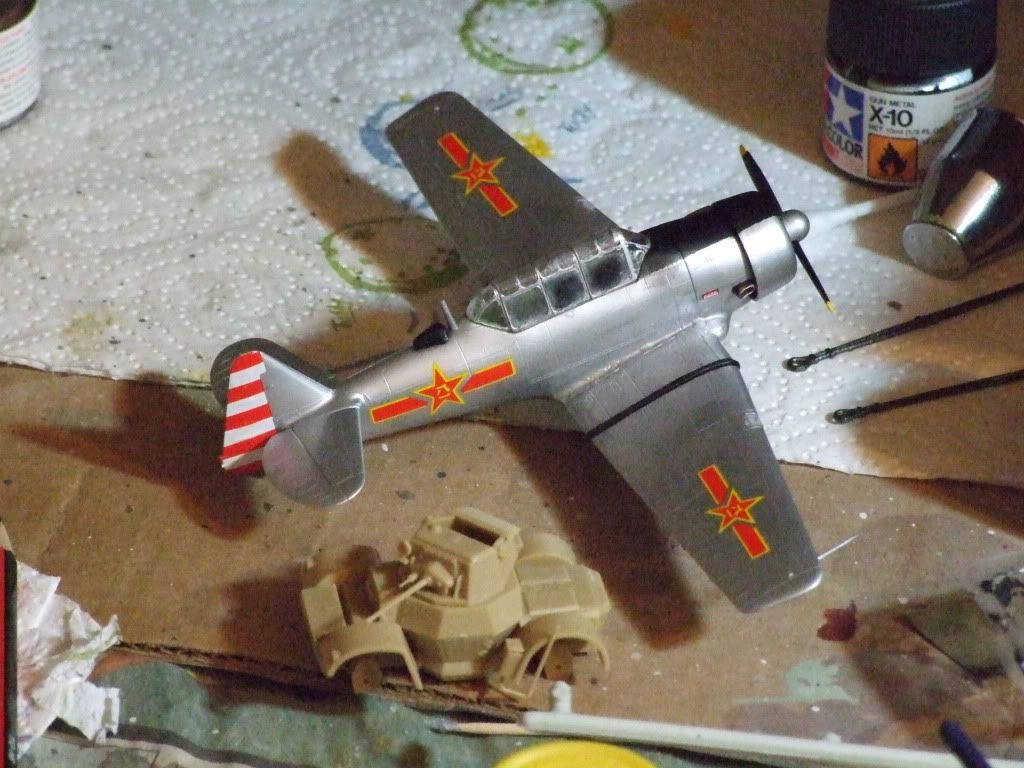
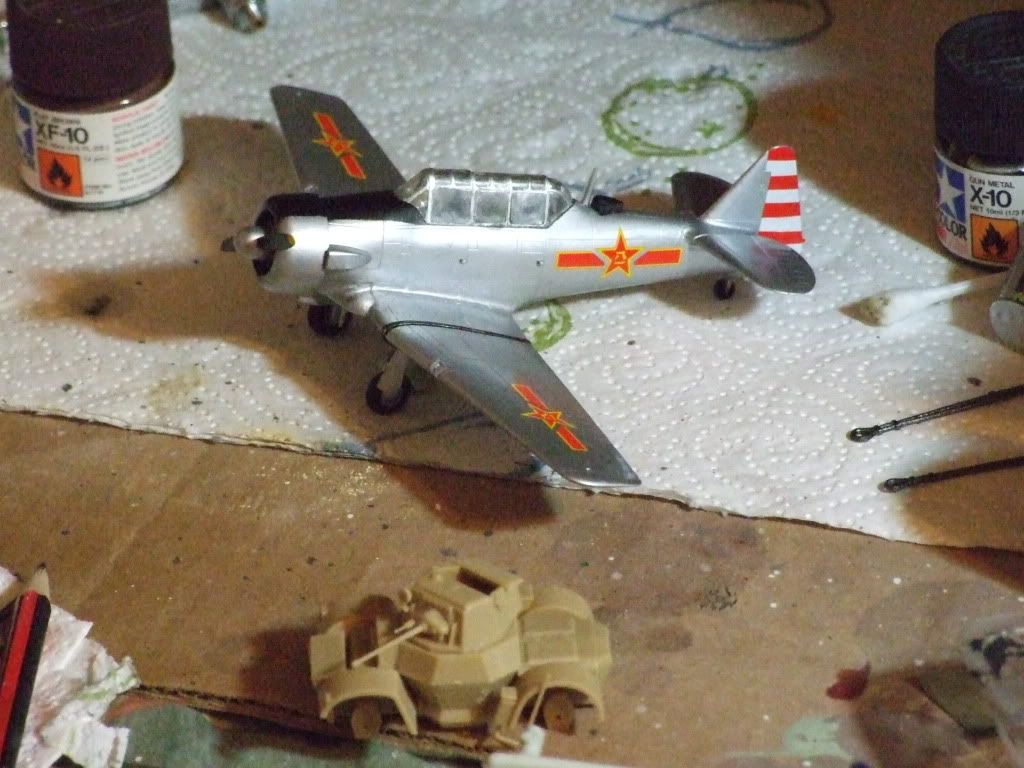
There's nothing for it but to press on, so the canopy and other glass bits get affixed, decals attached and various bits touched up. I've chosen a colour scheme for the People's Liberation Army in China in WWII...the other scheme is Korean war and I'm a WWII man where possible...besides it ain't often you get a PLA Chinese scheme. Unfortunately the damage to the canopy renders it very much a bottom shelf model.
Two pictures of the finished item (apart from panel line washes.....I may try highlighting panel lines with graphite from a soft pencil, which apparently goes quite well with metallic finishes).....and preview shot of the next project in front, already mostly put together and awaiting procurement of some replacement axles (those in the kit being long gone for some reason).....I have a feeling that a couple of paper clips will be liberated from the office tomorrow : )
Kind of an ugly plane, really!