Welcome to The Few Good Men

Thanks for visiting our club and having a look around, there is a lot to see. Why not consider becoming a member?

Monsaint Manor (Drifter Man vs Bulletpoint DAR)

Drifter Man

FGM 2nd Lieutenant
FGM MEMBER
Joined
Apr 26, 2020
Messages
1,106
Reaction score
1,512
Location
Melbourne, Australia
1st August 1944, Operation Bluecoat. The spearheads of the British VIII Corps are advancing rapidly into German-held territory south of Caumont. As a result of the disorganised German retreat, lead units of the British advance find themselves only 2 km east of Monsaint, the site of a German regimental headquarters. Although the main direction of the British thrust is due south, a small force is dispatched to probe west towards Monsaint, secure crossings of the Vire river and, if possible, to take Monsaint manor - the suspected enemy command center. If successful, this probe will further disrupt German defensive operations in the sector.

This is the background we came up with for our fictional QB setup in CMBN v4.03. Bulletpoint challenged me for a game and found a large, intriguing map with a variety of open and close terrain, a few villages, bocage and a river to be crossed. He used his considerable mapmaking skills to turn this already great map it into an amazing one that will be a pleasure to play a game on. The setup is a British probe with a Large force size. I must say that it was me who insisted on having the British in a probe, although Bulletpoint believes this might set me up for a defeat. I do not believe the British are weak when on the offensive, and I want to find out.

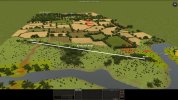
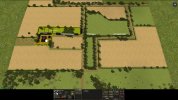
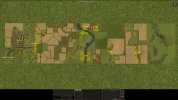
Below is an overhead image of the map. At 2300 x 540 meters it is a bit of a noodle. There are 8 objectives, placed to reflect the progression of the probe; they will total up to 500 points for the side who holds them, another 500 points can be awarded for enemy casualties. Allied (British) setup is on the eastern (right) edge of the map, leading to a somewhat unusual attack to the west (from right to left). The Germans can set up without limitation on much of the map up to and including the easternmost objective, Vilage de Farine.

Monsaint_overhead.jpg

There are three objectives on the east side of the river - Vilage de Farine, Hill 312 and Ville du Harfleur. Each is worth 50 points. The two river crossings are worth 75 points for the Bridge and 50 points for the Crossing, which spans a section of the river that is fordable by vehicles. Then nothing for a while, followed by Three intersections (50 points), Village centre (75 points) and, finally, "the suspected regimental HQ" at the western end of the map - 100 points for taking Monsaint Manor, the command center of Oberstleutnant von Kugelpunkt. It is rumored that he keeps his collection of fine wine, cognac and artworks at the manor, which he accumulated during his various postings in the occupied France. This and the layout of the manor have allowed him to maintain, in his own words "a decent standard of life" in the middle of the war. Until... until...

The time is 3:00 PM. The duration of the battle is 2 hours. Weather conditions are clear skies, hot (29 C), light winds from SW. The ground is dry. Rarity is set to standard. I have 5380 points for the purchase, my opponent has 3620 points. Bulletpoint can choose Heer or Waffen SS - I do not know his choice at this time. We have a house rule that all units must be purchased on a Typical setting (experience, soft factors etc.). The player cannot purchase formations or single units repeatedly until he gets the values he wants, but he is allowed to delete units from a formation he does not want, which can result in a slight bias in unit quality. This house rule is not enforceable and relies on honesty and trust between the players. It is meant to avoid having a map swarming with fanatic elite units.

From now on I will be discussing my plans and progress in this battle. Herr von Kugelpunkt, please keep out :)
 
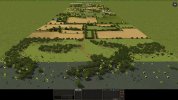
A closer look at the map.

It is over 2 km long, so my analysis focuses more on the near part up to the river. I need to get across the river first - then I can make detailed plans for the attack on the final objectives.

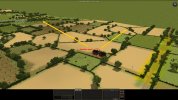
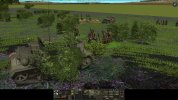
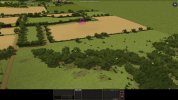
The first objective (50 points) and key terrain, Vilage de Farine. A compound of 19 buildings on a small hill. I am also showing the bocage terrain to the right of Farine, which will I expect to be strongly held and which I also need to get under control at the opening of the battle. There are 2-3 likely AT gun or other defensive positions at this objective, but I expect my opponent to keep his troops in the buildings, to give some protection against artillery. Most buildings are exposed to tank fire from my side, but there are a few I cannot get a tank aim on. Taking control of the bocage would enable me to establish additional base of fire to the north, but this base could be flanked if not properly secured. I also suspect that this position will have a TRP on it.

000_Farine.jpg

The second objective and key terrain, Hill 312 (50 points). It offers good view on Vilage de Farine, on Ville du Harfleur, the Bridge and the Crossing (ford). It is a terrain feature that dominates the eastern half of the map. Its defenders enjoy good concealment but relatively poor cover in the narrow strip of woods. Therefore, I do not expect a strong position directly on the Hill. Instead there is a bocage box that guards the access to it, and that I will have to take. The northern edge of the hill has a good reverse slope position that can be used by some defenders (armor?) to control the road from Farine.

000_Hill312.jpg

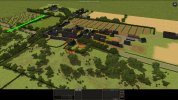
Third objective, the eastern edge of which is also key terrain - Ville du Harfleur (50 points). This settlement of 21 buildings guards access to the bridge. The eastern part, which offers excellent view along the northern edge of the map almost all the way to my setup zone, includes a concealed position for an AT gun and a position behind a stone wall for a tank. This makes the northern edge of the map a kill zone for my armor (the same applies to a narrow slice along the southern edge, which can be controlled by something big and bad from 1000-1500 meters). I do not plan to assault Ville du Harfleur frontally across the open terrain, although I will try to neutralize the position.

000_Harfleur.jpg
 
Bulletpoint Ridge. This is a terrain feature that dominates basically the whole map. It controls the Crossing and offers observation of the surrounding objectives as well as to the western edge of the map, including the village of Monsaint - however, it is not an objective itself. Similar to Hill 312, it offers good concealment but limited cover. My plan is to force the Crossing and take Bulletpoint Ridge from the south, cutting off the defenders of Harfleur. Being able to cut off enemy forces and destroy them, rather than allowing them to retreat, is of key importance, as I do not want to face the same troops five times on five lines of defense. Unfortunately, I do not see a good way to prevent retreat from Vilage de Farine or Hill 312.

View to the southeast:
000_BPRidge.jpg

View to the west (deeper into the German side):
000_BPRidge2.jpg

Hill 307. Key terrain with two buildings that controls the area towards the southern side of the map as well as all the way to Bulletpoint Ridge. A suitable position for a tank or an AT gun. We planned to make it an objective but replaced it with "Three intersections" (50 points) instead. These are lined with tall bocage and are more easily defended than Hill 307, but I do not consider them key terrain. Tentative plan is to enter Three intersections at the southern end, as the northern end is well hidden from supporting fire.

000_Point307.jpg

Finally, the village of Monsaint - on a hill but hidden behind so much foliage that it is difficult to see into or out of. Only the church seems to be an important position - not the church itself but the elevated terrain around it. Also possible spot for a tank. I do not plan to attack the village at all, instead I want to bypass it on the way to the "suspected regimental HQ" - the Monsaint Manor. A heavy, 4-story building, surrounded by trees and bocage, again does not offer observation farther than a few dozen meters, but makes a strong position that will have to be assaulted at close range.

000_Monsaint.jpg

I hope to give you many close-up views because the attention to detail than Bulletpoint showed when making this map is outstanding. I bet that he pays the same attention when setting up his defense. Which is something to worry about!
 
Last edited:
My opponent has 3620 points (in both purchase and rarity) and the whole map to deploy. What is he going to do with it?

The options are endless of course, but I anticipate a balanced force of infantry and armor, mildly in favor of the armor part, backed up with artillery (81mm, 120mm mortars or 10.5cm howitzers). I also expect mines - all kinds and not just at the river crossings but also near openings in the bocage. Also TRPs. From other types of fortifications, I do not expect trenches (frankly, I do not think they are helpful at all), but he could use foxholes and wire.

I would dedicate a sizeable infantry force to the defense of Farine, hoping to disrupt or even stop the attack in the good defense terrain right at the starting line. I would post some armor and AT guns in a blocking position at Harfleur to guard the northern flank. The majority of the force would be stationed east of the river or on the Bulletpoint ridge (mainly armor there) in an attempt to contain the attack before crossing the river. If things do not go according to the plan, I would withdraw to preserve my force and regroup and reform at the next line of defense. Basically, I envisage having two forces, one fighting up front, the other backing it up. If the fighting force starts breaking down, it can pull back, covered by the other force, and become the covering force for the next round of the match.

I also think that Bulletpoint will maintain a mobile force to be ready for a counterattack at a right time.

So, what can 3620 points buy? There is no point in making a detailed analysis - again, the options are endless. Already the choice of Heer vs Waffen SS has great impact, because Waffen SS tend to have higher Typical quality.
35% on infantry. A company of Panzergrenadiers and a platoon of AT guns.
40% on armor. Enough for a platoon of Pz IV or StuG III, less than a platoon of Panthers. Include a few halftracks for the panzergrenadiers.
15% on artillery. A heavy mortar section and two medium mortar sections, all integrated in the Panzergrenadier battalion.
10% on fortifications, which would give me around 10 minefields, a few TRPs and obstacles. Probably no bunkers.
 
I have 5380 points in purchase cost and rarity - a nearly 50% advantage - but only a narrow strip of land to deploy. I spent some time researching the intricacies of British TO&E to make every point count. To get the right force for the job and a fun force to play with. Here is what I found.

Artillery. The British player has three options: 3in mortars, 25pdr (towed or SP Sextons) and 105mm (M7 Priest). Everything else comes with a rarity cost that makes it unaffordable, given that the British player needs loads of rarity points for other things. I tested all three practical options in the different forms they come. I included the 8-tube SP gun batteries that are unaffordable.

TubesCaliberShell weightNo. shellsCostCall time HQCall time FOCall time TRP, FOCost per 100 kg shells
Medium Mtr, on map, 2x carrier281 mm4.5 kg11616975332.4
Medium Mtr, on map, no carrier281 mm4.5 kg726575320.1
Medium Mtr, offmap281 mm4.5 kg10016575336.7
Field Gun Troop [light]488 mm11.5 kg14032012.58.5419.9
Field Gun Bty [light]888 mm11.5 kg28061712.58.5419.2
SP Fld Gun Section [Sexton]288 mm11.5 kg21049512.58.5419.2
SP Fld Gun Section [Priest]2105 mm15 kg13844614.59.5521.5
SP Fld Gun Bty [Sexton]888 mm11.5 kg840185212.58.5419.2
SP Fld Gun Bty [Priest]8105 mm15 kg552167014.59.5520.2

I concluded that the cost is proportional to the weight of the shells you buy, you only get slight bulk discount for the batteries. 3in mortars are very expensive unless you buy them on-map and delete their armored carriers - which leaves them with only 36 shells per tube, but very cheap. This is the standard setup for the "Infantry only" British infantry battalion. There are a plenty of options for the player on how to combine the 25pdr to get the right number of shells and tubes, but I was not impressed by their call times and effect. For a long time I was going for the 8-tube 25pdr battery (towed, of course), but in the end I decided to scrap all offmap artillery and load up on onmap mortars, which will, however, be used exclusively in indirect fire role. It is difficult to deploy a mortar in the sight of a defender. Bulletpoint would know what is coming and would not let it come.

Infantry. My idea for this battle is to use infantry primarily as eyes for mortars and armor. They should get direct support from tanks or armored cars and should do relatively less fighting on their own. I chose the recce regiment, which has armored cars integrated in it and whose scout troops are some of the good ones in terms of firepower/cost ratio. Each scout section has three detachments and each detachment has binoculars [correction: no, only the HQ detachment has binocs], a Sten and a Bren, but only 380 rounds of ammo for the Bren. They are supposed to be used with the Bren carriers, which carry more ammo, but I do not like these carriers - somewhat useful but expensive at ~50 points each. Each section leader can call artillery, which is great.

However, I also wanted some normal infantry units that have more men and can stay in the fight for a while. At first I thought it would be the assault troops of the recce regiment, but then I decided to combine an infantry battalion and a recce regiment. Both will give me cheap on-map mortars for a total of 12 tubes and 432 shells. The infantry battalion has a carrier platoon, similar to the scout troops. It also has a pioneer section, which I may need to deal with the expected minefields at the river crossings. And so I take all these and add a rifle company of the infantry battalion, also with three PIATs.

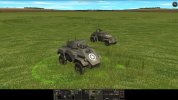
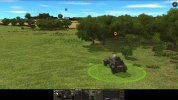
Armored cars. This is an interesting one. I believe that cheap, expendable armored cars, protected well enough to withstand small arms fire and hitting hard enough to be useful support for infantry, can be very valuable. Think of them as bulletproof machineguns. The British have many models, so I lined them up against a German machinegun position at 150 meters. German infantry wouldn't engage without a specific target order - I suppose this is hardcoded behavior that infantry will not attack armor with small arms, including a deployed HMG. When I gave the target order, the HMG's made short work of the Bren carrier and the Dingo. Daimler II did not do well, either. But Humber III and Humber IV are well protected and even a HMG cannot penetrate them frontally. The Humber IV can even be said to have good all-around protection. In addition, they both have a turret and plenty of ammo. Humber III is essentially a mobile Bren gun, Humber IV has a 37mm gun plus a coaxial MG (but can only use one or the other at one time). Both cost in the 50-60 points range, about the same as the others. I fell in love. These guys will support infantry and happily trigger armor arcs and antitank mines of the defenders, saving me 3x to 4x more expensive tanks.

000_Humber.jpg

Tanks. At one point I really wanted Cromwells, just for fun. But nothing, nothing could justify this choice. Compared to Shermans they are more expensive, cost rarity, are poorly protected (a Sherman can shrug off a 75mm if lucky, Cromwell almost never does - it just bursts into flames). They also carry less ammo. They are faster, but that is all - and speed does not interest me much in this battle. So the choice is Shermans. Sherman III and V are good options - they cost no rarity in August. I don't really know the difference, Sherman V is a little cheaper. I might as well just keep them mixed. No rhinos though - high rarity. The main issue is that normal cruiser tank troop has three 75mm Shermans and one Firefly, and I felt I would need more 17-pounders if my opponent brings in heavier tanks than the Pz IV. The 5-troop tank regiment came to my rescue: They have 4 troops of 75mm Shermans and one troop just with Fireflies. I can delete the normal Sherman troops I do not want and keep the Firefly troop.

Air support. Thought about it. Tested Spitfires and Typhoons, strafing, bombs and rockets. A Typhoon strafing attack can quite reliably strip optics and radio off a Panther or any other tank. Spitfires have less 20mm ammo and so are weaker. Rockets can hit and destroy any tank - but maybe not - it is a lottery. I could send the plane out on Turn 1, but then I have no idea what it will hit. Or I can call it during the battle to strike a specific vehicle, but this will expose my FO and occupy him for ~15 minutes. So, in the end, I sacrificed the Typhoon to save rarity points for more TRPs - see below.

Now, back to artillery. I've seen TRP's used against me with good effect but never used them myself. And so I came up with this idea - if I have many TRP's and place them well, I might be able to cover most points of interest - they have a 50m radius around the center where they are effective, and can be combined to make various line and area patterns. And, in combination to the flexible 3in mortars I'm getting, they could be very effective in getting me through this tricky map. A few arrangement attempts later I think I have a setup of 20 TRPs that will do this.
 
Last edited:
Finished unit purchase, turn sent back to the opponent.

I practiced the purchase in advance, because the system is moody and will sometimes fix your unit quality settings at the values of a particular unit in the left panel - I wanted to make sure everything is correctly randomized and "Typical". I bought the formations first, made global changes (e.g. tank type, PIAT/no PIAT etc.), then inspected the formations more closely and started deleting units I did not want.

11th Armoured Division
  • 4th King's Shropshire Light Infantry (Infantry Battalion bought as "Infantry Only")
    • Battalion HQ and 2IC section
    • Support Company
      • Mortar Platoon (6 tubes, 216 shells)
      • Carrier Platoon (4 sections, 9 men each, no carriers)
      • Pioneer Platoon
    • B Company (Rifle)
      • Company HQ, 2IC section and Sniper section
      • 3 x Rifle Platoon (PIAT) (HQ + 3 sections, 10 men each)
  • 2nd Northamptonshire Yeomanry (Recce Regiment bought as "Armored Infantry")*
    • Headquarters Squadron
      • Mortar Troop (6 tubes, 260 shells; I had a few spare points so bought two Loyd carriers)
      • FO party attached to the mortar troop
    • A Squadron (Recce)
      • Squadron HQ, 2IC section with a Humber III armored car and a Jeep (radio)
      • 1 Troop (Scout)
        • Troop HQ Humber IV + 2IC section on foot
        • 1 Section (armoured) (2 x Humber IV, 2 x Humber III)
        • 2 Section (carrier) (9 men, no carriers)
        • 3 Section (carrier) (same as 2 Section)
      • 2 Troop (Scout) (same as 1 Troop)
  • B Squadron, 3rd Royal Tank Regiment (Armoured Regiment [5 troop] [Sherman])
    • Squadron HQ (3 x Sherman V)
    • 6 Troop (4 x Sherman V)
    • 10 Troop (4 x Sherman VC Firefly)
  • 20 x Target Reference Point
  • 3 x Foxhole (I had a few points left and really no other use for them)
*This was actually an Armoured Recce Regiment with Cromwells, but I couldn't find where these Recce Regiments with scouts and armoured cars were attached.

Drifter_vs_Bulletpoint_purchase.png
 
Last edited:
1500 hrs, Setup phase. The only moment in the battle when everything is under control. My opponent says he needed many hours, as the defender. Even as the attacker I needed a bit under two, and I already had a good idea beforehand about what I was going to do. The recce regiment goes first - 1st Troop on the left, 2nd Troop on the right. Each troop sends one section, detachments widely spaced, towards Vilage de Farine (1st Troop) and the fields to the north of the objective (2nd Troop). Once I have eyes on the objective, armored cars will move forward to support the scouts. The Shermans will follow behind them. The Fireflies will step in if required. Two PIAT teams accompany the scouts as there are some positions around the objective that could be hiding enemy tanks. Only Farine, the immediate objective, matters now - until I take it, I am not getting anywhere.

000_Stagingarea.jpg

Meanwhile, four mortars will shell the enemy line from Turn 1. Two ahead of the 1st Troop, two ahead of the 2nd Troop. Their missions are set to maximum duration and "harrass" intensity, just to keep the Germans suppressed. This will conserve ammunition - each mortar can fire for about 20 minutes this way, and I will cancel the mission when no longer necessary. I am using the ammo in the mortar carriers first; once it is spent, I can repurpose the carriers to do other things.

000_FiringPlan.jpg

000_Mortars.jpg

I guess this is me:

000_Drifter.jpg

It is a long map. I have placed my 20 TRP's on in a prearranged pattern that should give me an ability to hit any place of importance along the way. However, the maximum range of the mortars is only slightly higher than the length of the map, and their accuracy is poor when firing at such long ranges. I may have to move up my mortars at some point. As I checked, they do not lose their ability to fire on TRP's when moved.

Bulletpoint_TRP_placement.jpg

000_Longmap.jpg
 
Last edited:
1501 hrs, Turn 1. It is about 200 m to the low hedge ahead of the setup zone. My scouts cover about half of this distance in the first 60 seconds. I still do not have proper observation of the objective, which is another 150-200 m after the hedge. First mortar shells fall on Vilage de Farine and on the hedgerows in the fields to the north of it.

It only takes 2-3 minutes for a German FO to call 81mm mortars on a TRP. The clock may be ticking from now, and I will keep wide spacings between my units up front.
As I learned from the briefing screen, my opponent chose German Army - not Waffen SS.
I noticed that while mortar crews preferentially take ammo from the mortar ammo bearers, they do not do the same with ammo carriers parked next to them (although the ammo in the carrier is showing in their panel as available for use). That's fine with me - once the ammo bearers are empty, I will have them pick up ammo from the carriers and the empty carriers will still be available for other duties.
Finally, a small correction - the two detachments of the scout section do not have binoculars. Only the HQ detachment does.
 
Last edited:
Another 'typical' user! Props to you good sir. You do seem to be incredibly light on infantry for such a big map?
I agree with Bulletpoint that troop quality in QB needs to be regulated. High-quality troops remove the challenge of managing unit morale, making the battle less interesting. In addition, in my opinion, high-quality troops are underpriced. It is almost a no-brainer to buy the best quality troops when the opponent is going to do the same.

I am very light on infantry and you're rightfully concerned about it - if the infantry takes heavy losses, I will no longer be able to screen the armor. It is a fine line I'll be walking here. But I've had some spectacular successes (and equally spectacular failures) with armor-heavy setups. Plus I have a thing for Allied armor formations :) I hope I can make this one a success, too.

Edit: I have 162 "fighting" men for this - 90 of the Rifle Company and 72 scouts. So I would classify it as light, rather than incredibly light. But yes, light.
 
Last edited:
1502 hrs, Turn 2. The scouts are approaching the low hedgerow line and slow down. As I am getting more eyes on the objective, I am also about to start moving light armor. At the end of the turn, a rifle shot is heard in the sector of the 2 Troop, the first shot of this battle fired by the Germans. Probable sniper. I have no contact but I think I know where he is.

002_Sniper.jpg
 
Last edited:
I agree with Bulletpoint that troop quality in QB needs to be regulated. High-quality troops remove the challenge of managing unit morale, making the battle less interesting. In addition, in my opinion, high-quality troops are underpriced. It is almost a no-brainer to buy the best quality troops when the opponent is going to do the same.

100% agree. It's for this very reason that my ladder rules state that 90%+ of points are spent on 'Typical' quality units. (Some minor tweaking of stats is allowed to use up your last few points). If you want to use elite forces you can, but you're then required to choose Waffen SS, Fallschirmjäger, Gebirgsjäger, or UK or US Paratroops. Even within these elite formations there will still be a mix of regular/veteran/crack troops. No commander in the history of warfare ever got elite quality clone troops (except maybe Star Wars), so in my view as CM being a simulation rather than just a game, why should we have that luxury?
I view the management of troop morale and getting the best use out of your better quality troops as well as your cannon fodder not-so-good troops as being key in using ones skills to win a battle. I'm still working on this aspect myself. :p
I also feel winning a battle with an imperfect/realistic force is far more satisfying.
 
I used to be an anything goes ladder warrior (old times - CMx1) but with CMx2 I am starting to learn that the best experience may be carefully chosen games with opponents that share this worldview that you've outlined @Stafford. We should fight one day! But before this can happen, I must get into that wine cellar at von Kugelpunkt's headquarters.
 
I used to be an anything goes ladder warrior (old times - CMx1) but with CMx2 I am starting to learn that the best experience may be carefully chosen games with opponents that share this worldview that you've outlined @Stafford. We should fight one day! But before this can happen, I must get into that wine cellar at von Kugelpunkt's headquarters.

Absolutely, hit me up whenever you have time and we'll get something going! (y)
 
1503 hrs, Turn 3. The suspected position of the... suspected sniper, as I find out, has observation of a part of my setup zone - so Bulletpoint has already seen some of my Shermans and armored car held back in reserve. I flood the position with MG fire from vehicles. No shots are fired from there in this turn.

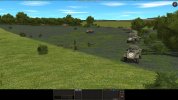
A German infantry team - estimated 4 men, MG42 and rifles - breaks camouflage on the top floor of a 2-story building on the objective and opens fire on British infantry in the woods. An armored car returns fire and the Germans take a casualty. The image below shows the positioning of the objective on high ground, which makes it difficult - but hopefully not impossible - to area fire the buildings.

003_Humber.jpg
 
1504 hrs, Turn 4. The German unit is seen retreating from the building to the field behind the objective. Now that they have been spotted, Bulletpoint sees no reason to keep them exposed to area fire. There is no other enemy activity at Vilage de Farine while I am beginning to fire into the buildings with machineguns from tanks and armored cars. I do not want to use main guns unless I have a target - both to save ammo and to preserve the buildings, which I might want to use later.

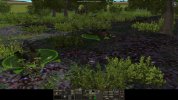
Unfortunately, 2 Troop advancing on the right flank pays a dear price for my impatience as I try to move too many units at once. A tank hunter team hiding in the bocage - far ahead of the German setup zone and also with very good observation into my setup zone - sprays my advancing scouts with MP40's and then takes out a Humber III, which I moved unwisely ahead of infantry, with a panzerfaust. The three-man crew is killed, as is one of the scouts. It did not occur to me that my opponent would advance this far ahead without me noticing! But yes, bocage has hidden their movement very well. Even now, after they had emptied two MP40 magazines into the woods and fired a panzerfaust, I have no contact icon at all.

004_TankHunters.jpg

Blood has been drawn on both sides. The battle has begun!
 
1505 hrs Turn 5. The air fills with rattle of machineguns as I try to saturate known and suspected enemy positions. Around 8 vehicles are area-firing. A Sherman fires two shells at the position of the tank hunters, then the scouts of the 2 Troop advance again. Will I be able to reach and eliminate the tank hunters? Or did they manage to pull out? I still see no contact and I cannot believe they could possibly move without anybody seeing or hearing anything.

Now I am also about to send 1 Troop scouts into the crop field on the left, in an attempt to probe the Vilage de Farine objective.

005_Overview.jpg
 
Last edited:
1506 hrs Turn 6. We still don't know anything about the tank hunters. The scout team that was approaching their position suddenly decided that they'd rather go back into the shade of the trees. It is probably because they were already Tired. I am finding movement very challenging in this battle. Probably due to the hot weather, troops seem to become Tired faster than under usual conditions. At the same time, I must consider that covering the map from one end to another just with Quick move (even if they could sustain it) would take ~20 minutes. My task is to cross it in 2 hours while fighting against a determined defender...

Well, at least on the left flank, we can see a trio of very brave pixelmen from the 1 Troop, A Squadron, 2nd Northamptonshire Regiment move towards our first objective.

006_1Troop.jpg
 
1507 hrs Turn 7. No new developments... scouts finally reach the hedgerow at which the tank hunters were lurking but find nothing. Hiding? Suppressed? Dead? Escaped? I've never had any contact on them except their MP40 tracers. I fell like I'm chasing ghosts.

I am going to lift the mortar barrage from Vilage de Farine as my scouts are approaching. It looks like Bulletpoint only left a few infantry teams in this area to cause some disruption, but I will not know until I get to the buildings. The village is still under suppressive MG fire from multiple sides - I am moving fire from house to house to make sure everyone gets their share. But it is equally possible that I am strafing a bunch of empty houses. Doesn't matter. MG ammo is practically inexhaustible.

007_Farine.jpg
 
Back
Top