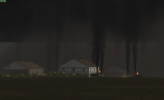
It's a cold, foggy October evening in Schweben, an hour north east of Frankfurt. What better day for the apocalypse?
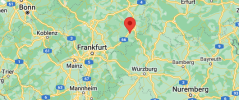
One largely intact Soviet motor rifle battalion is moving towards the town with the intent of spending the night there, ahead of further offensive actions in the morning. Even with the world ending, the offensive must continue. Arrayed against them are a mixed US cavalry and engineer unit - presumably they were far enough forward, or far enough back, to have avoided being glassed along with their main unit by the initial nuclear strike.
Now, I should admit a certain amount of... carelessness, in my preparation for this battle. I was playing against @hmstanley, a third match in a series that was then tied one each - I had seized an Italian hill with my Fallschirmjägers, while their greyhounds had run roughshod over my pumas in Normandy. Feeling inclined to something a bit bigger, we settled on a large Cold War battle as a suitably epic finale. Hmstanley hadn't had much opportunity to play the Americans, while I hadn't had much experience of Cold War at all, and so I agreed to take the Soviets and the battle conditions were set to random. This would be important later!
I constructed my force from a BMP-1 motor rifle battalion, with T-62 tanks and one company mounted in BMP-2s. To afford the artillery, air support and general extra odds and ends, I dropped one of the infantry companies, so I was left with one BMP-1 company, one BMP-2 company, one T-62 company (the 1975 version with the all-important laser rangefinder), their attendant 120mm mortars, some 122mm howitzers, and a handful of hinds armed with just their 12.7mm cannons (which are dirt cheap, and so I like throwing in just to disrupt the enemy and give them a bit of a shock when the sky starts shooting at them). As this was fairly close to a standard formation, I was fairly confident it could deal with a fairly standard-looking map. True, it all looked a bit grey and bleak, but I live in Wales so that's quite normal. 'Light fog' sounded find, might slow down spotting a bit but with the mass of tanks I was concentrating that shouldn't be a huge issue. With the plan set and the fire missions placed the companies were racing away towards their first waypoints.
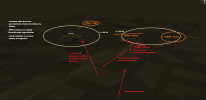
I am fairly sure this isn't proper Soviet doctrine. I was charging headlong down my right flank with very little information about the location of my enemy. I will defend this, to a certain extent, as the initial 'land grab' of a meeting engagement. Even if my enemy is planning to defend against this exact move, if I hit them at full speed then they're unlikely to be fully ready - with BTRs to act as tripwires for enemy tanks (and filled with infantry to spot if they make it through), followed up by a BMP platoon, I was confident the enemy tanks and ATGMs would spot and engage those vehicles first, which would allow my tanks to spot them (there's 13 of them - someone will spot the flash of light). I think most players tend to be more cautious, but after playing a bit with the Ukrainians against the Russians in Black Sea I learnt that 'cautious' works for NATO because as long as they don't charge in headlong they will usually to almost always spot first. That is not something I can rely on, especially with my dated T-62s, so my preferred approach is provoking the enemy to fire first. I've got loads of BMPs that are scary enough to need shooting, so why not?
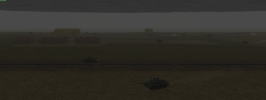
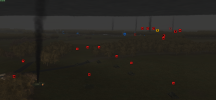
Even with the relatively open spaces, forming a line with the required 50m spacing proved quite challenging, but by and large my tanks were correctly spaced and all pointing down the railway line towards my opponent. Then two of them exploded.
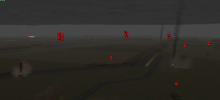
A BTR full of MG teams (which I admit not having much use for and so were assigned scout duties) also got hit, and while some of my battalion weren't able to see past the forest down to the far map edge, the rest did get a contact marker but no further spots were made. You can see that some of my BMPs and BTRs got through, and as all the rifle teams had an RPG-7 and an RPG-18 I was fairly sure they would at least delay any effort by my opponent to hide their tanks or dragon teams in those areas. This wasn't a great start, but it wasn't a crisis either. Unfortunately I hesitated, then split my tank company, with each tank diving either into the low ground around Schweben (four tanks) or the forest (seven tanks). This was a mistake. One that I actually repeated in my more recent game against @Cargol, so apparently I'm not the quickest on the uptake, but the instinct to rush every armoured vehicle into cover from effective enemy fire is a strong one and it overwhelmed my academic understanding that my tanks needed to be kept together. Танковый together strong.
It was at this point that I checked the conditions and realised the mess I was in. This was 1982, and that long-range shot was a clear sign my opponent had M60s with Tank Thermal Sights - suddenly the worry that the M60s would have a close-range advantage in the fog due to their higher rate of fire became a concern that they would have a dominating advantage at range because I couldn't see them at all (the T-62 is not treated as having a proper night sight in CM:CW, just 'IR Optics'). With this 'new' information, and the situation I found myself in, a new plan was devised (and yes, that sound is every single Soviet general rolling in their grave at the idea of a 'new plan' mid-firefight - sorry comrades, I'm obviously not properly committed to the Soviet cause and way of war. You can shoot me once the Americans have had their turn at it).
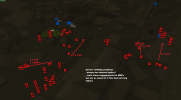
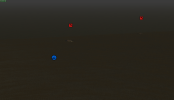
You can see me splitting my four T-62s on the left into two teams of two. Once again, yes, it's obvious with hindsight, but I'm still very used to operating NATO tanks where this is perfectly normal. On the right I will defend it as getting additional angles on the enemy tank contact. My BMPs were right into the forest, and with only one enemy tank contact I thought that I had jumped a single screening tank before its infantry (probably with ATGMs) could deploy to support it. I had my tanks 'covering' that BMP rush (which I had thought was into an empty forest), but when it was apparent that either the darkness or a slight change in terrain meant that they couldn't see, I did roll them forward en-mass to try and support the BMPs and their infantry as they spread out. This is when things went bad.
Very bad.
It turns out than when my infantry get out and start listening (and before they get shot), they hear rather a lot more vehicles.
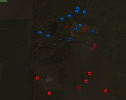
These would be some of the only times I spotted my opponent's tanks. And that was only because the infantry were right next to them (and even then some of them - invariably the team with the RPG-7 - missed them). My tanks couldn't see a thing, and the spots would take too long to transfer through the C2 network. In my defence, I think this was an error on the part of my opponent too - @hmstanley is free to argue their point back, of course, but in clear conditions I would have thrown over two tank platoons and a platoon of BMP-1 infantry right into this moving US force and taken out those two tanks in return during this engagement. If I'd had the whole tank company, it would have been even more one-sided. What would have followed would have been a close-in mess that would have been hard to predict, but even though the M60s are better in those kinds knife-fights, these are really expensive M60s with all the latest optics, while my T-62s and BMP-1s are cheap and numerous and also just as able to spot them at close range. Even with the awful spotting problems in the fog, this was probably my single best opportunity to smash a section of the US force and I squandered it by withdrawing - that's definitely on me.
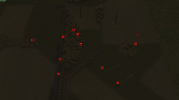
Now, factoring into my thinking was an emergency test I ran in identical conditions. Normally testing scenarios during a battle feels a bit too 'gamey' to me, but in this instance I ran a simple test to see when a platoon of T-62s would spot an M113. My initial test, of an M113 hidden in a treeline at 100m, had the M113 spot the T-62s, pop smoke, and reverse away - the T-62s saw nothing. Trying at 100m in the open, the same thing happened. Closing to 50m (which was hard when the M113s were determined to reverse away from the T-62s that they had a constant good spot on) didn't show anything either, and when I opened up the T-62s the M113 gunner opened fire on them... and the T-62s didn't even get a spotting icon. It was only at 30m that they were able to spot the M113, and I think even then it backed away before they could blow it apart. So at this point in the battle I realised that my tanks were effectively useless against the M60s - they could spot and kill at over 1km, while I had an effective spotting range of 30m. My plan then, was simple - get into the town, which was the sole objective, and stop the Americans from entering it. I had plenty of RPG infantry, and so long as none of them set foot inside I could get enough points from scoring the objective to scrape a draw.
Circle the wagons and wait for dawn.

One largely intact Soviet motor rifle battalion is moving towards the town with the intent of spending the night there, ahead of further offensive actions in the morning. Even with the world ending, the offensive must continue. Arrayed against them are a mixed US cavalry and engineer unit - presumably they were far enough forward, or far enough back, to have avoided being glassed along with their main unit by the initial nuclear strike.
Now, I should admit a certain amount of... carelessness, in my preparation for this battle. I was playing against @hmstanley, a third match in a series that was then tied one each - I had seized an Italian hill with my Fallschirmjägers, while their greyhounds had run roughshod over my pumas in Normandy. Feeling inclined to something a bit bigger, we settled on a large Cold War battle as a suitably epic finale. Hmstanley hadn't had much opportunity to play the Americans, while I hadn't had much experience of Cold War at all, and so I agreed to take the Soviets and the battle conditions were set to random. This would be important later!
I constructed my force from a BMP-1 motor rifle battalion, with T-62 tanks and one company mounted in BMP-2s. To afford the artillery, air support and general extra odds and ends, I dropped one of the infantry companies, so I was left with one BMP-1 company, one BMP-2 company, one T-62 company (the 1975 version with the all-important laser rangefinder), their attendant 120mm mortars, some 122mm howitzers, and a handful of hinds armed with just their 12.7mm cannons (which are dirt cheap, and so I like throwing in just to disrupt the enemy and give them a bit of a shock when the sky starts shooting at them). As this was fairly close to a standard formation, I was fairly confident it could deal with a fairly standard-looking map. True, it all looked a bit grey and bleak, but I live in Wales so that's quite normal. 'Light fog' sounded find, might slow down spotting a bit but with the mass of tanks I was concentrating that shouldn't be a huge issue. With the plan set and the fire missions placed the companies were racing away towards their first waypoints.

I am fairly sure this isn't proper Soviet doctrine. I was charging headlong down my right flank with very little information about the location of my enemy. I will defend this, to a certain extent, as the initial 'land grab' of a meeting engagement. Even if my enemy is planning to defend against this exact move, if I hit them at full speed then they're unlikely to be fully ready - with BTRs to act as tripwires for enemy tanks (and filled with infantry to spot if they make it through), followed up by a BMP platoon, I was confident the enemy tanks and ATGMs would spot and engage those vehicles first, which would allow my tanks to spot them (there's 13 of them - someone will spot the flash of light). I think most players tend to be more cautious, but after playing a bit with the Ukrainians against the Russians in Black Sea I learnt that 'cautious' works for NATO because as long as they don't charge in headlong they will usually to almost always spot first. That is not something I can rely on, especially with my dated T-62s, so my preferred approach is provoking the enemy to fire first. I've got loads of BMPs that are scary enough to need shooting, so why not?

Even with the relatively open spaces, forming a line with the required 50m spacing proved quite challenging, but by and large my tanks were correctly spaced and all pointing down the railway line towards my opponent. Then two of them exploded.

A BTR full of MG teams (which I admit not having much use for and so were assigned scout duties) also got hit, and while some of my battalion weren't able to see past the forest down to the far map edge, the rest did get a contact marker but no further spots were made. You can see that some of my BMPs and BTRs got through, and as all the rifle teams had an RPG-7 and an RPG-18 I was fairly sure they would at least delay any effort by my opponent to hide their tanks or dragon teams in those areas. This wasn't a great start, but it wasn't a crisis either. Unfortunately I hesitated, then split my tank company, with each tank diving either into the low ground around Schweben (four tanks) or the forest (seven tanks). This was a mistake. One that I actually repeated in my more recent game against @Cargol, so apparently I'm not the quickest on the uptake, but the instinct to rush every armoured vehicle into cover from effective enemy fire is a strong one and it overwhelmed my academic understanding that my tanks needed to be kept together. Танковый together strong.
It was at this point that I checked the conditions and realised the mess I was in. This was 1982, and that long-range shot was a clear sign my opponent had M60s with Tank Thermal Sights - suddenly the worry that the M60s would have a close-range advantage in the fog due to their higher rate of fire became a concern that they would have a dominating advantage at range because I couldn't see them at all (the T-62 is not treated as having a proper night sight in CM:CW, just 'IR Optics'). With this 'new' information, and the situation I found myself in, a new plan was devised (and yes, that sound is every single Soviet general rolling in their grave at the idea of a 'new plan' mid-firefight - sorry comrades, I'm obviously not properly committed to the Soviet cause and way of war. You can shoot me once the Americans have had their turn at it).

You can see me splitting my four T-62s on the left into two teams of two. Once again, yes, it's obvious with hindsight, but I'm still very used to operating NATO tanks where this is perfectly normal. On the right I will defend it as getting additional angles on the enemy tank contact. My BMPs were right into the forest, and with only one enemy tank contact I thought that I had jumped a single screening tank before its infantry (probably with ATGMs) could deploy to support it. I had my tanks 'covering' that BMP rush (which I had thought was into an empty forest), but when it was apparent that either the darkness or a slight change in terrain meant that they couldn't see, I did roll them forward en-mass to try and support the BMPs and their infantry as they spread out. This is when things went bad.

Very bad.

It turns out than when my infantry get out and start listening (and before they get shot), they hear rather a lot more vehicles.

These would be some of the only times I spotted my opponent's tanks. And that was only because the infantry were right next to them (and even then some of them - invariably the team with the RPG-7 - missed them). My tanks couldn't see a thing, and the spots would take too long to transfer through the C2 network. In my defence, I think this was an error on the part of my opponent too - @hmstanley is free to argue their point back, of course, but in clear conditions I would have thrown over two tank platoons and a platoon of BMP-1 infantry right into this moving US force and taken out those two tanks in return during this engagement. If I'd had the whole tank company, it would have been even more one-sided. What would have followed would have been a close-in mess that would have been hard to predict, but even though the M60s are better in those kinds knife-fights, these are really expensive M60s with all the latest optics, while my T-62s and BMP-1s are cheap and numerous and also just as able to spot them at close range. Even with the awful spotting problems in the fog, this was probably my single best opportunity to smash a section of the US force and I squandered it by withdrawing - that's definitely on me.

Now, factoring into my thinking was an emergency test I ran in identical conditions. Normally testing scenarios during a battle feels a bit too 'gamey' to me, but in this instance I ran a simple test to see when a platoon of T-62s would spot an M113. My initial test, of an M113 hidden in a treeline at 100m, had the M113 spot the T-62s, pop smoke, and reverse away - the T-62s saw nothing. Trying at 100m in the open, the same thing happened. Closing to 50m (which was hard when the M113s were determined to reverse away from the T-62s that they had a constant good spot on) didn't show anything either, and when I opened up the T-62s the M113 gunner opened fire on them... and the T-62s didn't even get a spotting icon. It was only at 30m that they were able to spot the M113, and I think even then it backed away before they could blow it apart. So at this point in the battle I realised that my tanks were effectively useless against the M60s - they could spot and kill at over 1km, while I had an effective spotting range of 30m. My plan then, was simple - get into the town, which was the sole objective, and stop the Americans from entering it. I had plenty of RPG infantry, and so long as none of them set foot inside I could get enough points from scoring the objective to scrape a draw.
Circle the wagons and wait for dawn.


