P-26A Peashooter

M

McIvan

Guest
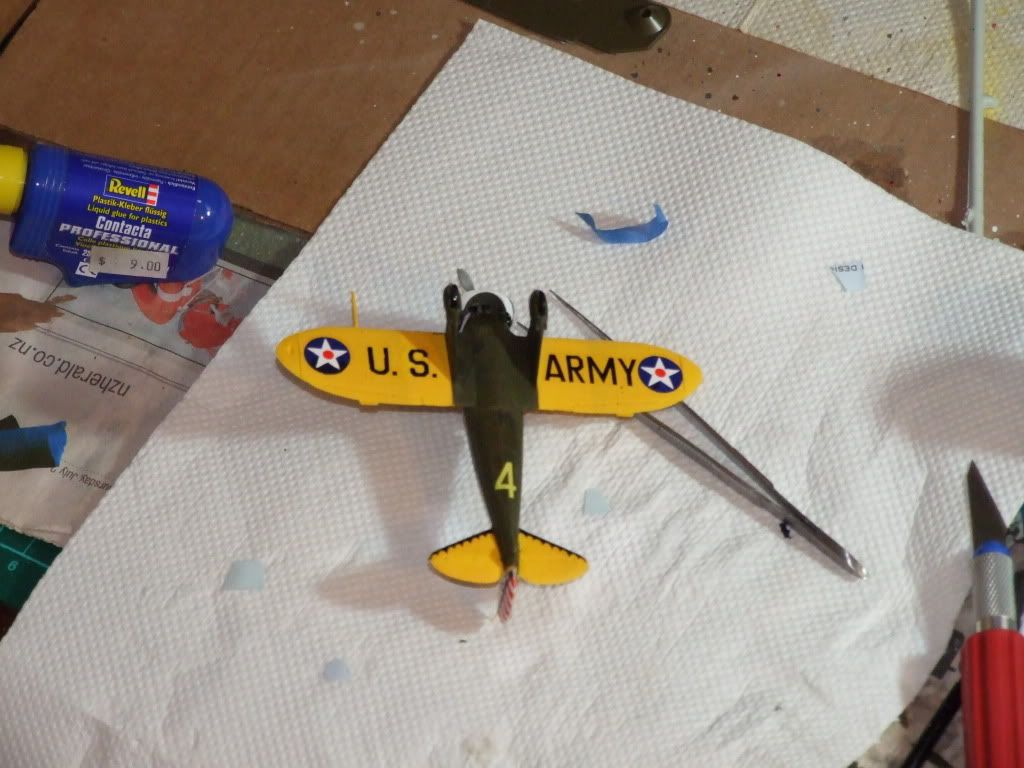
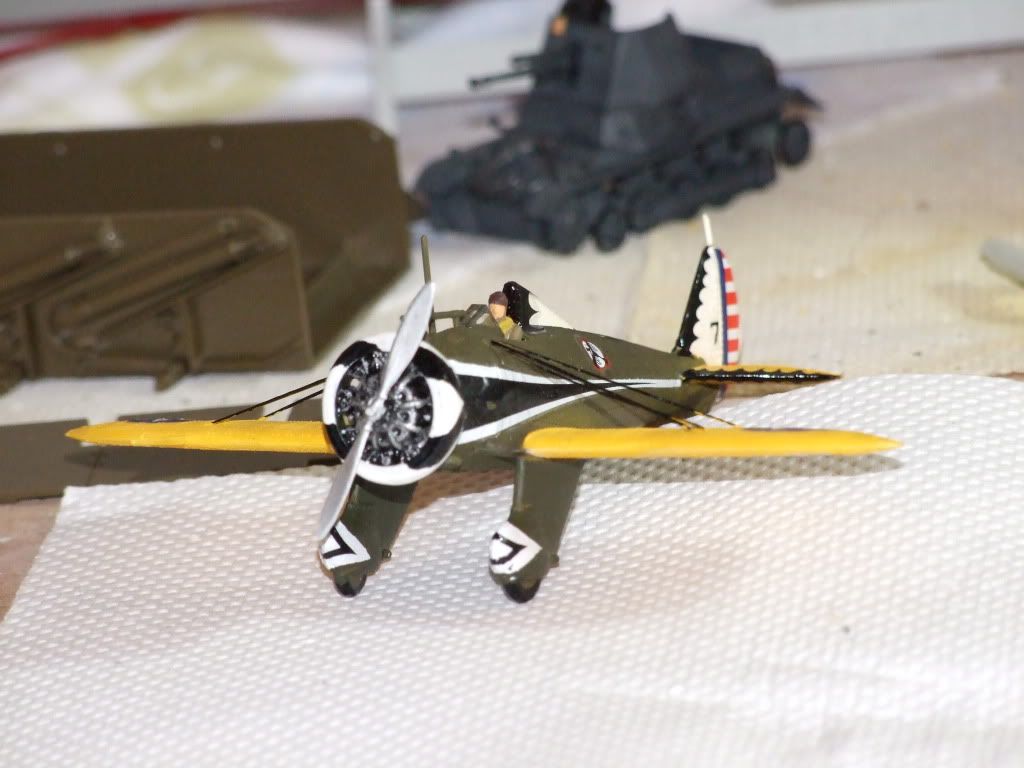
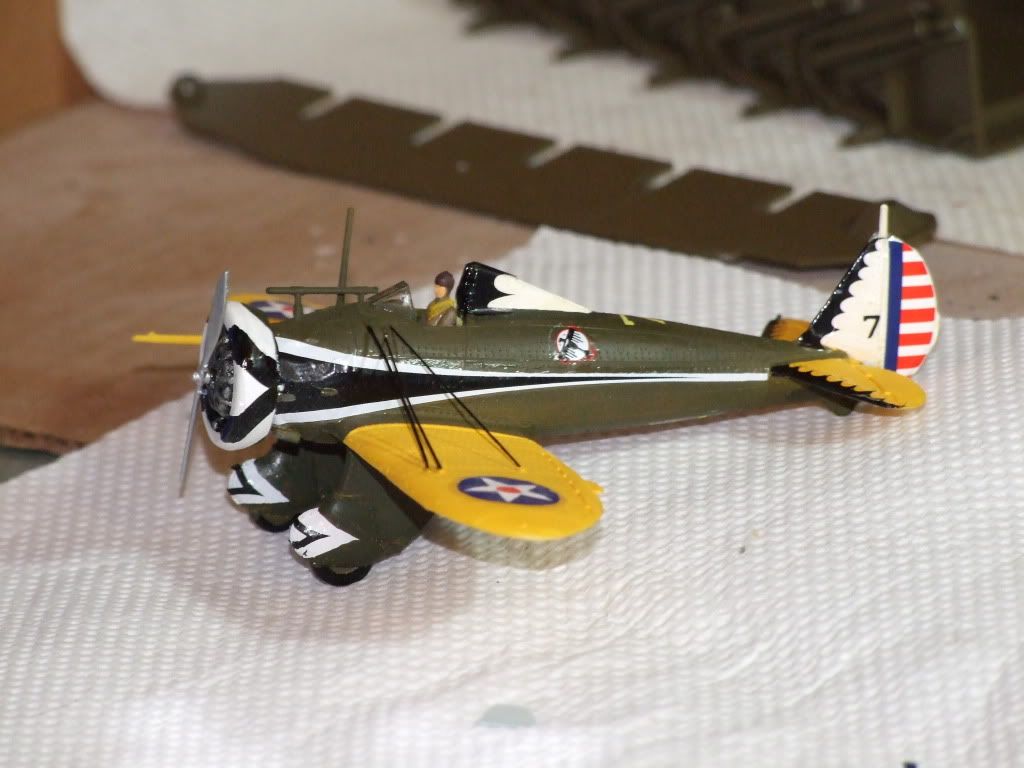
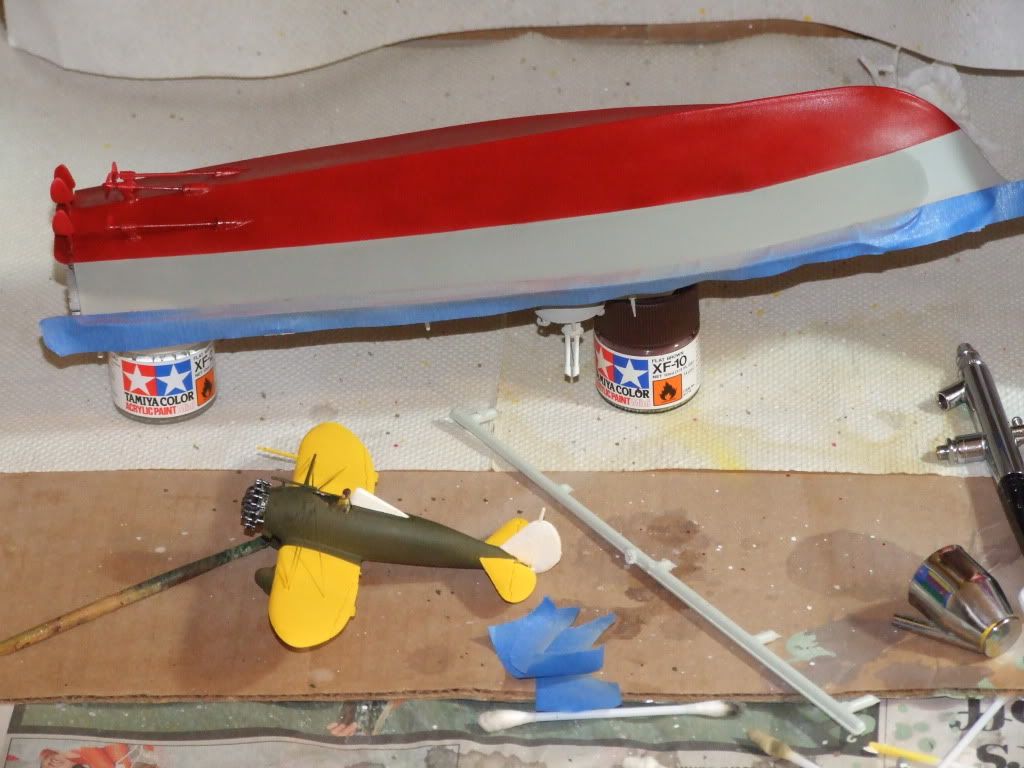
This is my current model.....it is a very quick, very cheap,and very enjoyable build of a colourful pre-WWII monoplane.

2009_0729TEMP0001.jpg


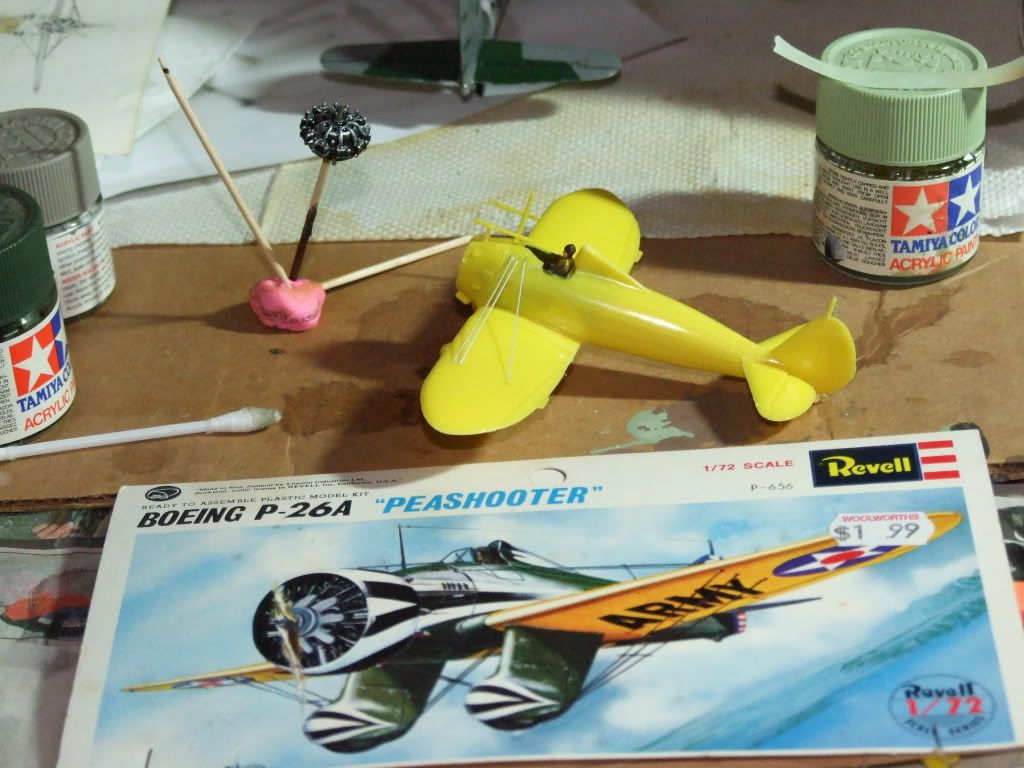
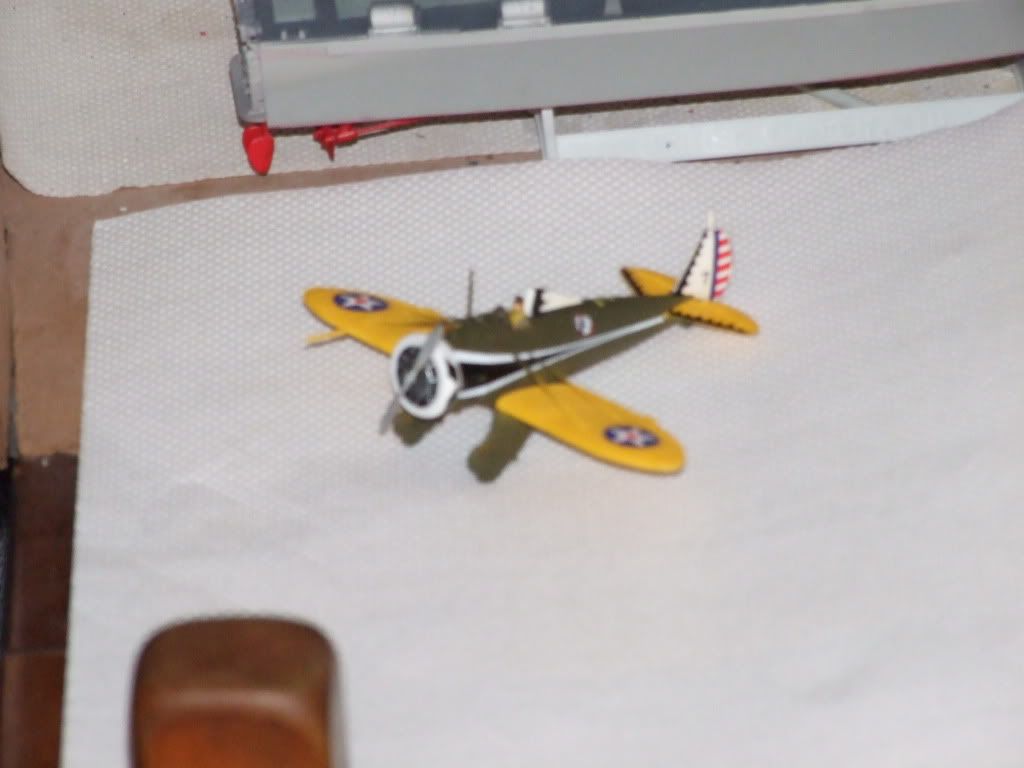
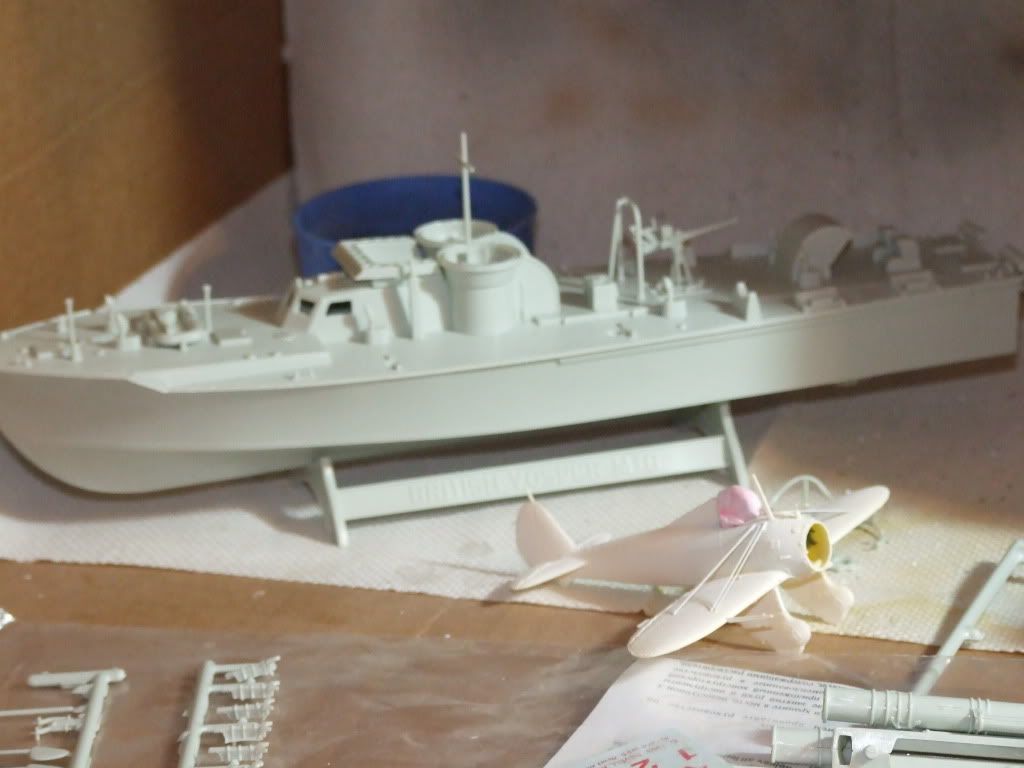
Here's the little beastie.....all prepped for painting in its yellow plastic glory. Engine and cowling will go on separately...because there's a fairly unmaskeable gap between back of the cowling and the fuselage which will let spray onto the engine. Engine is on a stick at rear after painting.

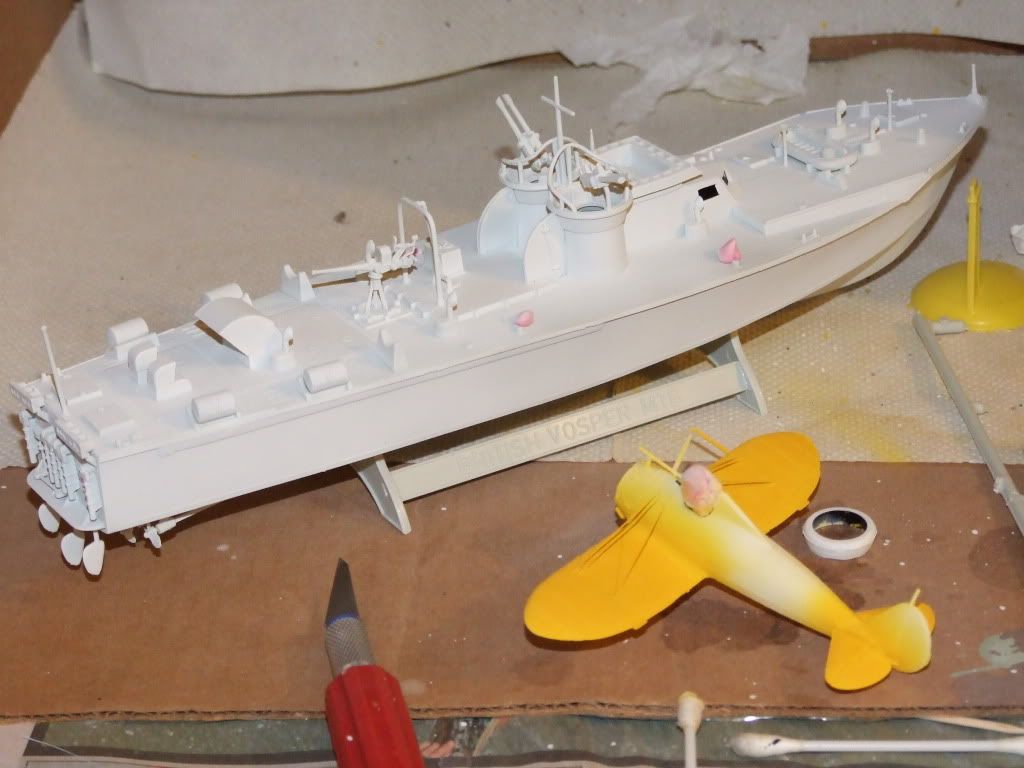
I've even troubled myself, at the time this photo was taken, to put half the top wing rigging on, using stretched sprue cut to size. First time I've ever done it and frankly I'm not sure I can be bothered doing the underwing. I am usually a fairly impatient modeller who just wants the look and feel of the thing so I can get onto the next one.

I suspect this is because I'm so recently back into the hobby. I'll probably torment myself into doing the rest later.
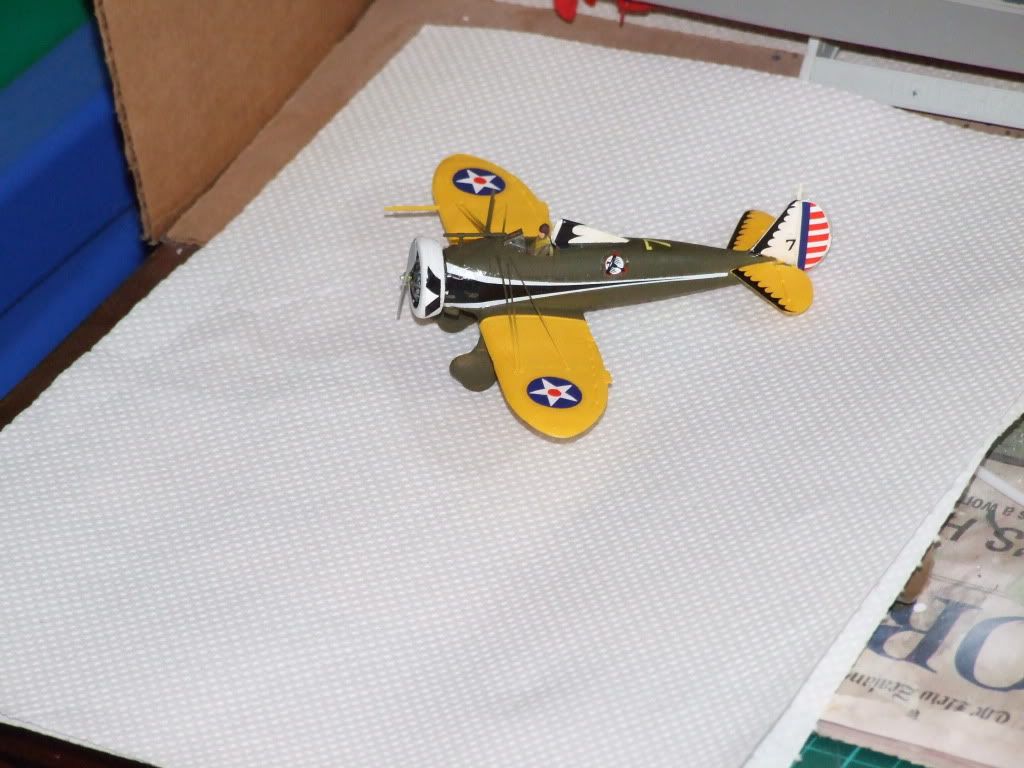
 
Glad to see you having fun with it, after all it's just a hobby that is meant to be enjoyable. Nothing wrong with trying out new tricks with things like stretched spur, sometimes we all surprise ourselves in how much we can actually do, and besides, if you stuff it's not like you spent huge amounts of $$$ on it, grab another and try again.
 
Peashooter now all undercoated in white.

Undercoats are something I never used to bother with when brush painting...because brush coats are nice and thick. I've found that airbrush coats are so thin that you really do need something underneath.....and a top coat when you're done.

The other reason for undercoating is that the wings of the Peashooter are yellow, which goes best over a white underlay.

2009_0729TEMP0002.jpg


The other inhabitant of the picture is a Revell 1/72 Vosper MTB. I quite like having more than one model on the go, particularly because I don't really enjoy painting lots. It's ok, but really I like sticking bits together. So once a model is at the paint stage, like the Peashooter, I can't resist starting to glue bits on something else.

The MTB is coming along nicely, although there are a lot of ejector pin holes and flash, and the parts are not exactly delicate, representing mould technology at the time. The machineguns look more like 40mm bofors than .50 cal.
 
Not much happened this week owing to time consuming problems with the wings. The undercoat revealed that the glue holding one of the piece of rigging had sunk a little bit of a pit into the wing, so I puttied it and sanded.

I should then should have recalled my own advice that yellow needs a white or yellow base or it won't cover. I sprayed the yellow....the putty showed through badly, and no amount of yellow spray was going to make it go away.

In the end I had to first cover it with white, and even then I had a hell of a difficult time getting the yellow over that bit to blend with the yellow of the rest of the wing. Finally managed it however. Rudder and just aft of the cockpit headrest get sprayed white (again), then we can do the olive drab body.

2009_0808TEMP0003.jpg


The other thing I tried, and eventually gave up on, was mixing a lighter shade of yellow, and spraying this in the middle of the panel sections...the idea being to leave the panel lines a darker hue. Well, I mixed it, and I was spraying it, but it didn't make a lick of difference.

Yellow is just a bloody difficult colour to deal with.

Behind the peashooter is the Vosper MTB....all complete apart from the two torpedo tubes (which I kept off temporarily for ease of painting...you can see my fashionably pink "blue" tack where the mountings go) and painting. It has had a white undercoat. Now, I probably would have been better off in blissful ignorance, but I was looking around on the net for colour schemes and discovered that Revell actually modelled an MTB configuration that was manufactured in the US under licence and shipped off to the Soviet Union as a Brit lend-lease contribution. Hmmm. After thinking it over, I'm quite taken with the idea of doing it in Russian colours and slapping a Russian ensign on the back. If I could find out what the Russians painted their boats, that is. So far it seems like they just kept the Royal Navy scheme slapped on at the boatyard, but investigations are ongoing.
 
Have you considered a darker yellow for the panel lines? Even a brown or charcoal grey wash to float into the seams (assuming they are recessed on the model).
 
Have you considered a darker yellow for the panel lines? Even a brown or charcoal grey wash to float into the seams (assuming they are recessed on the model).

Yeah, that's the plan now that the lighter option failed. We aren't talking high tech moulds here...these are all raised panel lines, not recessed, so got to be subtle. What I'm provisionally planning is a wash of yellow and brown ink, but I'm still mulling over a method of getting lighter. I wanted lighter, because the yellow I used is a little dark for pre-war US fighters. If worst came to worst I can simply spray layer after layer until one day it shows.

I'm a bit reluctant to tamper much, because the tween-war planes were kept pretty clean and shiny.
 
Bit of frustration over the last few days...not much time, and then what time I did have involved putting on some masking tape....which stubbornly refused to stay stuck, so had to get some higher tack tape, and then I managed to snap two lines of rigging in the process. AAAARRRGH!

So basically we are just getting back to square one....although at least the white areas have had their second coat, and we are ready for the green (after a bit of wing rigging glue cleanup).

The Vosper MTB has had the first tone of grey onto the hull, and the superstructure has been sprayed. Second hull tone next, a darker grey, followed by a yet darker grey for decks and hull red for the bottom.
 
Right, progress is slowly being made.

Got discouraged for a while when I managed to break two of the rigging lines on the upper wing, but finally replaced them. Sprayed the rudder and fin aft of the pilot white....still had to brush paint over a few spots later. Added olive drab to the Peashooter....with a couple of drops of yellow to tone it down slightly...I think Tamiya Olive Drab is a fraction too dark. Touched it up in a few places.

2010_0222TEMP0001.jpg


The Vosper MTB has had two tones of grey on the hull, and the superstructure is painted. Last night the hull red went on....but once again the curse of overspray has struck me; there is now a faint line of pink on the grey round the other side. Nothing that a quick spray of grey won't fix....but unfortunately part of it is on a light grey that I had to mix from white and grey by hand, so may be difficult to get a good blend.

Am now contemplating trying to mask the superstructure so I can spray the deck...this will be rather tedious :)
 
I've basically stalled on the MTB because Revell are annoying me intensely with the colours they insist the MTB should be painted....I'm getting more and more dubious about them and are starting to think they're largely ********. I don't think the deck would have been that dark, and this blue grey for the top of the cabin and other bits strikes me as quite spurious. Still got plenty of overspray too, and have switched to brush painting for the small stuff. Irritates me every time I look at the damed thing....it's kinda pretty, but realistic?!?

Further down, the P26 has the cowling on, which had to be sanded back to get rid of ridge and then painted white again. It needs a crescent of olive drab on top and bottom, but I will have to hand paint that after the decals go on....doubt I could accurate cut a mask to accomplish it....you'll see that I mean when it's done.

2010_0314TEMP0002.jpg


Decals have now gone on the P26 and bloody hell were they a nightmare! They're very old....as soon as they got wet the glue just disintegrated in a white milky cloud and the decals floated off the paper in seconds. They did NOT adhere well to the plane at all...they much preferred my fingers, tweezers or whatever else was holding them, and they didn't snuggle down over the detail, especially the long stripes close to the engine cowling, where they have to fit over a few bumps. Not sure whether I will buy one of the third party decal softening products you can get....it may well be too late now...or just varnish them all firmly in place...probably the latter.

Endless cursing as I tried to untangle decals ferociously intent on folding over themselves rather than unflolding so I could stick them on the damned aircraft. They also broke in several places and had a hard time to trying to float the broken pieces back into position and look relatively seamless.

Finally, the decals on the cowling are much to narrow....will have to continue the stripes on via brush painting. Also need to do a bit of colour filling on the trailing edge of the elevators and rudder and the hump immediately behind the pilot.

Having said all that, it's a pretty little thing :)

2010_0314TEMP0003.jpg


It's a bit blurry, will try and get a better pic.

Still needs the wheels painted, and the spats need to have a wedge painted white for more decals to go on....I didn't study the decals well enough and thought they did the white on the decals, but no...have to mask and spray in the wedges (see the box art a few pages back)...bah. Rigging (which broke YET AGAIN) needs to be painted black or dark grey.
 
...Still needs the wheels painted, and the spats need to have a wedge painted white for more decals to go on....I didn't study the decals well enough and thought they did the white on the decals, but no...have to mask and spray in the wedges (see the box art a few pages back)...bah. Rigging (which broke YET AGAIN) needs to be painted black or dark grey.

Even if the decals did include white, they are NEVER opaque enough.

Good job, though.
 
Great job. Just goes to show you don't always have to buy a super expensive kit to create a great looking model.
 
Re the P26 decals, I was filling in some of the missing black areas last night, and it became apparent that some, maybe even all, of the decals are just resting on the plane from their own weight....the black flames behind the pilot's headrest tried to fall off a couple of times.

So that's it......need to get the painting finished as soon as possible so I can get a coat of varnish on as soon as the paint dries........I would like to wait till the weekend and get into the hobby store to purchase some decal setting solution this weekend coming, but I suspect I need to seal in the decals immediately before they dry out completely and simply fall off the model! I may brush a sealing coat on tonight so that I don't have to wait for the remaining painting to cure.

I find a bottle of decal set invaluable.
 
Right......well, the next bit almost prompted me to throw the model into the nearest wall!

You'll recall I need to do the wheel spats.

Ok, so I mask them up to spray white. Hard to get a good white without sparynig, especially over green. So on goes the tape. Being mindful of my problems with overspray, I very lightly attach some more tape to the underside to mask off the bits I don't want to get a frosting of white. You may, if you are an experienced modeller, already be hanging your head in your hands at this point and wondering what I was thinking.

On goes the white spray. Looks very nice.

Time to take off the masking tape....comes off round the wheels nicely. A bit of bleed, but nothing that can't be touched up with a brush.

Time to take off the rest.

Um.

My decals seem to be fracturing and coming off where the tape is touching them. You will recall the decals were a nightmare, right? That they were exceptionally fragile and lacked any adhesion to the model? Well done. You're one up on me. What on earth was I thinking?

Away comes bits of the black "flame" on the elevators.

Away comes the vast majority of the "3" above the "4" on the underside (to denote pursuit squadron 34). But worst of all, the "U.S." part of "U.S. ARMY" gets ruined, and so does part of the star.

Once I realised what I had done, it was like being a man in a minefield that has heard the click under his foot but hasn't lifted it yet. You can do what you like to try and prevent damage, but you're still screwed. As I slowly lifted tape and watched my decals get ruined I felt like the bloke slowly lifting his foot.

Here is is, showing the underside. At this point I have painted over the remaining bits of the "3" and have painted in replacement white portions of the star. Not showing is the side of the aircraft where the racing white and black strip down the side had a chunk torn out of it...by this stage I've painted in more white but has yet to add the black down the middle.

2010_0320TEMP0006.jpg


OK, so after having a short fit of depression, I started to try and repair the damage. After all, when you get right down to it this stuff is on the bottom and not many people will see it.

So, having attempted to repair the damage with careful hand brushing, this is where I got to:

2010_0320TEMP0008.jpg


....and with that I called it a day.

Gentlemen, I present to you the repaired and nearly complete model. It awaits only a varnish coat or two to blend and seal in the shiny decal elements, and then some very light wash to show the aileron, rudder and elevator lines. These tween-war models were otherwise kept pretty clean.

2010_0320TEMP0011.jpg


2010_0320TEMP0012.jpg
 
Back
Top Bottom