Running Up That Hill
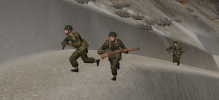
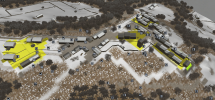
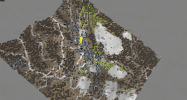
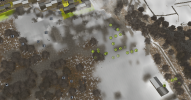
I had a battle against @hmstanley over the very interesting Sommocolinia map as a meeting engagement. We rolled randomly for sides and environment, and ended up with me leading the Luftwaffe and hmstanley leading the British into a clash with flurries of snow that had settled on the ground.
We had an understanding that this would be an infantry battle, with no TRPs or pre-scheduled bombardments. The British entered from the South East, while the Luftwaffe entered from the North West.
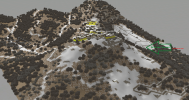
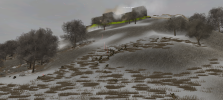
I had originally thought that the terrain looked fairly even. The Axis have an extra ridge to set up forces from while the Allies lacked a forward slope to support their side of the ridge from, which would make it harder for the Allies to push over the ridge uphill of the town*, I judged that even if the Allies stayed on their side of the ridge they could still provide a base of fire for troops assaulting along the length of the ridge into the town. Indeed, it would be possible for the Axis to have a similar base of fire right on the other side of the ridge, which would have made for a tense situation, so I was immediately thinking of pushing some troops onto the Allied side of the ridge to disrupt an attempt to set up that base of fire.
*for an example of why these matter, see Usually Hapless' videos of Uphill Struggle and Three Peaks.
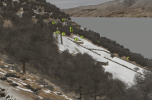
Some initial testing on the map revealed something interesting; while the British had a dirt track to follow, the Luftwaffe had some rough paths through the trees. These paths had frozen solid in the snow, so I could actually push vehicles along them fairly quickly, and they were a lot shorter than the winding road the British had to take. There were rough patches that would slow the Luftwaffe down, but without any mud to worry about the Opel Blitz didn't seem to have any issues with bogging. That meant that motorised infantry were on the table.
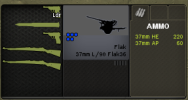
Looking at the terrain, the obvious choice were the Fallschirmjaeger; as covered in Usually Hapless' video, they have two MGs per squad, and how could I say no to firepower like that? I pushed them down to regular experience and motivation to buy a whole battalion, ensuring that I had plenty of bodies. I dropped one Fallschirmjaeger platoon in favour of a motorised pioneer platoon to blast through walls and buildings in the town, and had enough points left over for some 105mm howitzers with an FO, a couple of 'medium flak' 37mm AA that I could position to ward off enemy aircraft and in a pinch fire on the parts of the town they could see, a couple of armoured cars and a supply section of four Opel Blitz. To fit the rarity limits of the cars, and to trim some of the surplus points, I dropped one in three panzerschreck teams (so one from each company, as they are a squad-level team) which saved me 200 rarity each and meant I could push up the FO and the howizters to veteran experience. The Fallschirmjaeger battalion also has a lot of light mortars (one per platoon) - well, it calls them 'light', but they were 81mm mortars, so they had a lot of flexible options for indirect fire.

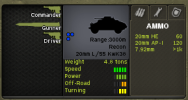
The plan with the armoured cars was that they would be part of my 'point force' moving into the town. The British might well send some SMG-armed paratroopers (the natural choice for this terrain with their greater number of automatic weapons) ahead in fast vehicles to scout and contest strongpoints, and I wanted to bring something that could scare them away so that my own comparable teams could set up uncontested; the scouts would be unlikely to be carrying the PIATs, though giving my scouts AT is definitely something I'm going to think about in future battles (and imagine if they could take out a full truck or half-track that tried to push too far). In more modern titles, with their greater availability of man-portable and disposable AT at the squad level, the armoured cars probably wouldn't be as scary (indeed, their role would be filled by the IFVs carrying the scouts into battle - and even a Bradley is wary of sudden RPGs).
At this point I hadn't realised how much trouble the British would have reaching the town in a timely manner, so I was expecting to have the initial meeting inside the town. To that end, I identified what I thought to be the key points to getting a favourable first engagement, and set out my plan and my concerns.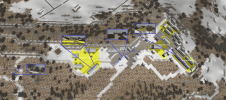
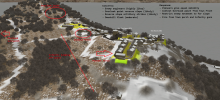
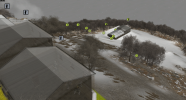
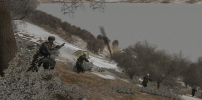
The plan was to push the pioneers up as close as they could go to the Town Perch in their trucks, then blast their way through into the objective and set up to watch the Main Town Square. The initial force would be the two armoured cars and three trucks with as many Fallschirmjaeger packed into them as possible (the trucks having space for a squad each with seats to spare). I did make the mistake of loading up some Fallschirmjaeger squads with extra ammo, which really slowed them down on the hill ascent (what do you mean, an extra 1000 7.92mm rounds is heavy?!) It's a habit of mine to send them with too much ammo rather than too little, but in this case speed was key so it was undeniably a mistake. I also took the MG platoon command squad (with their lovely MP40s and kubelwagen) and pushed them ahead as well - the MG platoon would be too spread out for their C2 links to really matter, and the radio could be handy for directing the mortars left in the deployment zone with their (also radio-toting) HQ.
The bulk of the Fallschirmjaeger forces would follow on foot, alternating walk and quick move to get them there in a timely manner without utterly exhausting them (fatigue was to be a consistent issue for my forces).
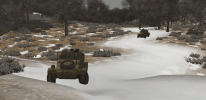
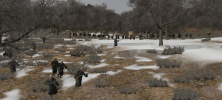
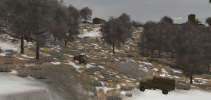
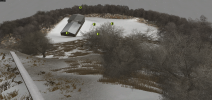
It was after I'd secured my initial objectives that I became curious about the complete lack of contact. There were no audible engine noises approaching the ridge, no advanced teams squirrelled away in buildings to slow my advance... nothing...

I had a battle against @hmstanley over the very interesting Sommocolinia map as a meeting engagement. We rolled randomly for sides and environment, and ended up with me leading the Luftwaffe and hmstanley leading the British into a clash with flurries of snow that had settled on the ground.
We had an understanding that this would be an infantry battle, with no TRPs or pre-scheduled bombardments. The British entered from the South East, while the Luftwaffe entered from the North West.

I had originally thought that the terrain looked fairly even. The Axis have an extra ridge to set up forces from while the Allies lacked a forward slope to support their side of the ridge from, which would make it harder for the Allies to push over the ridge uphill of the town*, I judged that even if the Allies stayed on their side of the ridge they could still provide a base of fire for troops assaulting along the length of the ridge into the town. Indeed, it would be possible for the Axis to have a similar base of fire right on the other side of the ridge, which would have made for a tense situation, so I was immediately thinking of pushing some troops onto the Allied side of the ridge to disrupt an attempt to set up that base of fire.
*for an example of why these matter, see Usually Hapless' videos of Uphill Struggle and Three Peaks.
Some initial testing on the map revealed something interesting; while the British had a dirt track to follow, the Luftwaffe had some rough paths through the trees. These paths had frozen solid in the snow, so I could actually push vehicles along them fairly quickly, and they were a lot shorter than the winding road the British had to take. There were rough patches that would slow the Luftwaffe down, but without any mud to worry about the Opel Blitz didn't seem to have any issues with bogging. That meant that motorised infantry were on the table.
Looking at the terrain, the obvious choice were the Fallschirmjaeger; as covered in Usually Hapless' video, they have two MGs per squad, and how could I say no to firepower like that? I pushed them down to regular experience and motivation to buy a whole battalion, ensuring that I had plenty of bodies. I dropped one Fallschirmjaeger platoon in favour of a motorised pioneer platoon to blast through walls and buildings in the town, and had enough points left over for some 105mm howitzers with an FO, a couple of 'medium flak' 37mm AA that I could position to ward off enemy aircraft and in a pinch fire on the parts of the town they could see, a couple of armoured cars and a supply section of four Opel Blitz. To fit the rarity limits of the cars, and to trim some of the surplus points, I dropped one in three panzerschreck teams (so one from each company, as they are a squad-level team) which saved me 200 rarity each and meant I could push up the FO and the howizters to veteran experience. The Fallschirmjaeger battalion also has a lot of light mortars (one per platoon) - well, it calls them 'light', but they were 81mm mortars, so they had a lot of flexible options for indirect fire.


The plan with the armoured cars was that they would be part of my 'point force' moving into the town. The British might well send some SMG-armed paratroopers (the natural choice for this terrain with their greater number of automatic weapons) ahead in fast vehicles to scout and contest strongpoints, and I wanted to bring something that could scare them away so that my own comparable teams could set up uncontested; the scouts would be unlikely to be carrying the PIATs, though giving my scouts AT is definitely something I'm going to think about in future battles (and imagine if they could take out a full truck or half-track that tried to push too far). In more modern titles, with their greater availability of man-portable and disposable AT at the squad level, the armoured cars probably wouldn't be as scary (indeed, their role would be filled by the IFVs carrying the scouts into battle - and even a Bradley is wary of sudden RPGs).
At this point I hadn't realised how much trouble the British would have reaching the town in a timely manner, so I was expecting to have the initial meeting inside the town. To that end, I identified what I thought to be the key points to getting a favourable first engagement, and set out my plan and my concerns.


The plan was to push the pioneers up as close as they could go to the Town Perch in their trucks, then blast their way through into the objective and set up to watch the Main Town Square. The initial force would be the two armoured cars and three trucks with as many Fallschirmjaeger packed into them as possible (the trucks having space for a squad each with seats to spare). I did make the mistake of loading up some Fallschirmjaeger squads with extra ammo, which really slowed them down on the hill ascent (what do you mean, an extra 1000 7.92mm rounds is heavy?!) It's a habit of mine to send them with too much ammo rather than too little, but in this case speed was key so it was undeniably a mistake. I also took the MG platoon command squad (with their lovely MP40s and kubelwagen) and pushed them ahead as well - the MG platoon would be too spread out for their C2 links to really matter, and the radio could be handy for directing the mortars left in the deployment zone with their (also radio-toting) HQ.
The bulk of the Fallschirmjaeger forces would follow on foot, alternating walk and quick move to get them there in a timely manner without utterly exhausting them (fatigue was to be a consistent issue for my forces).


It was after I'd secured my initial objectives that I became curious about the complete lack of contact. There were no audible engine noises approaching the ridge, no advanced teams squirrelled away in buildings to slow my advance... nothing...
Last edited:

