Ivanov Tournament for CMRT (finished)

Again i want to thank @Friedrich for making this tournament, i really enjoyed it looking forward to the next ! from german perspective ?

I have already created the first map and mission for the upcoming tournament. I created it in the intention to be a German side tournament. The first mission will be again very short, maybe 15 or 20 minutes depending what the results of the playtests will show.

In this mission a German vehicle convoy gets ambushed by Soviet partisans. After testing it a while I am now tending to make it a Soviet partisan campaign so that the participants will play the partisans. I think playing the partisans could be a different experience, because there are not many partisan scenarios and no campaign yet as far as I know.
Also the partisan side brings a lot of interesting battle settings like ambush scenarios and hit and run tactics, which could be interesting to play.

I will decide in the next weeks if it will be a Partisan or German side tournament.
 
Last edited:
Thanks Friedrich for the work you put in...fun times! Here is my brief and painful AAR:

It took awhile to scout out the positions (spot them). I took a few men (split squad) on the right to move through those woods to get a closer look. Hit a mine, but then took casualties from fire across the river. The rest of that platoon I just hunkered down for the time being (although I still took a few casualties from pop shots across the river). I ran up an AT rifle unit to the barn area to get an angle on the right bunker. They never made it. I immediately realized any movement in the open was prone to failure. I initially used the spotter to move up on the left woods to get eyes on the bunkers. I initially used the spotter (bad call in hindsight) to hit the right bunker with HE. I also moved up and AT rifle and HMG and armored car to also hit that bunker. Armored car taken out by hidden 50MM At gun, rest had no affect. I started to get reinforced. I felt that time was ticking and I needed to do something to move. So I placed my mortar units with direct sight so I would have less delay then on spotting. I shelled remaining right bunker with one unit, and expended the HE on the left bunker area with the other (only 16 HE rounds each). No affect. Now I am left with 4 smoke rounds for each tube (thats all that was given). Now it became not only a race for actual time, but I had to ensure that all the smoke was activated before making a move. I knew that the smoke was my only saving grace for rushing the bridges. When smoke was laid, I started running units to and across the bridges. The bulk of my forces went over the left (larger bridge), with what I call a distraction group (roughly a platoon) over the right (smaller) bridge. I moved the HMG to suppress where I could, but it seemed to have little affect. I got a majority over the larger bridge on the initial wave, only to hit the mine fields....too late to turn back, had to push up the wire and blow a hole. The right (small bridge) party made it mostly across the bridge, only to hit mines. Same issue. Then the smoke cleared, end of game. Right group was wiped out by the bunker and cross fire from the left. Group on left (large bridge) steadily chopped up by mines and constant fire including crossfire from the right bunker. That was it. In real life, I would have refused (and been shot) this assignment with the lack of support.... 8 smoke rounds and limited HE...moving across a small bridge, under fire right into a mine field and limited cover. Painful.
 
Slysniper AAR

Pre battle plan.
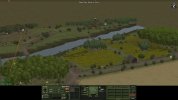
After reviewing the Terrain, My decisions were. My assault would need to be the left bridge, since there was low ground on the far side that would give shelter from the enemy dug in positions once across the bridge.

So I would have to take the left objective while somehow keeping the right objective under fire and pinned or blocked from view to my actions on the left.

Then from the point that was taken, move along the back of the map to take the right flank objective.

My armor car was going to be my base of fire, figuring it would hold up to any enemy small arms fire. That was it, the rest would come from what I run into during the battle


Start of battle

Run my armor car from left to right flank to see if it draws any fire
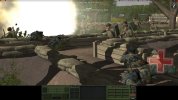
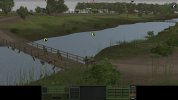
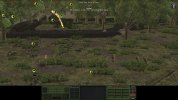
it did not but we do receive fire from the left objective to a few troops I have prepared for long range fire support seen below
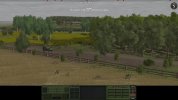
1.jpg


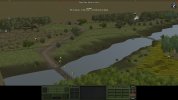
The car goes behind the woods , turns around and positions to give give to the area of fire we received activity from while not exposing itslf to any more enemy lines than neccesary.

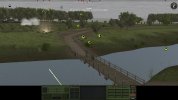
2.jpg


I had pre ordered arty on that trench line anyway, so it will come somewhat into play also as to affecting that trench.
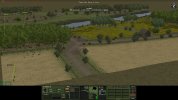
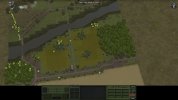
3.jpg
 
The arty starts to fall but close is not going to get the job done in this situation

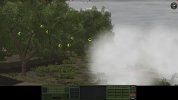
4.jpg


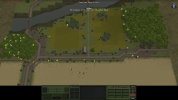
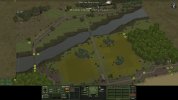
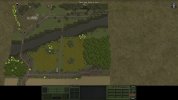
general position of my troops.

Note on the right flank, since we were informed the woods were likely mined. I move my troop up along the edge of the woods, if needed I will use them for cover, but no I am not going in them, that is just stupid.

5.jpg


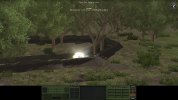
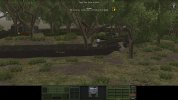
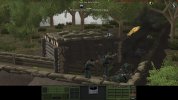
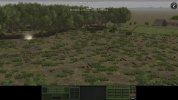
I then have lady Luck help me out, AT gun fire comes out of no where. My Armoured Car had moved more out in the open to fire on the bunker and the old famous tree trunk defence saves me. Not once but twice.

6.jpg
 
General position when his AT gun has fired

I had moved a mortar team up in the woods on the far left, Deciding I would need direct fire on enemy locations, Also pushing up my Heavy MG to also give long range fire to the enemy.

7.jpg


I start getting some accurate fire on the enemy bunker to the right flank


8.jpg


I will start firing my mortar on known targets, the second mortar team moves up to be ready to take their place if they are eliminated or provide them with more ammo if they stay alive.


9.jpg
 
The Mortar team gives me my first sign of hope. A round drops right on top of the AT gun location. I will assume it did the job, it will be a few minutes before we see the destroyed gun


10.jpg


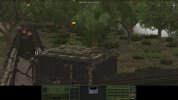
looking into the enemy bunker on the far right and I see my long range fire has kill a few men, this gives me the determination that I will waste alot of ammo from long range to keep this bunker pinned and hope for more losses.

11.jpg


My next success, the mortar now drops a round on a Enemy MG position

12.jpg

Reviewing this, that early stages were really slow as to progress, I felt no need to rush into disaster, I needed to prepare the oppotunity to cross the stream

More AAR later today.
 
Last edited:
general overview as to my troops locations

13.jpg


With the MG position knocked out and having units that can pour fire into the right flank bunker,
I decide I need to send the first troops to see if the crossing is possible


14.jpg

I fired smoke on the right side, but it overshot where I wanted it to go, I wanted it in front of his trench line.

On my left another enemy MG opens up, I was not thinking he was in action at that location.


15.jpg
 
Its Time to work a path through the mines and blow holes in the wire


16.jpg


I pour what fire I can on the MG and I see him break and rout

17.jpg


The Right flank Bunker has gone silent. There is a good reason why. Wow , all my long range fire, hundreds of rounds have paid off. It is empty, they have died trying to man that position.


18.jpg
 
With time and a lot of men stepping on mines, I get a breach team to the second wire. Time to Blow

I also had tried throwing demo Charges on mine locations to help quickly clear the path.
But my men were not following instructions well when trying that order. I did manage to make a couple of locations safe to walk on.


22.jpg


with the path set. I start my units on the slender path to the trench line objective.

Still losing men to mines. I might have lost more to mines than anything else.

23.jpg


Once again my mortar teams drop the smoke pourly, I wanted this in front of my men so they could enter the trenches under smoke, instead it falls behind me


24.jpg
 
well, I wanted both flame thrower teams to start this next phase, I lost one to the last set of mines before getting to the trench. So I proceed with one team. I hope that this might break the men in this Bunker and have them rout out of it.


25.jpg


I continue sending units up. we will need to overrun this location

26.jpg


My flame thrower team manages to use all of their fuel, its time to stirke before the enemy can recover.

27.jpg
 
I see a lot of raised hands from enemy units around the Bunker

28.jpg


But the MG inside the bunker is not affected and it mows down men I have assaulting the bunker from both sides along the trench line

29.jpg


My first attempt was a disaster.
I have one man make it to the back side of the Bunker, that is not a breach team.
Most everyone else is dead or routing.
Where did all my boys go.

30.jpg
 
Ok, I need to regroup and I need to do it fast, time is becoming a issue as to meeting all my task.

So I low crawl my flame unit which has only it SMG now just to see if it can make it.
If he makes it, I am going for my team with Demo Charges next.

While doing that, every unit i feel I can muster to the assault is pushed up through the breach again, mines still blowing at times.

31.jpg


One of the team is shot, but the charges make it and they send not 0ne but 4 nicely thrown charges onto the bunker. That should do it.

32.jpg


The last defender inside comes rushing out and is gunned down , no mercy for those devils from that bunker.

33.jpg
 
With only 7 minutes left. No master design in plans now, just push what I can left to get to the last two or three men he has on the right flank objective. My long range teams have picked him apart the whole battle when he has tried to use these units. I know I can overpower him at this point.

34.jpg


The assault is ordered with 2 minutes left. Things look good until his last unit does his heroic action, killing 5 of my men and sending most of the rest running.


35.jpg


But a few men stayed strong , continued the push and it was a radio man that did the final deed to bring his man to his end. And the battle field grows quit for the last 30 seconds of the match.
 
Yeah Lady Luck was on your side. You had a lot of troops sitting in the open that did not take casualties and you took out the MG and AT gun. Good job.
 
Great AAR @SlySniper , your attack was almost turn-for-turn a copy of mine in the test scenario. I didn't quite clear the final objective, but I advocated the following changes based on the experience.

The test scenario originally had an aircraft! In my case it never showed up, but I felt that it was too much of a wildcard that has little to do with the skill of the player, in fact it could be detrimental if it decides to attack your armoured car or other friendly troops. Also the airforce wouldn't waste air power on such a small target.

The forest tiles were originally 'heavy forest', however anyone who has played on this knows that the locator points for heavy forest are wonky, so these were changed for light forest.

The mortars were originally off-map, but changed to on-map with slightly less ammo, exchanging firepower for accuracy and speed of fire on target.

There was originally minefields between the two objectives, I felt this unlikely in reality so they were deleted.

Congratulations to @Friedrich on your first tournament and a smashing success, challenging and interesting maps, a scoring system that was effective and made it possible for people to eke out small bonuses that could affect their final score, and most importantly, the whole thing completed in a reasonable period of time so people won't lose interest! :)(y)
 
Good suggested changes.

the only thing I felt was off in all 3 battles were the fact of the depth of the mine fields in battle 3

It would be a major number of mines to do a belt of 40 yards or Meters in depth.
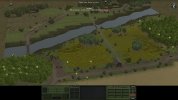
For this objective, that seems overkill as to it having it.
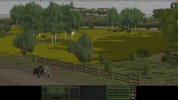
Also as to game play it leads to troops breaking from one set of mines and then routing back into another set.
(another penalty that is hard to swallow)

But hey, I saw a sign that said Normandy Beaches, so I knew it was going to be a real bugger.

It was a great test and alot of my success came from the fact I have played these games for a long time
and have learned what works and what does not work in this type of challenge
 
Back
Top Bottom