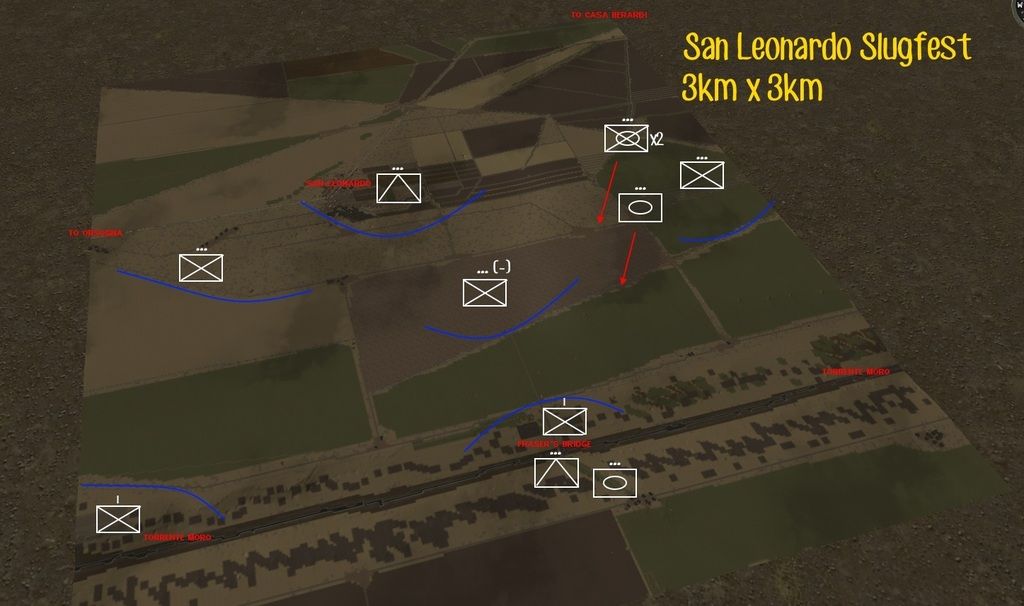
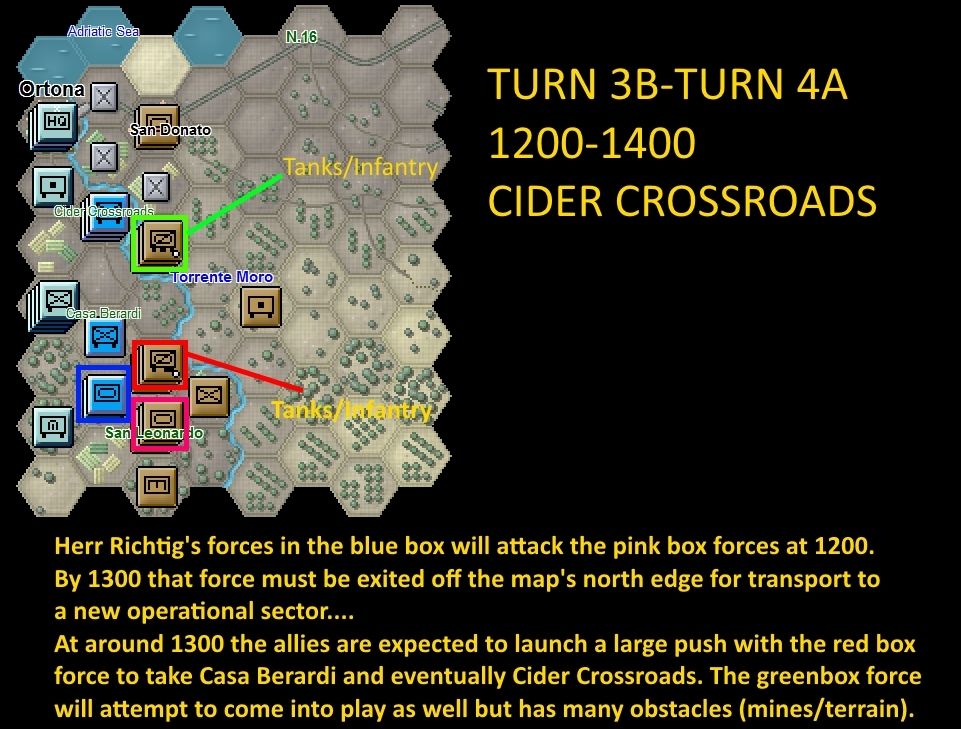
Odin's final San Leonardo AAR post (14 Nov):
It's been some time since my last update, and as you've seen the Canadians were victorious in my San Leonardo slugfest. So this is going to be a compressed final AAR post highlighting some of the significant points in the battle during its last 50-60 minutes or so...
As I left things last time, my assault on the Canadian bridgehead to the German left flank was in full flow.
Here's an overhead of the battle. The tank icons in the upper-left hand corner assaulting the Canadian infantry positions around the bridgehead
And quite a few Canuck infantrymen met there pixel truppen maker in the sky (aka Phil) during the attack.
It's from here on in that things become 'tricky'. First off, two MkIVs are lost to a 6pdr AT gun positioned in the Canadian bridgehead. The loss of the first tank was a surprise, as I didn't realise that there was a surviving AT gun. The loss of the second panzer was just annoying as I knew the AT gun was there, and ordered the panzer to area fire at it, but the panzer could not spot the gun and was distracted by bren gun carriers. A fatal mistake which led to its destruction - as the 6pdr swivelled round to to dispatch it at almost point blank range...
The first MkIV assaulting the bridgehead meets its maker
Shortly followed by the second
With the bridgehead attack brought to a halt, the surviving panzers were ordered by the general that be (Phil) to withdraw to in counterattack elsewhere. Unfortunately, One MkIV was lost to another AT gun, while another got bogged. Meaning only two MkIV's exited the battle.
Bang goes another panzer
With the tank support gone, the AT defence was left to a 88mm Flak , two 50mm AT guns, and two 75mm AT guns. A small group of armoured cars were also on their way.
Unfortunately, the Canadian observers got a sighting of my 88mm, positioned on the outskirts of San Leonardo, and called in an incessant mortar barrage on its position, until it felt like they couldn't have many mortar rounds left,and having created a moon scape around the gun, the Canucks final scored a direct hit.
With the panzers and 88mm gone, here's how the battlefield looked from my perspective.
My right wing has been opened up with the demise of the 88. Only a few HMG teams are left defending San Leanoardo - which combined with two more positioned on the edge of the woods to my left - try to pin down the advancing infantry with long range HMG fire.
At this point the Canadians seemed sure they had the upper hand and with with the Flak dispatched, my right flank is open and the Canadian infantry intensify their attacks down there. I continue to try to suppress the enemy's infantry movement with long range HMG fire. Which does enough to pin down the Canadians until I can call in a 105mm artillery strike on one of their advancing columns.
Death from above, If you look closely, you can see a couple of mushroom plumes from the 105 Arty fire dropping to the far right on the map. It seemed to inflict quite a few casualties and I saw Canadian infantrymen breaking to run for the rear.
Sadly, the assault down my right wing was too strong for my 105s to repel and the advance continued. At the same time the Arty began to drop, a squadron of Shermans arrived (by battle's conclusion, I'd estimate there were 10+ Shermans on the field).
The Shermans were evenly distributed, as the Canadians adopted a broad frontal assault, supported by further infantry (possibly a battalion+ worth of infantrymen distributed across the battlefield?).
In hindsight the wise thing to do at this point, would have been for me to withdraw all of my grenadiers, under the protection of the AT guns and few HMG guns. I made the mistake though of just withdrawing one motorised grenadier platoon. Which was to cost me later on in the battle.
With the lone grenadier platoon exiting the battlefield, the remaining men dug in, looked to the sky and prayed for savation in the form of a few Paks. The AT guns were set up 700m+ behind the infantry's front lines with armour target arcs set, laying in wait for the Shermans
With the Canadian infantry of my right bogged down under artillery and HMG fire the Canadian commanders dispatched a platoon of Shermans to kicjstart their advance. With a platoon of Shermans trundling across the the map with their flanks exposed, I decided to role the dice, and removed one of the 75mm's target armour arcs. It took aim at one of the Sherman's flank from at just under the 2km mark. After a few range finding shots, the AT crew pulled off the shot of my CM playing career and took out the Sherman at about the 1800m mark. WHAT A HIT BOYS!
Fire at will men
Take a bow son!
Just after this takes place, a combination of 75mm and 50mm fire pepper a couple od Shermans supporting an infantry advance through the centre. My 50mm guns manage to force one crew to abandon their tank; but the lack of punch fails to KO the tank. In the meantime, the other Sherman knocks out both 50mms, before its self being KOed by one of my 75mms, positioned further back.
That's a nice piece of emmental
With both 50mms taken out, I'm up against it, and the Canadian infantry positioned in the centre proceed to push forward. With my defence in the centre weak, I have little to repulse them, except for my two remaing 75mm PAKs. So I give the order to open up on the exposed Canuck grunts, 800m of so in front of AT guns' positions.
Over the course of the next two turns I see at 15-20 red crosses flutter up in amongst the exposed Canadian infantry. But I know it can't be long until the enemy turn the mortars against my AT guns. Sure enough the two lone Paks come under incessant mortar fire, effectively nullifying my AT defences.
The only glimmer of hope is the arrival of a three armoured vehicles to my far right. But in the face of a tidalwave of tanks and infantry, they are not the bulwark I require to dam the onslaught.
The reinforcements consist of a 37mm and 75mm halftrack and a 20mm armoured car... oh dear
The 37mm is promptly dispatched by an AT gun, which is within LOS on its arrival on the battlefield. During the next turn an HMG team in San Leonardo is ordered to fire on the 6 pdr's positon (from almost 2km away). It manages to suppress the AT gun, allowing the short-barrelled 75, halftrack to sneak up to the ledge of a rise overlooking the the Canadians advancing on my right flank. The halftrack spots two Shermans supporting the Canadian attack and fires at both using shoot and scoot tactics over the course of 3-4 turns. It manages to penetrate both tanks, forcing both crews to bail. But much to my frustration it cannot deliver a knock out blow to either, due to the low velocity of its gun, and limited HEAT ammo.
Damn that's annoying!
Unable to stem the Canadian tide, I decide to make for the hills, and set my men on quick march orders for the nearest exit zones. Unfortunately, as I mentioned earlier, it was a mistake on my part not to withdraw my infantrymen earlier - as realistically pre-panzerschreck era - what could they hope to achieve against a well organised tank supported assault?
A few turns later my men are fleeing as the enemy catch a scent and relaise there be easy prey to be had
I had hoped to withdraw under the cover of my two surviving Paks. But they are forced to eat dirt under continuous mortar fire, amazingly both hold out for 10 minutes+ until they are eventually knocked out.
One Pak crew manages to get their heads up long enough to fire a round off at the lead tank of Sherman column. Sadly the crew miss and are in turn KOed a turn later.
I should have taken account of the huge distance between the my frontline grenadiers' positions and the rear exit zone, which is 1.5km+ away. As the Canadians unleashed a avalanche of APCs and tanks they manage to catch 30-40 men, mercilessly cutting down those that don't surrender.
That said most of my men just about make it to the exit zones.
And they even manage to inflict the odd casualty on the way (although no where near in the same proportions as they suffered losses during the closing stages of the battle).
With that the battle brought to a close, and we can survey the AAR screen.
Upon relection, if I had withdrawn my infantry much earlier in the battle, I could have ended up with a much improved kill ratio, but as was is I learnt a lesson about multiplayer campaigns and the benefit of exit zones -
If facing overwhelming odds better to shy a battle and live to fight another day.
On another note if I had been given the MarkIVs for the duration of the battle, I would have grouped them together, parked them just behind a rise of a hill, and laid in wait for advancing Shermans, popped them over the crest at an opportune moment and let the Shermies have it.
It's possible use of the panzers for the duration of the battle could have turned the tide in the my favour. Ultimately, with the encounter taking place over such exposed ground, it was always going to be decided by tanks.
But, despite ending in defeat, I really enjoyed the battle, and my thanks goes out to
@kohlenklau for organising it! Cheers Phil!
ODIN OVER AND OUT.


