Welcome to The Few Good Men

Thanks for visiting our club and having a look around, there is a lot to see. Why not consider becoming a member?

Progress screenshots: FGM Competition "1944" (Finished)2010

Regarding decals on zimmerritt, in reality things like the numbers got hand painted, often very roughly, over the zimmeritt. If you were to try and do a steady hand paint of the problem bits of the numbers you'd be more authentic rather than less.......not for the unsteady of hand, mind!
 
Getting conscious of the deadline approaching! It's a lot quicker than my present work rate.

So anyway, got a white base coat on, and then adding a black pre-shade, in prep for the base coat.

2010_0516AprilRugby0082.jpg


Then today I lay down a base coat of Khaki Drab with a little khaki in it.

Following that I highlighted panels more directly angled at the sun, using a fair amount of yellow and white mixed into the Khaki Drab. I also built up highlights along the sides so that panels are darkest at the bottom and lighter at the top. I also added random dots and patches to break up the generic khaki drab in other areas.

2010_0516AprilRugby0083.jpg


At this point the differences look fairly stark - and they look more so under the camera flash than they actually do in reality - but I'm hopeful that sealing coats, washes and weathering will blend them into each other. I say hopeful, because I haven't tried any of this before.

I also sprayed the vinyl tracks with a mixture of dark sea grey and gunmetal. Next step for them, when I buy some, will be a wash of black ink or black oils.
 
Right, well, part of the problem is learning a bit more about my camera. I've started playing about with a few settings, but still have a long way to go and don't really have the time to learn....so this is as good as it is likely to get. Nevertheless, the colours are showing a bit more true to life in these next photos.

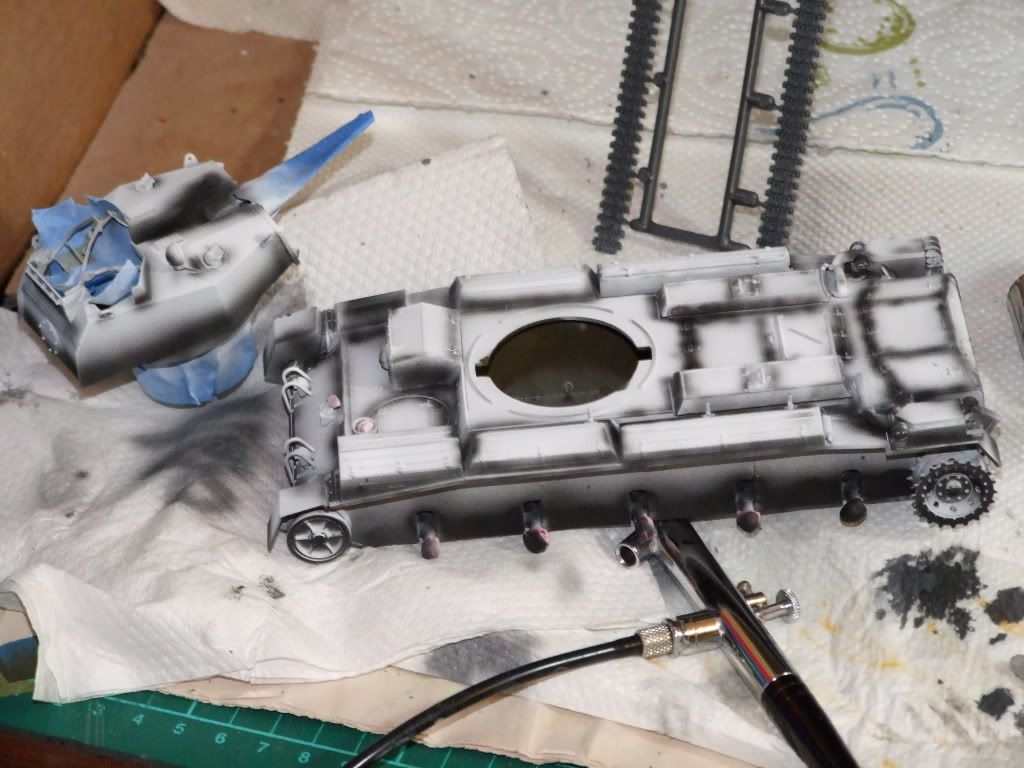
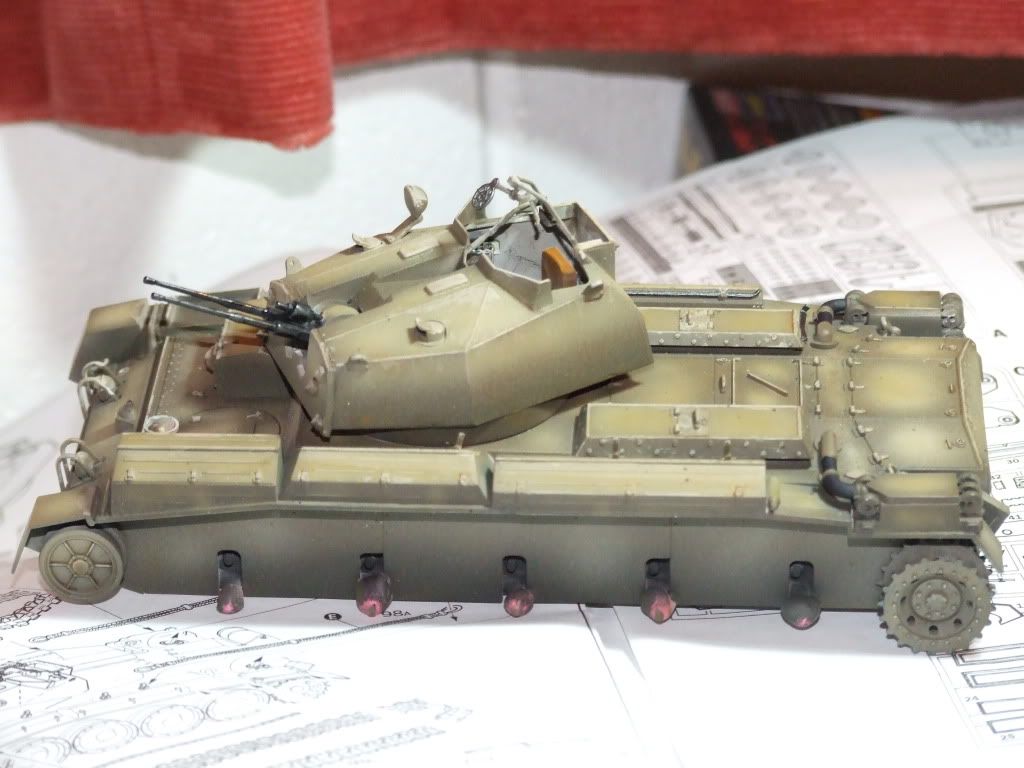
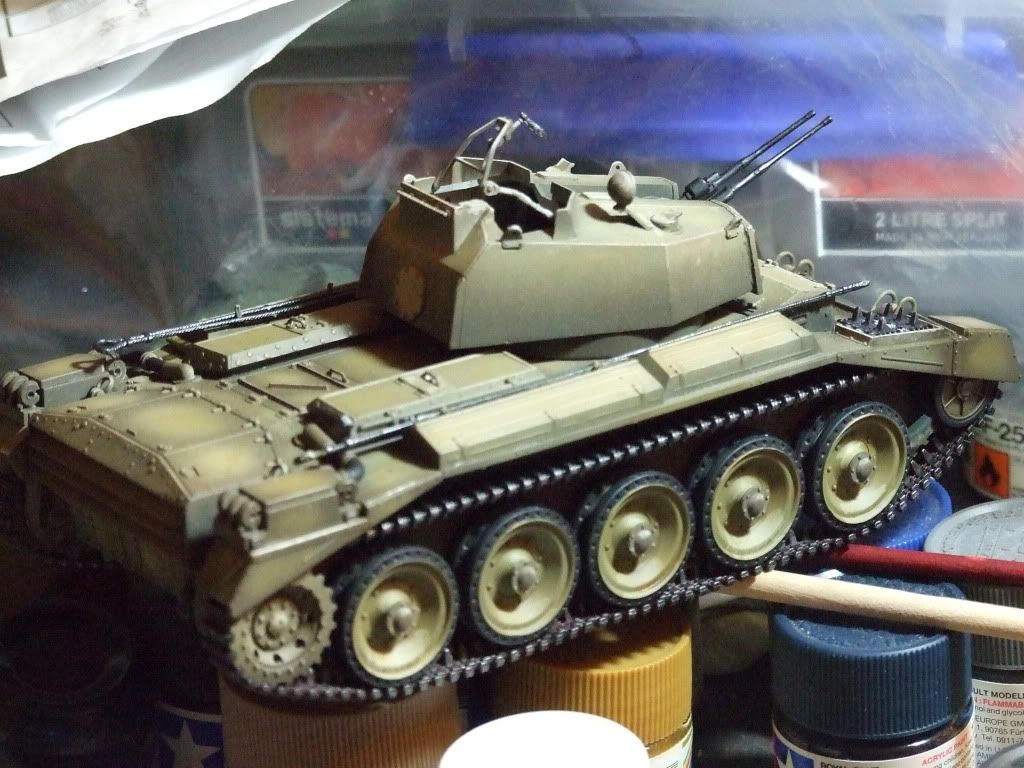
First job is another layer of even lighter colour on extreme highlight edges and so forth. You can see I've taken the masking tape off the guns, which need a bit of a touch up. It's all pretty stark at this point.

2010_0524DadsUnveiling0001.jpg


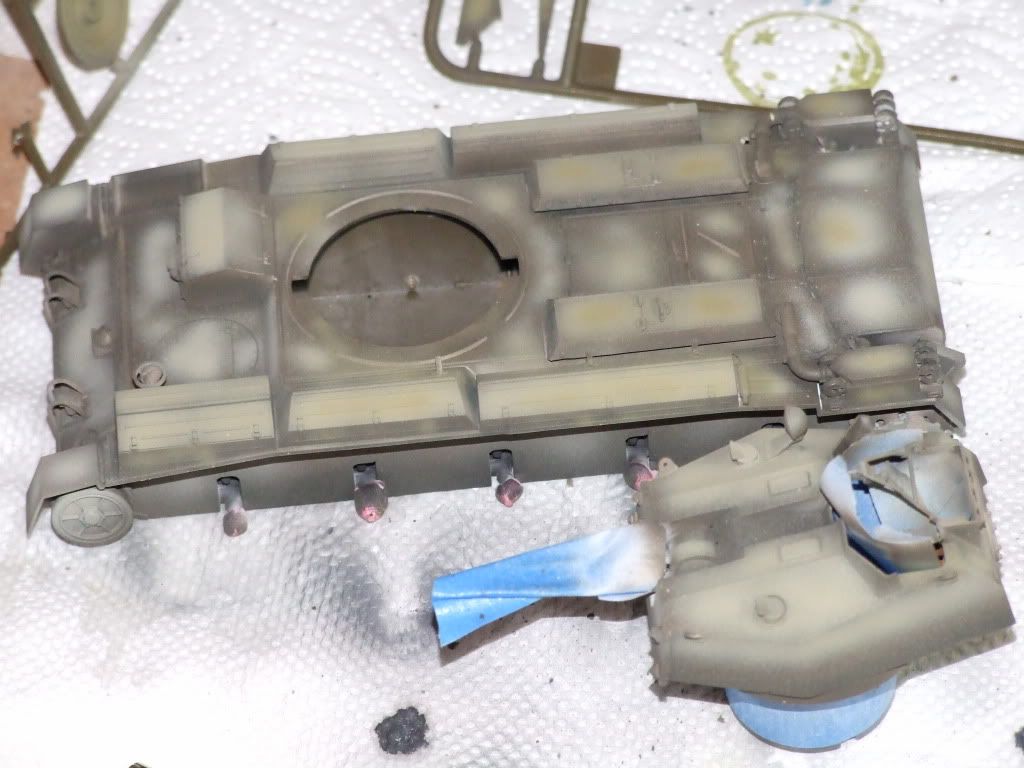
Next I added some filters (or glazes, if you prefer)....just a very thin solution of paint and thinner, applied with a damp brush. It's not a wash...you don't want to get it in the recesses. My purpose was to bring different shades a little closer together and somewhat blend them. You just want to make the surface wet with it.

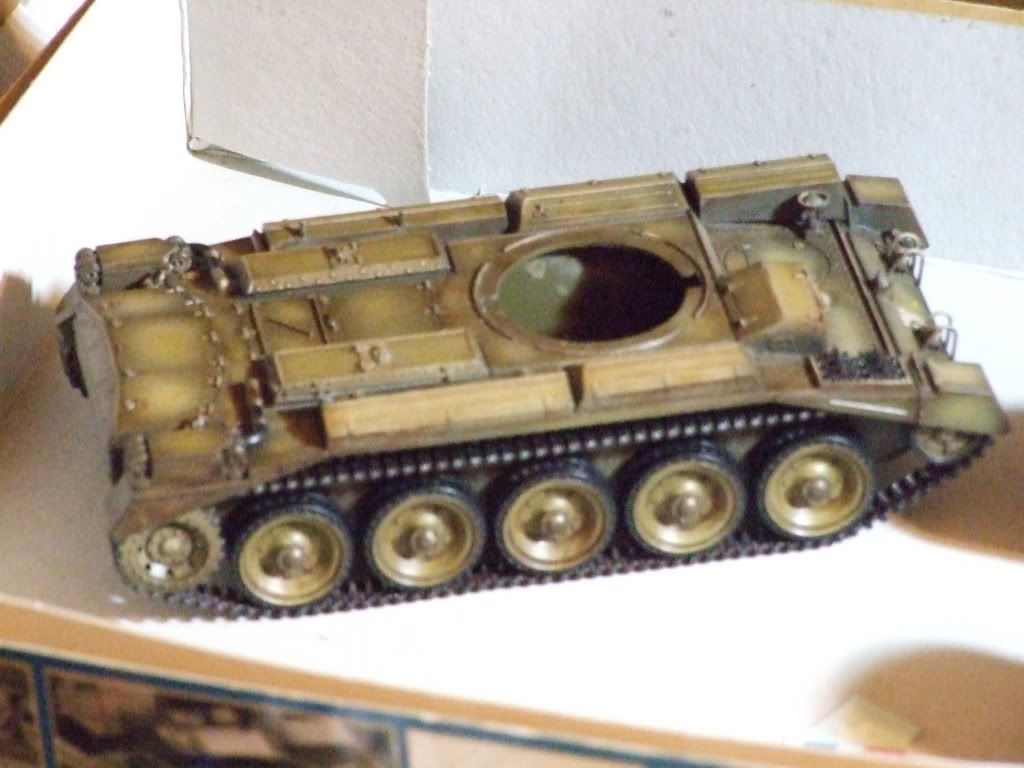
This is after a filter of raw sienna, a mustard colour. I went over some areas a couple of times more. Effects are just visible.

2010_0524DadsUnveiling0005.jpg


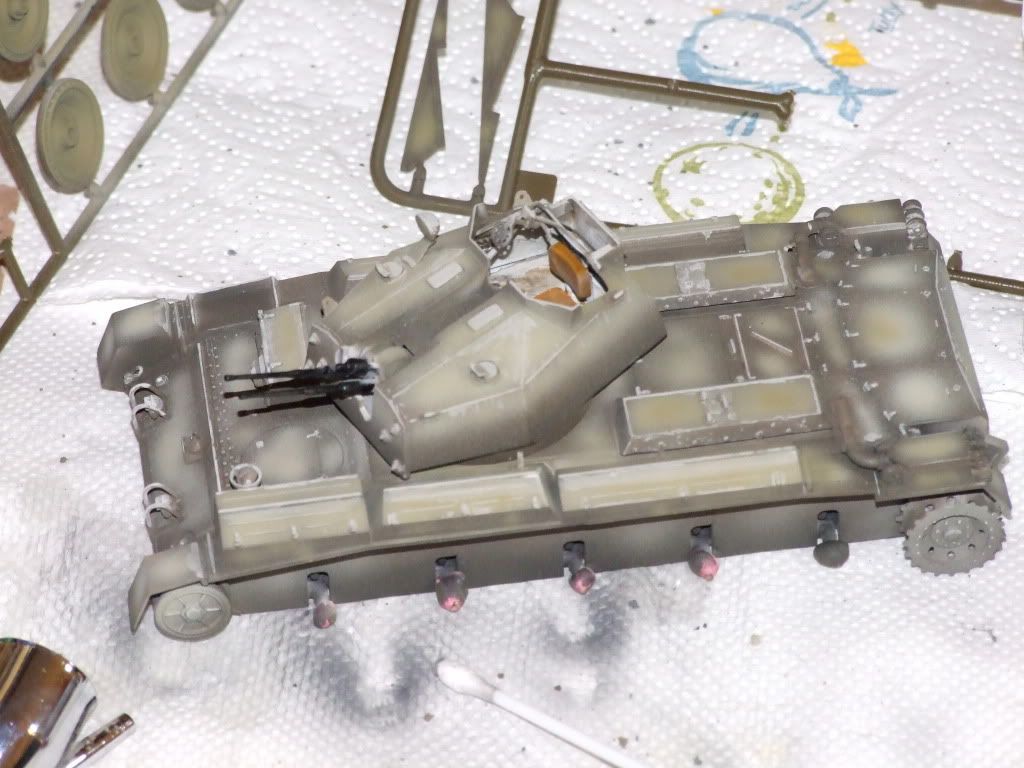
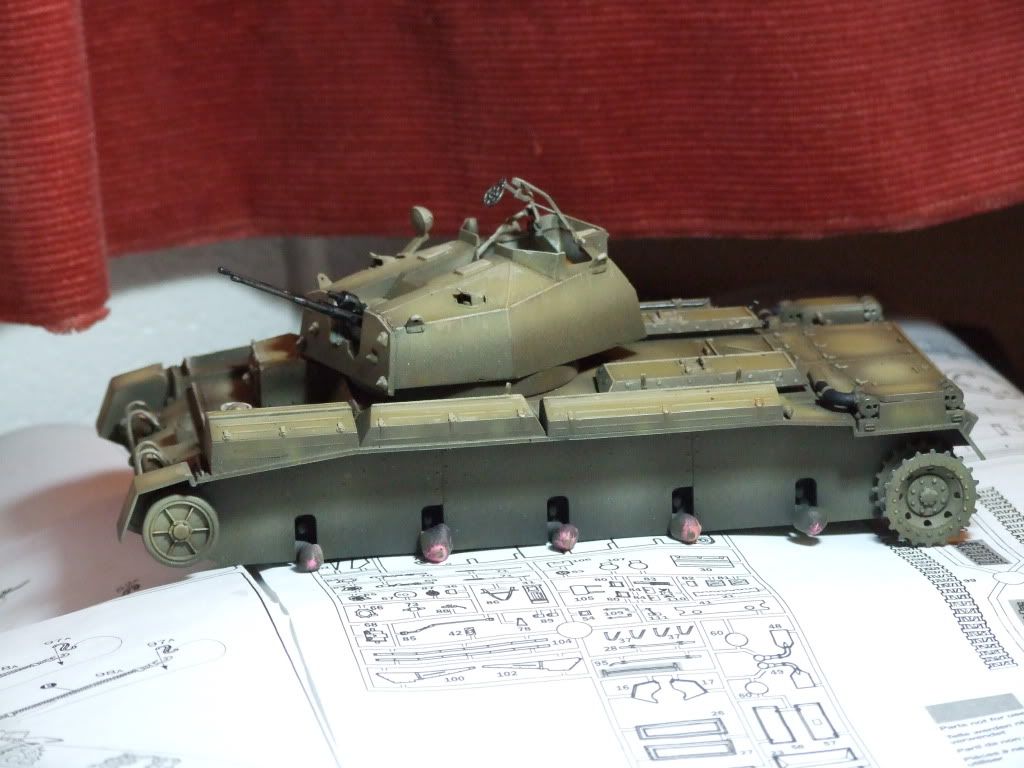
Next I added filters of raw umber...an olive drab sort of shade.

2010_0524DadsUnveiling0070.jpg


2010_0524DadsUnveiling0072.jpg


I kept on with it, and in the end as you will see in the following pics I was very pleased with the overall effect from the filters...the paint developed a richness and depth to it that it certainly didn't have with the initial coat. I thought about brown filters, but decided to leave that as I am going to do an overall burnt sienna oil wash later.

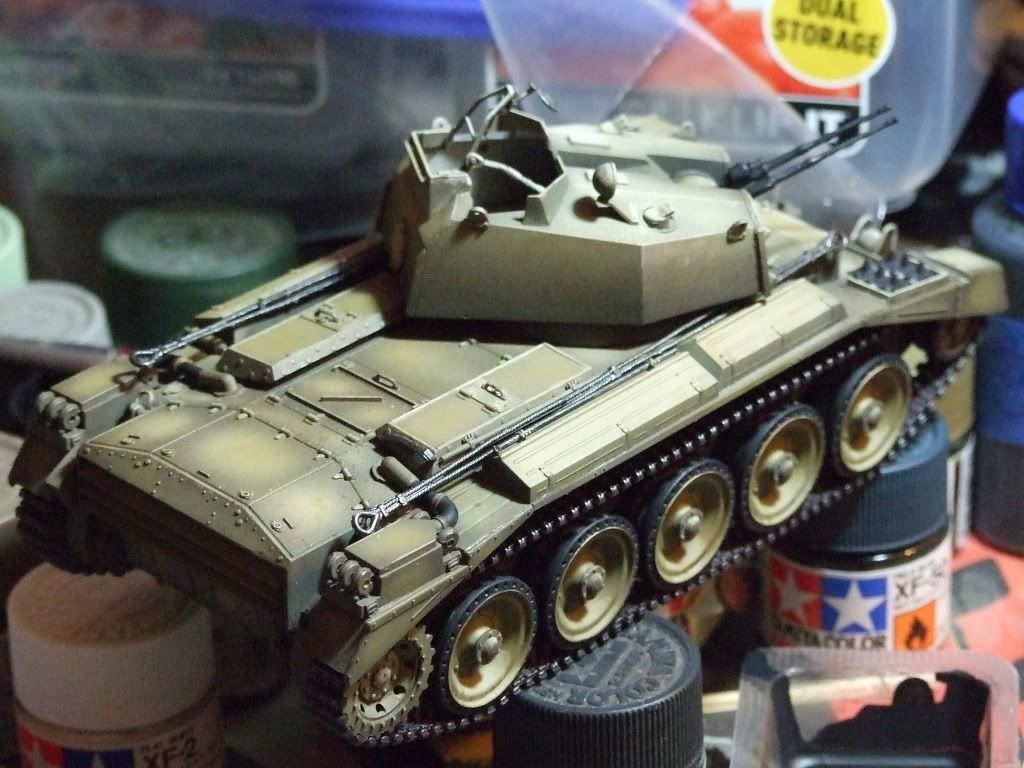
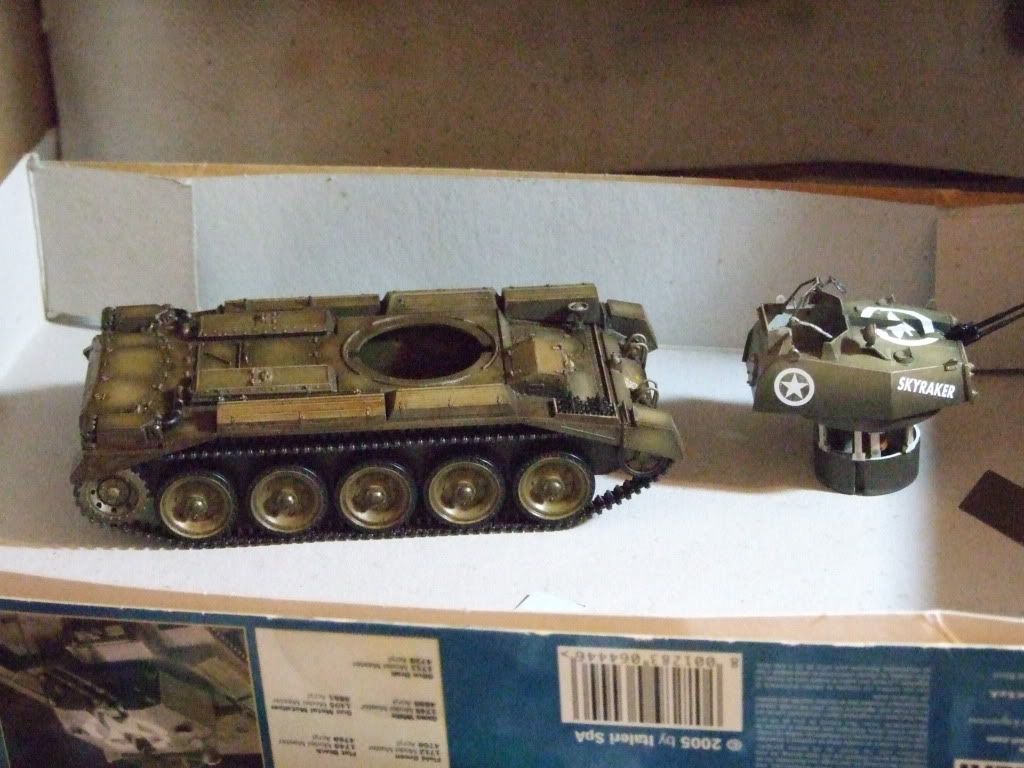
While I was doing all this, the tracks were getting some decidedly amateurish attention. Earlier I'd sprayed them a mix of gunmetal and dark sea grey, followed by a wash of thinned black...but it hadn't really given the effect I was after; it was all a bit weak. So next I applied a wash of thinned hull red, intending it to get into seams and along the track teeth and give a bit of a rust colour...but the wash was far too heavy and the tracks now too reddish. Sigh. So I brush painted gun metal like a very heavy dry-brush over the length of the track and followed THAT with a heavy wash of the same panzer grey/black mix I used for the road wheel tires. And voila....that produced an acceptable pairs of tracks, still with a bit of darkened red in the crevices for a light rust effect....very light mind you, I envisage the Crusader Mk IIIAA as a fairly new tank not long in Normandy.

As mentioned, the road wheel tires got painted, and hoses to the air filters, and the tracks were joined....a tricky little exercise getting them to fit round the idler and driving sprocket and lost a little paint there, but overall it adhered to the vinyl tracks really well. Hot knife saw the tracks joined, and then there was an evening dry-fitting and then gluing on the road wheels, followed by all the side skirts.

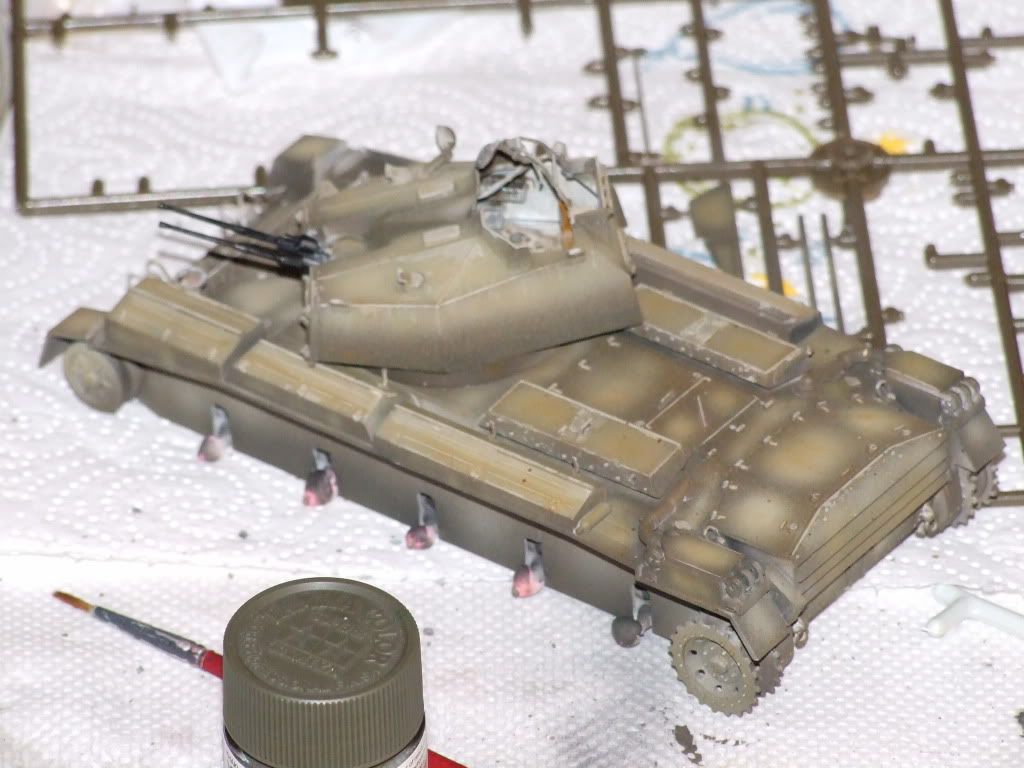
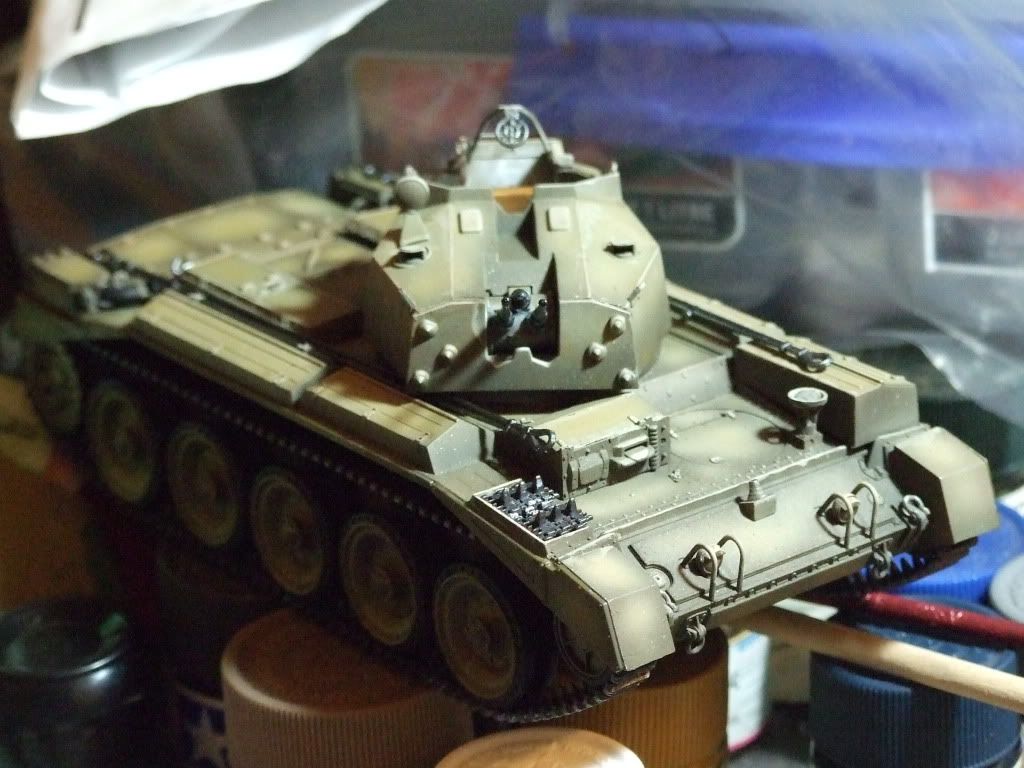
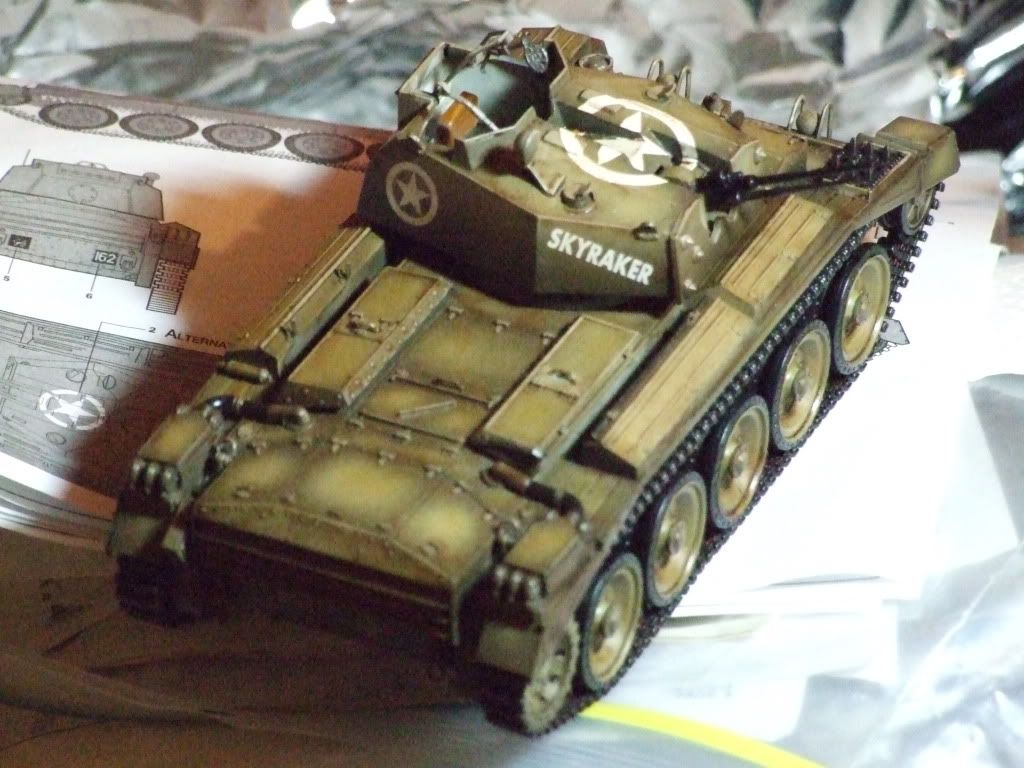
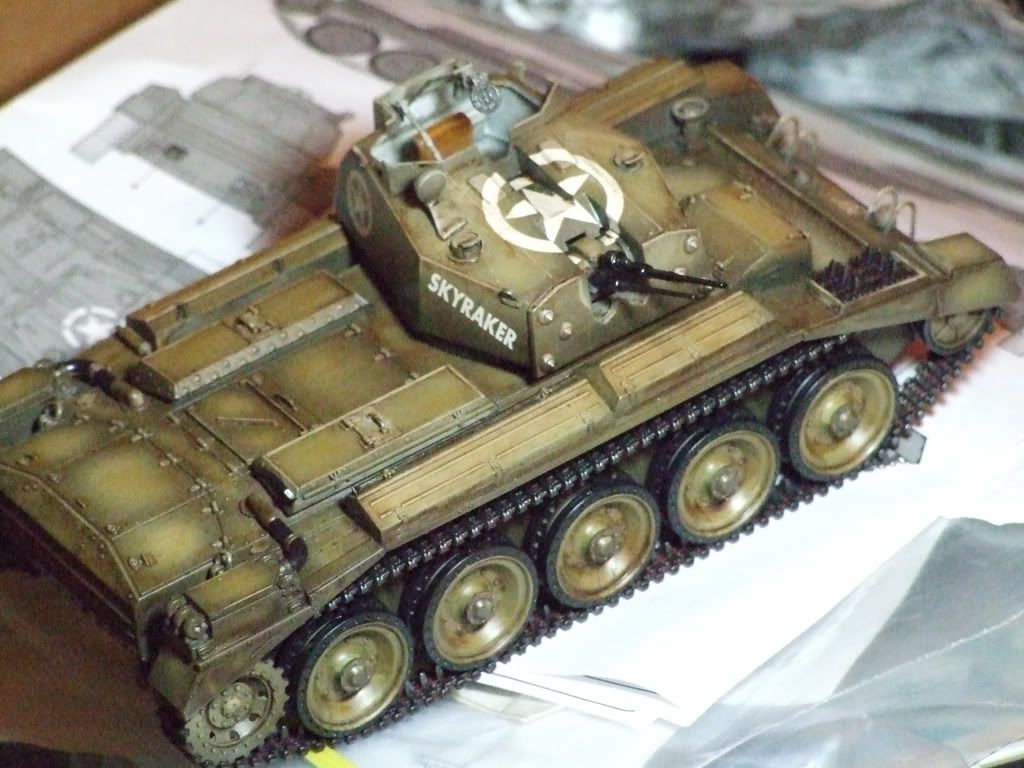
This evening it is ready for a satin gloss coat before decals and the main wash and pin washes....and it looks like this:

2010_0526DadsUnveiling0003.jpg


2010_0526DadsUnveiling0002.jpg


2010_0526DadsUnveiling0001.jpg


The towing cables are just resting on their own weight....they need some touching up and a wash of brown. Slightly puzzled over how I can get them to conform a bit better to the hull.....I may risk one of them with a bowl of hot water to soften it and see whether it survives some bending.....

Tomorrow is decals (I've just finished spraying the gloss coat), then it's a trip to the artist store to get some windsor & newton burnt umber oil paint. I'm really enjoying this, because it is just one thing after another that is new to me. Whatever happens, I'll finish this build having learned a lot if nothing else.
 
Looking very good, really impressed how the different layers of paint come together to give a really nice effect. Just one question, why not glue to join the tracks for the final join? I speak as a complete novice.
 
Looking great, McIvan -- awesome work!!

How about that Super 14 Final? ;-)

Fortunately, the best two teams are in it.

Unfortunately that's neither your team nor mine!

Better luck to us next year....we're looking forward now to the yearly ritual slaughter (we hope) of the Northern Hemisphere squads....
 
Looking very good, really impressed how the different layers of paint come together to give a really nice effect. Just one question, why not glue to join the tracks for the final join? I speak as a complete novice.

Vinyl doesn't glue well, although I could have put some superglue or expoxy resin on. Each track has two pins at one end that go through holes at the other end...then you use a hot knife to melt the pins down so it can't come apart. It actually held (when I was doing the dry fit) quite well just by itself, so I figured just melting down the pins would do the job.
 
Im really impressed... Im thinking of doing a vehicle next but dont have an airspray gun so am wondering if it is worth it!!??

The great thing about vehicles is that the weathering obscures many sins. I never had an airbrush until late last year and did everything with a brush, and vehicles are more forgiving than planes. You can do base coat, washes and highlights with a brush perfectly well, and if you look in the modelling forums there are brush painters turning out astonishing work.

The only thing I would say is that the Tamiya paints aren't great for brush work (because they dry so fast)....they are better for airbrush. If you can find some in your local, Vallejo paints are reputedly the best brush paints around, and they have large ranges of colours mixed for each army....they are specifically an armour based paint range and they do lots of useful colours like various rust shades, oily steel, gunmetal blue. I've inherited a few pots in a bulk buy of models that included the Crusader, have used one colour so far as was very impressed....dense paint, very fine pigment; high quality stuff. Suspect it will need to be thinned with water as a matter of course...and for that purpose the paint pots are designed as droppers so you can meausre out drops and then mix them with whatever.
 
Vinyl doesn't glue well, although I could have put some superglue or expoxy resin on. Each track has two pins at one end that go through holes at the other end...then you use a hot knife to melt the pins down so it can't come apart. It actually held (when I was doing the dry fit) quite well just by itself, so I figured just melting down the pins would do the job.

Thanks for that, I wondered how the tracks went together. The itch to buy a kit is growing...
 
Decals not going well tonight.....star on the top of the turret is a three piece job but even so is not snuggling over the various lumps and angles. May have to buy some decal softener in the weekend....but time is running out. How do others get their decals to sit over bumps/lumps/turn corners?
 
How do others get their decals to sit over bumps/lumps/turn corners?


I use Micro-Sol..works pretty well
 
1/2" Styrofoam sheet cut to size then Cello-Clay over that....still needs paint/washes etc.....
 
Since my last post I have laid down a nice coat of Klear varnish, and then the decals. The star on top had to go over multiple curves and didn't do so very well.

Bit more progress today...firstly went out and bought some micro-sol....it did the job reasonably well. There are one or two barely noticeable wrinkles, but the rest is snuggled down.

Also on the purchase menu was some Windsor & Newton Burnt Umber oil paint....I've always used acrylics since getting back into modelling, but the pros seem to use oils for washes, so I'm giving it a go. Tried to find artist white spirits for thinner, but couldn't, so went with mineral turpentine as a thinner. There are warnings about using turpentine, but I think they are in reference to the old wood based turpentine which is too "hot" and will attack the underlying paint and plastic.

Here we have a picture of the hull with its wash of oils.....I have used a clean brush to try and remove some from the middle of panels. I used a fairly heavy wash and you can see from comparison with the turret that the hull now has a browner tone to it, which is an effect I wanted. I haven't done a wash of the turret at this stage because I've just put on a second application of micro-sol on the decals. Next picture is a closer view of the hull. After this were taken I used a cotton bud to clean a little more excess oils off.

2010_0529DadsUnveiling0001.jpg


2010_0529DadsUnveiling0003.jpg


Next we have the model as it is now, with the wash of oil not long ago applied to the turret. The decals were still pretty soft....I should have given them more time....but they're ok.

2010_0529DadsUnveiling0004.jpg


2010_0529DadsUnveiling0005.jpg


It is pitiful how ridiculously pleased I am with this at the moment : ) I hope to goodness I don't stuff it up in the final stages....
 
Back
Top