You are using an out of date browser. It may not display this or other websites correctly.
You should upgrade or use an alternative browser.
You should upgrade or use an alternative browser.
Monsaint Manor (Drifter Man vs Bulletpoint DAR)
- Thread starter Drifter Man
- Start date
Another great DAR! You are making posts faster than I can read ;-)
Interesting to see how this will go. Like @Stafford I was also thinking you're a bit light on infantry, and quite heavy on TRPs. Never seen that many in one battle!
Another experiment! One battle heavy on machineguns, another one on TRPs. I might run out of mortar ammo long before I get to use them though.
I'm making a separate post for each turn but for the time being they don't have much content. For the time being, Bulletpoint's men are just trying to sting and annoy, instead of actually defending the ground. This will change!
1508 hrs, Turn 8. A scout is lightly wounded by friendly fire - a fragment of a 37mm fired by an armored car. I am reducing the volume of fire because it is starting to suppress my own infantry.
Hearing is an important sense to be used in CM. In all that noise of MG fire, I can distinctly hear two German rifle shots and trace them to the building from which they originated - the largest building in the village. For now I'll try to pretend I know nothing and maneuver a Sherman into a good position to put a few HE shells into that house.
My scouts are tired from advancing and some units must take a break in the middle of the field. This is going to be a long journey.
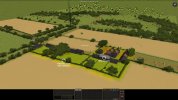

1509 hrs, Turn 9. More enemy activity at Vilage de Farine. Approaching scouts take MG fire at close range. I relied on a hunt order so that they can go to ground and vanish in the crop field - and it worked. But, like in the previous example when I walked into an ambush, I decided by chance to run another unit over the same place - and these guys immediately take a casualty. Again, I have no contact - not even a "?" icon. I need to rely on hearing and observation of tracers to find the enemy positions. This position will be difficult, it cannot be area-fired from anywhere. Two armored cars give overwatch but see nothing. I am ordering a mortar strike with a TRP and moving in another armored car for direct attack, but this will take 2-3 minutes. I must expect that I will lose more men in the next turn.
So far I've only seen one German soldier but heard eight, including two LMGs. An army of ghosts... but I think I have enough firepower to deal even with ghosts.
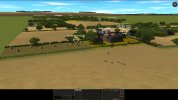
So far I've only seen one German soldier but heard eight, including two LMGs. An army of ghosts... but I think I have enough firepower to deal even with ghosts.

1510 hrs, Turn 10. The scouts successfully vanish from sight of the enemy, in the wheatfield. They even catch a glimpse of one of the ghosts, but they are ordered to hide, not return fire - in their position they would have no chance. This buys me time to bring in support.
A Sherman attacks the building from which rifle sounds were heard. The blast of 75mm HE causes another building, already damaged by mortar fire, to collapse.
Far back in my setup zone, a Sherman Firefly bogs down while moving into an overwatch position. It was going Quick over open terrain, in dry conditions I hope for the best.
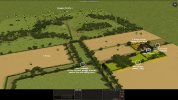
A Sherman attacks the building from which rifle sounds were heard. The blast of 75mm HE causes another building, already damaged by mortar fire, to collapse.
Far back in my setup zone, a Sherman Firefly bogs down while moving into an overwatch position. It was going Quick over open terrain, in dry conditions

1511 hrs, Turn 11. 2nd Northamptonshire continues its push towards Vilage de Farine and the fields to the north of the objective. 2 Troop reaches a low hedge that is close to the edge of the German setup zone. From an elevated position, which was previously host to a suspected sniper team (now gone), they see a Marder IIIM tank destroyer parked at the eastern edge of Ville du Harfleur, in the antitank position that I identified before setup. I am ordering a Quick, Heavy mortar strike on it, hoping to immobilize it or hit the commander. A direct hit into the compartment is unlikely.
I often read about German players using Marders and I wondered why they are so popular. They are cheap (slightly more expensive than a towed PaK40) but cost a fair amount of rarity, and of course are vulnerable. Bulletpoint could have half a dozen of these. Was it a good idea to scrap the Typhoon and buy four Fireflies? A Typhoon would be finished with this Marder quickly, a Firefly would be fighting an even-matched fight. There is probably a good reason why experienced players prefer Marders. Maybe I am going to find out. Also, experienced players don't expect you to buy 20 TRPs
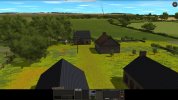
A German 81mm mortar is heard from Hill 312 and a shell explodes in the field, far from any significant target. A spotting round? Does he see a target of opportunity? My troops are widely spread out. As a precaution, I order shelling of all two story buildings in Farine, and move my exposed vehicles in case my opponent hopes to immobilize one. And, of course, a fire mission is ordered on Hill 312.
At Vilage de Farine, my hard-pressed scouts finally get some support from their armored friends and will hopefully resume their advance.
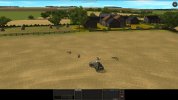
EDIT: The bogged Firefly has extracted itself and continues on its way. What a relief.
I often read about German players using Marders and I wondered why they are so popular. They are cheap (slightly more expensive than a towed PaK40) but cost a fair amount of rarity, and of course are vulnerable. Bulletpoint could have half a dozen of these. Was it a good idea to scrap the Typhoon and buy four Fireflies? A Typhoon would be finished with this Marder quickly, a Firefly would be fighting an even-matched fight. There is probably a good reason why experienced players prefer Marders. Maybe I am going to find out. Also, experienced players don't expect you to buy 20 TRPs

A German 81mm mortar is heard from Hill 312 and a shell explodes in the field, far from any significant target. A spotting round? Does he see a target of opportunity? My troops are widely spread out. As a precaution, I order shelling of all two story buildings in Farine, and move my exposed vehicles in case my opponent hopes to immobilize one. And, of course, a fire mission is ordered on Hill 312.
At Vilage de Farine, my hard-pressed scouts finally get some support from their armored friends and will hopefully resume their advance.

EDIT: The bogged Firefly has extracted itself and continues on its way. What a relief.
Last edited:
I often read about German players using Marders and I wondered why they are so popular. They are cheap (slightly more expensive than a towed PaK40) but cost a fair amount of rarity, and of course are vulnerable.
You pretty much answered your own question, they're basically a highly mobile Pak40. Use them the same way you would a sniper, take one or two shots and reposition to ambush from somewhere else.
In WWII 80% of tank fights were won by whoever fired first, same can be applied here especially in bocage country. Paks are accurate and lethal, combined with mobility they're incredibly good value.
Makes sense. Yes, they are good value - two or three for a tank.You pretty much answered your own question, they're basically a highly mobile Pak40. Use them the same way you would a sniper, take one or two shots and reposition to ambush from somewhere else.
In WWII 80% of tank fights were won by whoever fired first, same can be applied here especially in bocage country. Paks are accurate and lethal, combined with mobility they're incredibly good value.
I ran a quick test of Marders vs Humber IV (wondering if I could counter cheap armor with cheap armor). [Marder has a] Very good spotting ability, even with the commander in, and excellent gunnery. The Humber can easily take out a Marder from the front with its 37mm, but it must spot it and hit before it gets blown to pieces [which is unlikely to happen].
EDIT: added a few words in [brackets] to clarify.
Last edited:
Yep they're vulnerable to a lot of things, light armour, mortars as you aluded to in your post, even MG spray is capable of taking out a couple of the crew. It's the mobility that you buy them for, not the 'armour'. 
Ideally they shouldn't be spotted until they fire, and should get a second shot off and withdraw to safety before their target can react on the chance that they have been lucky enough to survive a couple of 75mm AP rounds.
Ideally they shouldn't be spotted until they fire, and should get a second shot off and withdraw to safety before their target can react on the chance that they have been lucky enough to survive a couple of 75mm AP rounds.
It's just enough armour to keep the vehicle togetherIt's the mobility that you buy them for, not the 'armour'.
They do get spotted easily though, like any vehicle. Maybe it's better to keep them in some dark ambush position. Bulletpoint's Marder is very visible.
1512 hrs, Turn 12. The first troops enter the Vilage de Farine objective, avoiding obvious entry points. Mines are expected. The mortar mission that I was afraid of is turning out to be just occasional shelling of one place he can see from Hill 312. Should be harmless, and probably is a direct fire mission. One Sherman has LOS on Hill 312 and will fire a few shells in this direction.
Another building on the objective has collapsed after my shelling. It seems pointless to pour more ammunition into this place. All shelling and MG fire into the village will stopped from now. The preplanned mortar missions are now cancelled and the mortars shift onto the next line of defense. TRPs make it quick and easy.
A Panzerschreck team deploys against an armored car supporting 2 Troop, but my scouts are vigilant and take one man down at close range. The tube guy is still alive though. I hope I can keep him suppressed and take him out too.
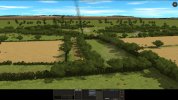
Meanwhile, the two 5-seater mortar ammo carriers were emptied of 81mm shells by mortar ammo bearers and appropriated by pioneer teams. The obvious paths are probably mined, I am going to need demo charges to make new ones.
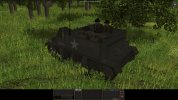
Another building on the objective has collapsed after my shelling. It seems pointless to pour more ammunition into this place. All shelling and MG fire into the village will stopped from now. The preplanned mortar missions are now cancelled and the mortars shift onto the next line of defense. TRPs make it quick and easy.
A Panzerschreck team deploys against an armored car supporting 2 Troop, but my scouts are vigilant and take one man down at close range. The tube guy is still alive though. I hope I can keep him suppressed and take him out too.

Meanwhile, the two 5-seater mortar ammo carriers were emptied of 81mm shells by mortar ammo bearers and appropriated by pioneer teams. The obvious paths are probably mined, I am going to need demo charges to make new ones.

I often read about German players using Marders and I wondered why they are so popular. They are cheap (slightly more expensive than a towed PaK40) but cost a fair amount of rarity, and of course are vulnerable. Bulletpoint could have half a dozen of these. Was it a good idea to scrap the Typhoon and buy four Fireflies? A Typhoon would be finished with this Marder quickly, a Firefly would be fighting an even-matched fight. There is probably a good reason why experienced players prefer Marders. Maybe I am going to find out. Also, experienced players don't expect you to buy 20 TRPs
Like @Stafford, I think they are basically a mobile Pak40 with a very potent gun. But imo not an even fight against a Firefly, although yes it can be very dangerous to it. Marders are quite easily suppressed and extra vulnerable to flanking since they don't have a turret. But compared to a PaK they can at least get away if they come under fire at a reasonable price.
Agreed with your comment that they are better used far back in keyhole positions compared to manning the front. Obviously I don't know why Bulletpoint put it there, perhaps he thinks it is a dangerous position and doesn't want to risk more valuable assets on it.
Bulletpoint's position is a good one for a TD (it is protected from the sides and can be engaged only frontally, unless... (I might tell you laterLike @Stafford, I think they are basically a mobile Pak40 with a very potent gun. But imo not an even fight against a Firefly, although yes it can be very dangerous to it. Marders are quite easily suppressed and extra vulnerable to flanking since they don't have a turret. But compared to a PaK they can at least get away if they come under fire at a reasonable price.
Agreed with your comment that they are better used far back in keyhole positions compared to manning the front. Obviously I don't know why Bulletpoint put it there, perhaps he thinks it is a dangerous position and doesn't want to risk more valuable assets on it.
A clarification for one of my posts above: Humber IV is not a good match for the Marder. The Marder will win, because it can spot the Humber first and is more likely to score an early hit.
Edit: I also noticed that CMFI reports often mention Archers. I don't have CMFI but I think it is the same recipe: a surplus tank chassis + powerful antitank gun makes an "expendable", mobile, hard-hitting AT system.
Last edited:
1513 hrs, Turn 13. The advancing 1 Troop gets under fire again, this time from a building. MG42. No casualties are taken, the scouts (actually the 2IC team of the 1 Troop, which I sent along) go to ground immediately and vanish from enemy sight. I am starting to suspect that this is all caused by a single infantry team that is using the gardens behind the houses to move from place to place, playing a game of whack-a-mole with me. Bulletpoint uses the terrain very effectively, but it is also fair to say that the terrain is suitable for this kind of defense. There are plenty of openings in the low hedges, which makes the hedges passable for infantry. Eventually, this should become an advantage for me as well.
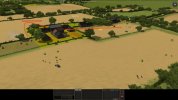
In the area of the 2 Troop, enemy infantry is seen retreating through an opening in the bocage and onto the main road in the center. The panzerschreck has escaped, too. When my scouts reach the hedgerow, they only find the body of the man they had taken down. But at least I had a contact, finally! The ghosts have materialized.
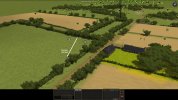
The position of the scouts who can see the Marder at Harfleur makes a very good vantage point. I can even see past the river. I should get someone with binoculars over here.
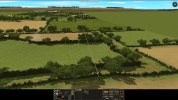
I am also finding that the fields the Marder is facing should not be left unattended. I should send a force here to protect the flank of the 2 Troop scouts. Vehicles can't go there because there are no wide openings in the hedge on my side. Time for the pioneers to make one.

In the area of the 2 Troop, enemy infantry is seen retreating through an opening in the bocage and onto the main road in the center. The panzerschreck has escaped, too. When my scouts reach the hedgerow, they only find the body of the man they had taken down. But at least I had a contact, finally! The ghosts have materialized.

The position of the scouts who can see the Marder at Harfleur makes a very good vantage point. I can even see past the river. I should get someone with binoculars over here.

I am also finding that the fields the Marder is facing should not be left unattended. I should send a force here to protect the flank of the 2 Troop scouts. Vehicles can't go there because there are no wide openings in the hedge on my side. Time for the pioneers to make one.
Very much enjoying the AAR! Another thing that is going to make that Marder vulnerable is that it is almost sitting on one of your (many) TRP's. So any artillery you target it with is going to come in without spotting rounds & your tanks are going to be much less likely to miss it once they spot it as well.
Thanks @scrappie !
I wasn't aware of the effect of TRP on other units than artillery, but the manual confirms what you say - enemy units near TRPs are easier to get range on and hit. But the spotting part is a problem. I've run a few Sherman vs Marder tests, including this exact position on this map and including the TRP. The Marder almost always spots first, fires first, hits first. It even has a chance of defeating two Shermans coming in with hatches open. At best it is a coin toss if the Sherman can survive the hit or hit first although it has fired second.
So what I am going to do is drop 4-5 mortar shells on the Marder - coming in about 3 minutes from now. The chances of doing actual damage are small, but it should force my opponent to change position unless he wants to sit on a TRP. This should open the way for advance, leaving the task of dealing with the Marder for later.
1514 hrs, Turn 14. Another turn with cautious advance and no enemy activity. Two new contacts appear (white circles below). The left one is in a two-story building, probably hiding, and my scouts are so close that they can 'sense' the enemy presence. The second one appears in the bocage corner on the right. Possibly an antitank team waiting for an armored vehicle pass by.
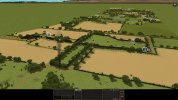

1515 hrs, Turn 15. My opponent has withdrawn his troops into a corner of Vilage de Farine where the tanks could not fire, and 1 Troop scouts run into them while searching the objective. It appears to be only three men - two MG42 and one Panzerschreck (but not showing as a weapons team). This strange collection makes me think we are looking at the remainder of a motorized panzergrenadier squad that has taken casualties. But I may be wrong about that. One German casualty is spotted in one of the buildings. MP40: good to know that the leader is down. Nevertheless, I advance too fast with the 1 Troop and lose a man to MG fire in the field, and the scouts closest to the defenders are pinned down by their fire. It's not healthy to face a MG42 at 20 meters. I hope I can get some support for these three guys before they get shot up...
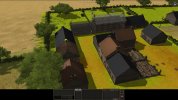
The enemy mortar on Hill 312 is now directly spotted. It has adjusted its fire and is now targeting a wood patch in Farine where my scouts are hiding. A fire mission starts landing on the mortar position - the Germans take a casualty but continue firing.
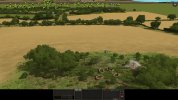
A second mortar is heard from the wood patch at the eastern edge of Ville du Harfleur. It is targeting the 2 Troop.
Situation update, 1515 hrs. 15 minutes have passed, 1/8 of the time I have available. I have advanced 380 meters from the starting line, of which 200 meters was undefended buffer terrain between the setup zones, which nevertheless took 2-3 minutes on Quick to cross. The advance was led by the two scout troops of the recce regiment, with support of their armored cars, tanks of the 3rd RTR, and regiment mortars. I have taken 6 casualties - 3 infantry casualties and 3 crew of a destroyed armored car. German opposition has been with light forces, but stubborn and organized with skill. I am certain about only 3 German casualties. My opponent has offered me very little to shoot at and I have only see few solid contacts. His mortar fire has not yet caused any damage but is becoming more accurate. I have spent 21% of my mortar ammunition (101/476).
I have to be realistic about my chances. The final objectives are about 2000 meters away from the starting line. If I am covering, on average, 15 meters per minute now, against light opposition, I cannot advance 2 km in 2 hours while overcoming Bulletpoint's main defenses. It's just too far and I refuse to commit to a mad rush that would only yield an easy victory for Bulletpoint. Instead I should aim to grind through one line after another - maneuvering around the defenses is not possible on a narrow map - with the goal to capture the river crossings in the time limit and with acceptable losses.
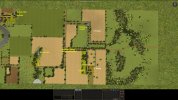

The enemy mortar on Hill 312 is now directly spotted. It has adjusted its fire and is now targeting a wood patch in Farine where my scouts are hiding. A fire mission starts landing on the mortar position - the Germans take a casualty but continue firing.

A second mortar is heard from the wood patch at the eastern edge of Ville du Harfleur. It is targeting the 2 Troop.
Situation update, 1515 hrs. 15 minutes have passed, 1/8 of the time I have available. I have advanced 380 meters from the starting line, of which 200 meters was undefended buffer terrain between the setup zones, which nevertheless took 2-3 minutes on Quick to cross. The advance was led by the two scout troops of the recce regiment, with support of their armored cars, tanks of the 3rd RTR, and regiment mortars. I have taken 6 casualties - 3 infantry casualties and 3 crew of a destroyed armored car. German opposition has been with light forces, but stubborn and organized with skill. I am certain about only 3 German casualties. My opponent has offered me very little to shoot at and I have only see few solid contacts. His mortar fire has not yet caused any damage but is becoming more accurate. I have spent 21% of my mortar ammunition (101/476).
I have to be realistic about my chances. The final objectives are about 2000 meters away from the starting line. If I am covering, on average, 15 meters per minute now, against light opposition, I cannot advance 2 km in 2 hours while overcoming Bulletpoint's main defenses. It's just too far and I refuse to commit to a mad rush that would only yield an easy victory for Bulletpoint. Instead I should aim to grind through one line after another - maneuvering around the defenses is not possible on a narrow map - with the goal to capture the river crossings in the time limit and with acceptable losses.

Thanks @scrappie !
I wasn't aware of the effect of TRP on other units than artillery, but the manual confirms what you say - enemy units near TRPs are easier to get range on and hit. But the spotting part is a problem. I've run a few Sherman vs Marder tests, including this exact position on this map and including the TRP. The Marder almost always spots first, fires first, hits first. It even has a chance of defeating two Shermans coming in with hatches open. At best it is a coin toss if the Sherman can survive the hit or hit first although it has fired second.
So what I am going to do is drop 4-5 mortar shells on the Marder - coming in about 3 minutes from now. The chances of doing actual damage are small, but it should force my opponent to change position unless he wants to sit on a TRP. This should open the way for advance, leaving the task of dealing with the Marder for later.
Yeah in a 1-1 situations open topped vehicles have better situational awareness. But if you share your spotting contacts through c2, you can change that. Still, if you have to expose yourself in plain view of it's frontal arc than it's not really a good idea to try and duke it out 1-1. Perhaps if it's suppressed by mortar fire.
Definitely sharing contacts through C2 can work well. I recently took out a Marder in a keyholed position with a couple of Shermans using this method. Only difference was I could bring my Shermans into hull-down positions to make them harder to spot & harder to hit.Yeah in a 1-1 situations open topped vehicles have better situational awareness. But if you share your spotting contacts through c2, you can change that. Still, if you have to expose yourself in plain view of it's frontal arc than it's not really a good idea to try and duke it out 1-1. Perhaps if it's suppressed by mortar fire.
When you mortar the Marder, can you get a tank that has LOF to the Marder’s likely path of retreat?


