Welcome to The Few Good Men

Thanks for visiting our club and having a look around, there is a lot to see. Why not consider becoming a member?

Monsaint Manor (Drifter Man vs Bulletpoint DAR)

What the hell kind of sacrifices to what Gods did Bulletpoint make to have that happen? It's always, always the tube guy who gets hit. And if it's an infantry squad, it's either the leader or the Bren gunner.
I imagine he burns effigies of Shermans for the Germanic god Schregg or something. His Panzerschrecks have extraordinary survival skills.

On the other hand, the casualties of the British scouts are reasonably evenly distributed among the three specialties (leader, gunner, soldier). And I am already building my supercharged rifle sections that should be proofed against being crippled by taking a single casualty. Also trying to spread the Brens evenly among the teams so I don't end up losing everything to one mortar shell. I think their time will come in the second hour of the battle.
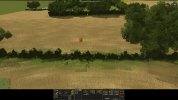
054_RifleSection.jpg
 
1555 hrs, Turn 55. Developments:
  • The Germans have not withdrawn from Hill 312 - they are still lurking in the woods. 1 Troop (what is left of it) gets ambushed and loses two men. They fire back only one shot from a Webley - that one shot takes out one German soldier. Another German team (probably section HQ) is located at the top of the Hill.
  • Bulletpoint's mortars have woken up and fire from the Church far back on Hill 312. 4 Platoon commander is lightly wounded by a stray shell that was too long. I am happy to see that mortars will be out of the picture soon, but infantry cannot live there as long as they are firing. Also, I wanted to use the Hill to attack Marder 5 in the next turn. Should I proceed with the attack anyway?
055_Hill312.jpg
 
1556 hrs, Turn 56. The mortar attack is not a direct fire on Hill 312 - it is an indirect mission on a linear target drawn between the northern part of Farine and Hill 312, with 'harass' intensity. This means that Hill 312 should be survivable for my infantry - only few shells should fall there. I'm scattering the troops that could end up in the mortar fire between the two objectives. There is one building in Harfleur from which the spotter has view on the two points. This building is going receive some 37mm and 75mm in the next turn.

A German infantry team shows themselves up at the western end of Harfleur ('B Team'). I think they are responding to a smoke screen I laid around Marder 4 to cover attack on Marder 5 (I chose not to proceed with it until I clarify what this mortar fire is about, but I will do so soon). Bulletpoint may be thinking that I want to advance along the northern edge of the map and wants to see what is going on there. I do not plan anything of this kind, but it is nice that he revealed his positions.

The fight continues on Hill 312 between scouts and panzergrenadiers, this time one German is taken down.

056_Overview.jpg
 
Last edited:
1557 hrs, Turn 57. This time I lose three scouts on Hill 312 and around (mortar fire and Germans on the far side of the hill). I keep pushing scouts into this dangerous position - I want to make sure no Panzerschreck is hiding nearby so I can deploy tanks, but at the same time, without the support of tanks it is very difficult for the scouts to prevail. I also need the tanks there to attack Marder 5 - this is not possible until I have infantry overwatch. I am sending a rifle section to assist by going around the northern edge of the Hill.

Bulletpoint's redeployment at Harfleur was not motivated by my smoke screen - he withdrew to save his troops from shelling from Hill 312. I notice the HMG team, originally withdrawn from the 3-story building in Harfleur, following the infantry team and redeploying on the northern edge of the map. Although I only see two casualties, it looks like there is only one man remaining from this team after one minute of area-firing with 37mm.

The sniper is located again, one hedgerow behind his previous position...

057_Overview.jpg
 
1558 hrs, Turn 58. More infantry is spotted on Hill 312 and in Harfleur - I think the contacts I have are worth one infantry platoon. I finally scrap the idea of peeking across Hill 312 with either infantry or tanks. I can't get support fire over there and, as I anticipated, my opponent intends to hold onto the western slope of the Hill. The top of the Hill and center of the map, where I wanted to place armor, is a kill zone watched over by Marders. However, if I take control of the eastern edge of Harfleur ("Tank spot" below), I can use a covered position for a tank or armored car to shell the western slope of the Hill (but not the southern part next to the water patch). Also, the tank could support further advance by covering the hedgerows between Hill 312 and the river - although it cannot area fire there, it should be able to pick off infantry that rear up their heads.

Six mortar rounds fall on Hill 312. Luckily, no one is hurt, in fact two rounds fell on the German-held side. Bulletpoint should have 18 rounds left, enough for 5-10 minutes of shelling.

058_Overview.jpg
 
1559 hrs, Turn 59. First scouts reach the eastern edge of Harfleur. It has been a marathon across the huge field and everyone is tired. I am delighted to find (so far) little opposition there. The first building and the wood patch next to it cannot be area-fired, but I only find a Panzerschreck team that retreats out of sight as soon as a few bursts are fired at them. If I can secure this northern end, I can post a tank here to support the other troops stuck at Hill 312. Bulletpoint is probably aware of this and I can see what looks like an infantry team moving into the large farm buildings. More targets for my tank fire.

Another schreck is found right after Hill 312, in a corner of a hedgerow, just where I expected it. This was the reason for not moving any tanks forward on the Hill.

I am receiving first fire from the other side of the river - apparently an ammo bearer team taking some shots at the scouts approaching Harfleur.

059_Overview.jpg
 
Catching up to this one after a flu did had the better of me for a while. Nice progress! :)

This all shows how cautious the attacker must be when trying to defeat a well-prepared defense. I've heard the opinion that assault is too difficult for the defender because of the large difference in points, but there is a good reason for the difference. The defender's job is to sit, observe and kill anything that moves. The attacker first pays with blood for information about the defender's positions, and then again with more blood for assaulting them. Good that I brought those armored cars - they haven't done much fighting but they have done a lot of dying for the valuable tanks.

Always like to think the terrain/map and the objectives should decide what's an assault vs an attack or a probe. Of course they just mean arbitrary numbers input, but dislodging the defense of a large dense urban centre with some good covered positions / keyholes with LOS/LOF on the approaches and some competent troops defending it, requires more 'combat power' compared to taking some smaller objectives without good cover spread across a map with mostly open terrain. Perhaps the latter is more like a probe, while the first can be an assault in CMx2 terms. Various conditions can impact the balance, like heat/snow/fog/mud etc. Of course available forces matter too (Couple of Elephants would do quite nice defending open terrain I guess).

Agree with Stafford that this map seems to be quite favorable for defense. Bocages, ridges and villages, distance, heat, time, quite some objectives. Now you did spent a lot of points on TRPs :), but I guess an 'attack' would be more appropriate. The heat makes the long distance your footsoldiers have to leg it relatively longer, so perhaps 2 hours is on the short side? Although with mech forces or some more transports you could have been perhaps better 'prepared'.

But that's all difficult to call based on screenshots and as long as your having fun perhaps not that important :)
For sure I'm having fun following the DAR!
 
Catching up to this one after a flu did had the better of me for a while. Nice progress! :)


Always like to think the terrain/map and the objectives should decide what's an assault vs an attack or a probe. Of course they just mean arbitrary numbers input, but dislodging the defense of a large dense urban centre with some good covered positions / keyholes with LOS/LOF on the approaches and some competent troops defending it, requires more 'combat power' compared to taking some smaller objectives without good cover spread across a map with mostly open terrain. Perhaps the latter is more like a probe, while the first can be an assault in CMx2 terms. Various conditions can impact the balance, like heat/snow/fog/mud etc. Of course available forces matter too (Couple of Elephants would do quite nice defending open terrain I guess).

Agree with Stafford that this map seems to be quite favorable for defense. Bocages, ridges and villages, distance, heat, time, quite some objectives. Now you did spent a lot of points on TRPs :), but I guess an 'attack' would be more appropriate. The heat makes the long distance your footsoldiers have to leg it relatively longer, so perhaps 2 hours is on the short side? Although with mech forces or some more transports you could have been perhaps better 'prepared'.

But that's all difficult to call based on screenshots and as long as your having fun perhaps not that important :)
For sure I'm having fun following the DAR!
Welcome back!

I agree, and the choice of battle type is not just a matter of force balance - also of how much the objectives matter vs casualties. Now, with the experience of this battle, I might avoid assaults in the future and instead play probes possibly with force adjustment that reflects the battle conditions. If the attacker is compelled to let his force be annihilated because the objectives are worth 750 points and casualties don't matter, it does not make a great game in my opinion.

Interestingly, I don't feel my force is too small, although the TRPs were a waste for the most part. At least 50% of my force is still in reserve. I could always use more mortar ammo though! As for transports... I thought about them when considering my force options. But I wouldn't be able to send loaded transports ahead. Too risky. The foot soldiers would have to first scout the path, then the transports can follow. Which defeats the purpose of having transports for speed in the first place. From my experience I see transports as a way to quickly insert a force to a terrain I already have some control of, before the opponent can react.
 
1600 hrs, Turn 60. On Hill 312 I lose a man to friendly 3in mortar fire - a shell that fell some 80 meters short. I pull out an armored car from the Hill as the incoming enemy mortar fire is getting more accurate. At Harfleur, more scouts reach the eastern end of the village and eliminate the Panzerschreck team spotted earlier. German infantry is seen regrouping in the back of the village, trying to stay out of buildings under tank fire. I still can't believe my luck that Bulletpoint left the edge of the village undefended. Or did he? Maybe his forces are hiding in the buildings and I just don't have enough eyes there yet?

060_Harfleur.jpg

Situation update, 1600 hrs. So, how far have we got in one hour, one half of the battle time? Not far in terms of the full map length, but far enough if I only consider the first 5 objectives. On Hill 312 (objective zone is now contested) I have stopped some 700 meters from the starting line - going forward from there is not a good idea as I would face positions on the western slope, supported from the German side, while having no support myself. This could be expensive. However, I managed to reach the edge of Harfleur, some 820 meters from the starting line. I have contacts that include about a platoon's worth of Panzergrenadiers (includes two Panzerschrecks), two HMGs with heavily depleted crews, a sniper, three dangerous Marders in hard-to-get positions, and a few empty mortars. The only enemy mortars in action are two far back at the church. These have about 10 rounds left between them, then no more mortars for my opponent.

I have updated my estimate of Bulletpoint's force purchase to something between 6 and 8 platoons of motorized Panzergrenadiers (more likely 6 or 7, considering that every squad I have seen so far had a Panzerschreck) with all support weapons of the Panzergrenadier battalion: 6 mortars, up to 12 HMGs plus the Heavy Company (2x 75mm IG, 3x 75mm PaK40). And 6 Marders. Three Marders, the entire Heavy Company, one mortar, one HMG team and approx. one platoon of infantry have been destroyed. The defenders have taken at least 87 casualties.

My side has taken 62 casualties. 2 tanks (1 Sherman V and 1 Sherman VC Firefly) and 6 armored cars (3 x Humber III, 3 x Humber IV) have been lost. I have spent 68% of my mortar ammunition, leaving 153 rounds - I used them very sparingly in the last 15 minutes. I estimate the current score as 221:502 for Bulletpoint (50 for objectives + 171 for casualties for me, 400+102 for my opponent).

060_Overview.jpg

I still cannot operate with armor between Harfleur and Hill 312 as I planned, because Marders (especially 4 and 5) stand in the way. For the near term, I plan to take control of the eastern edge of Harfleur and attack Marder 4 with mortar fire (have been planning this for at least 15 minutes but I am putting it off, trying to get the mortar as close as possible to maximize the chances of a direct hit). From Harfleur I can support the advance from of Hill 312, which would enable me to attack Marder 5. In the medium term I want to take control of Harfleur and cross the river at the Bridge - this seems more in reach than the Crossing.
 
1601 hrs, Turn 61. The second hour of the battle begins and announces itself with action at Harfleur. I position a Humber IV in the "tank spot" I have chosen for support fire on Hill 312, to test if armor can survive there. It survived - for astounding 12 seconds. The Panzerschreck that took it out survived for another ten as the building from which he fired was in the sights of my scouts. It is an interesting development for two reasons. First, so far I have spotted teams of 6 squads - three defending the area up to Hill 312, two behind Hill 312 and one at Harfleur. But this is a seventh Panzerschreck (and the fifth I have eliminated), so there could be another squad at Harfleur (not a big surprise but good to know). Second, it is consistent with my hypothesis that Bulletpoint wanted each squad to have a schreck.

Meanwhile, Private Carmichael jumps over the stone wall and becomes the first British soldier in Harfleur. On the way he catches a glimpse of Marder 6 near the southern edge of the map (far from Harfleur) and provides valuable intel that this vehicle has relocated onto the other side of the river. Based on various contacts I think my opponent also relocated the HMG and infantry from the hedge near the river to the back of the village.

061_Harfleur.jpg

Things happen elsewhere as well. An invisible MP40 [on Hill 312] that has been firing away for 2-3 minutes (with some grenades added for good measure) finally hits one of my scouts. I score a direct hit on the position of the German HQ on the hill - I have no visual contact but overhear some cursing in German so I suppose it landed on target.

The mortars at the church fall silent for almost a minute, then fire again. I interpret it that they received new target orders, so in the next turn the rounds can fall pretty much anywhere. Something to look forward to... but Bulletpoint should have no more than 6 rounds left (+2 on the way).

[Edit... grammar, word order etc... I really shouldn't be writing when it is past midnight]
 
Last edited:
Thanks @Sambott and @Hardradi. Good to have you here!

Very enjoyable AAR. Counting mortar rounds, wow. o_O

Do you have a house rule about mining the crossings?

I wouldn't be surprised if Bulletpoint also counts mortar rounds, at least when he is attacking. Given how critical mortars are and their limited ammunition supply, knowing that enemy mortars have likely run out of ammo is a valuable piece of information.

We don't have any rules about mines. Bulletpoint can mine the crossings. I have two pioneer teams and I rely on them staying alive :) I am fairly confident that Bulletpoint did not use many minefields - he wouldn't have enough points for that. No mines found so far.
 
Turn 61 - update. I studied the new position of Marder 6 and found that it now covers the eastern edge of Harfleur where I wanted to place my armor. It cannot area fire there but a tank would probably be spotted and fired upon. On the other hand, it cannot fire on Hill 312 now. This opens a new avenue of approach around the southern slope.

I also looked at the possible new targets for the mortars at the church and decided that they will be firing at the concentration of troops approaching Harfleur. I order everyone to clear the area - hopefully they will make it before the rounds fall. However, the distance is over 1200 meters and the rounds can easily fall 200 m short or 200 m long - nothing I can do about that.

Also, I noticed that one of my mortar ammo bearers far back got hit (these 1-man units die without blinking, so they are easy to miss). I replayed the turn and concluded he was killed by a stray bullet from an MP40 at 250 meters - out of MP40 range. I did not think this is possible!

Note the effective smoke screen Bulletpoint laid on Hill 312 to prevent support fire against Harfleur.

061_MP40kill.jpg
 
Thanks @Sambott and @Hardradi. Good to have you here!


I wouldn't be surprised if Bulletpoint also counts mortar rounds, at least when he is attacking. Given how critical mortars are and their limited ammunition supply, knowing that enemy mortars have likely run out of ammo is a valuable piece of information.

We don't have any rules about mines. Bulletpoint can mine the crossings. I have two pioneer teams and I rely on them staying alive :) I am fairly confident that Bulletpoint did not use many minefields - he wouldn't have enough points for that. No mines found so far.
I was also impressed by your counting disciplne, although some formations have extra mortar ammo in trucks/carriers; so I was wondering if you could be so sure about it.

Knowing how much ammo the opponent has left is indeed valuable info.
 
I was also impressed by your counting disciplne, although some formations have extra mortar ammo in trucks/carriers; so I was wondering if you could be so sure about it.

Knowing how much ammo the opponent has left is indeed valuable info.
I make assumptions - and also mistakes - so I can't be sure, but in this battle it seems to be reliable. Around the time I expected each mortar to stop firing, it did. After the turn I am going to report, my opponent should have his last 2 shells.
 
1602 hrs, Turn 62. I did not make the right call about the mortars and the shells fell elsewhere, hitting one man from a 2in mortar crew. At Harfleur I lose a scout to a well-placed machinegun (probably LMG of an infantry squad). My opponent has the access to the village well covered, but with the help of armor I will break through. He is also pulling back empty mortars and ATG crews, while some other infantry is moving in.

It is not worth making a situation picture this time, so let me give you a "near grunt level" shot with a Firefly from 10 Troop, B Squadron, 3rd RTR supporting the attack on Harfleur with MG fire while the 2IC team of the 2 Troop, A Squadron, 2nd Northamptonshire Yeomanry is observing enemy positions.

062_Hill312.jpg
 
1602 hrs, Turn 62. I did not make the right call about the mortars and the shells fell elsewhere, hitting one man from a 2in mortar crew. At Harfleur I lose a scout to a well-placed machinegun (probably LMG of an infantry squad). My opponent has the access to the village well covered, but with the help of armor I will break through. He is also pulling back empty mortars and ATG crews, while some other infantry is moving in.

It is not worth making a situation picture this time, so let me give you a "near grunt level" shot with a Firefly from 10 Troop, B Squadron, 3rd RTR supporting the attack on Harfleur with MG fire while the 2IC team of the 2 Troop, A Squadron, 2nd Northamptonshire Yeomanry is observing enemy positions.

View attachment 21468

That's a real nice screenshot. Curious to see if the mortars will indeed stop, that would be some impressive intelligence on your side.
 
Thanks @Lethaface. They did not fire in this last turn, but I'll keep watching them. I mean, listening for them :)

1603 hrs, Turn 63. Now that deploying armor at Harfleur against Hill 312 is problematic, there is nothing to wait for on that side. I will drop a few mortar shells on the Hill and take it with an infantry assault. I mean, I hope I will. At Harfleur, scouts fight with some isolated German infantry. I think it is one mortar ammo bearer and the rifle man of the Panzerchreck team that took out my Humber IV. The first one gets hit by long-range MG fire from the Firefly in the screenshot above. Two German HMGs open up from the other side of the river, area firing the northern access by the edge of the map to Harfleur. Again, I think it is because of the smoke screen I laid to cover Marder 4 - Bulletpoint may be thinking that I want to use this northern access, but I don't, I just don't want to get hit by the Marder unexpectedly, it is not quite clear what it can see and what it cannot. Instead I want to make a breach in the hedge that protects the village in the east and attack frontally. I check that the MG positions can be dealt with by tanks from Hill 312.

063_Overview.jpg

As an interesting point, Humber III armored cars seem to work just like transports do. They usually have a dedicated crew but anyone can man them, and they can have passengers (it is a 3-seater, including driver). I got a recce squadron HQ armored car, which has a driver + two-man HQ team. I don't want to risk the HQ, so I move them to a jeep and replace them with two empty ammo bearers. Now I have an extra armored car. I don't think this can be done with Humber IV, which works like a tank - only with its dedicated crew.

063_HumberIII.jpg
 
1604 hrs, Turn 64. This turn did not go very well, all because of a well placed HMG in a two-story building in the back of Harfleur. This HMG controls the main street and first hit our brave private Carmichael, then turned its attention to an armored car whose crew I foolishly ordered to peek out to try and catch a glimpse of a Panzerschreck in the fields around 300 meters away. The commander got hit. I don't lose the car and can replace the commander with another man later, but still - the bodies keep piling up faster than I would like.

Rather than pulling back, the empty mortar crews, ammo bearers and an ATG crew is crossing the bridge to reinforce Harfleur. They have MP40s (at least 3 in the lot) so this will definitely make things harder for me. I can't do anything about this move because of the thick smoke screens my opponent laid to cover this move. In fact, I have adding some smoke myself to cover my own deployment.

The HMG in the building troubles me - no one can see him although it was firing the whole turn, and the building is out of sight for area fire (I'm learning new tricks from my opponent: you can put an infantry team in the corner of a building whose center is out of sight - then nobody can area fire the building but you can still shoot from the corner). Harfleur is pretty much impossible to attack from the north, but once the smoke disperses, I can attack from the south, covered by tanks from Hill 312.

(Arrows show lines of fire)

064_Harfleur.jpg
 
Back
Top