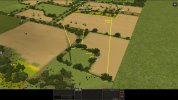
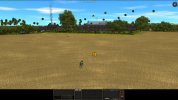
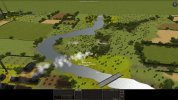
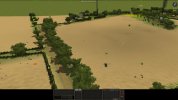
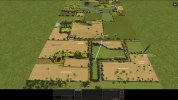
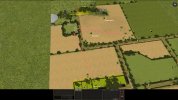
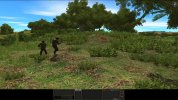
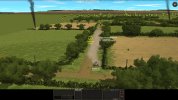
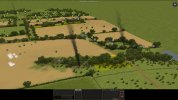
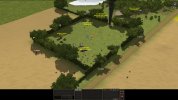
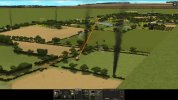
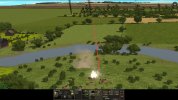
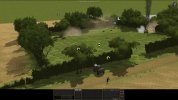
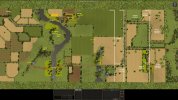
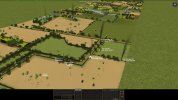
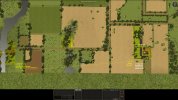
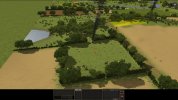
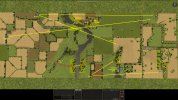
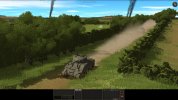
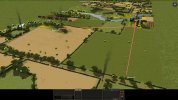
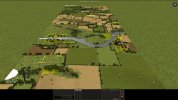
Monsaint Manor (Drifter Man vs Bulletpoint DAR)

1534 hrs, Turn 34. An unremarkable turn, not even worth a picture. I finish the shelling of the first ATG position, satisfied that I scored enough hits. The price is one man lost to friendly fire as the HE keep hitting a tree next to a scout unit - and they have been too suppressed to get out of there for 2 minutes. I will keep the Firefly in the same position to see if the ATG wakes up - at 830 meters it has a decent chance of getting missed or of surviving if hit. And if it doesn't, it is the tank that has the least HE ammo.

I am moving in three 3in mortars for direct fire missions - "high risk, high reward". German mortars are still firing - 37 rounds remain by my estimate. The mortar marked as "empty" is not empty - apparently using the ammo of another mortar of the same section, the sixth mortar I have not seen yet. Some rounds are accurate, some are off, but until Bulletpoint runs out of mortar ammo and until the ATGs are destroyed, I am not going anywhere on the Harfleur flank. The two scout troops of the recce regiment have been taking most of the shelling. They are dispersed and I try to move them around, and I think it would be worse if I had normal infantry teams with 4-5 men, the casualties would be higher with each hit. I'm keeping fresh, intact units back in reserve for when their time comes.

1535 hrs, Turn 35. Another unremarkable turn, nothing seems to work in my favor. Mortars take long to move and deploy. Two scouts are hit by German defenders at Hill 312 while just trying to move around. An armored car tries to pass an opening I made by pioneers, declares "no", turns around and starts looking for another path around several patches of bocage. And the Firefly area-firing the AT gun on Bulletpoint Ridge fires just one more round before the order is canceled. That one round explodes again on that fateful tree and kills the section leader of 2 Troop.

1536 hrs, Turn 36. German infantry team leaves a position before Hill 312 just as a mortar strike is coming. It looks like Bulletpoint placed foxholes a tile away from bocage where his troops can hide. Another mortar strike begins against the position of the second AT gun on Bulletpoint Ridge. Will we start moving soon?
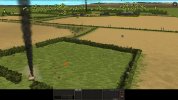
036_Hill312.jpg
 
Last edited:
1537 hrs, Turn 37. I am trying to get some troops to attack this bocage square leading to Hill 312 but so far to no avail. German machineguns cover all access routes - I lost another man trying to find a new one. Supporting fire from one tank (MG only) has to go through trees and has little effect, if any. The mortars are deploying; I hope they will finally change the picture.

037_Hill312.jpg

And I get reminded there is a Panzerschreck hiding in the wheatfield, waiting for me to expose my armor. They are perfectly camouflaged when prone, they just can't stand up without attracting attention - I am counting on it. They are just 80-120 meters away from my armor.

037_Schreck.jpg

On the right flank I finally mount a direct mortar attack on the ATG position on the northern end of Bulletpoint Ridge. Watching the fall of shot is frustrating. About half falls way too long, the other half way too short. One or two are on target. I'll have to use another mortar for this. That means several more turns getting it into a (risky) position. I'm just not getting anywhere in this battle.

037_ATG.jpg
 
1538 hrs, Turn 38. The Panzerschreck in the wheatfield stands up to engage and is promptly eliminated. Finally - I could not go out and get it myself (the field is covered by a HMG) and I could not see it when hiding. Now I am free (I hope!) to deploy armor against the defenders of Hill 312 without limitations. At the same time, the bocage box held by Germans will be targeted by direct fire from 3in mortars.

Meanwhile, Bulletpoint gives a target order to his MG42 against my Humber III and finds out what I already know - that it is a tough car to destroy with a MG. However, I find out something new: That its bigger and better Humber IV brother is close to useless. It has a very low profile, apparently, and it cannot see or target almost anything.

038_Humber.jpg

The AT gun position on Bulletpoint ridge was probably not destroyed. I fired 12-14 mortar shells, only 2 were sort of on target (one spot on, one a bit to the side). I cannot assume this gun has been destroyed. Another mortar is moving into position while the first one is pulling back before German mortars can strike it.
 
1539 hrs, Turn 39. Let's take a step back for a while to look at the whole situation.

039_Overview.jpg

I have been advancing in three directions. On the left, the remnants of 1 Troop (lost all but 6 men and 3 armored cars) have been stuck at the square bocage feature by the left side of the road, which is well defended - but now, under direct mortar fire and with armor attacking it from two directions, the defenses are starting to budge. I will send more scouts to the bocage square to assess the situation inside and how much more support fire is needed. Volunteers?

At the center, 2 Troop is moving towards the northern edge of Hill 312. 2 Troop has also taken heavy casualties but is in slightly better shape than 1 Troop. I do not expect opposition directly on the near side of the hill, but there can be enemy positions on the far side, where I do not want to go yet. However, I would like to push out or eliminate the sniper who is in control of the access to Harfleur on the right. My advance on the right has basically been stopped by the sniper and the AT gun behind the river. Neither can be targeted with area fire from anywhere. I have to get close or use mortars.

Speaking of, I am switching mortars to direct fire, almost exclusively. German mortars were silent in this turn, for the first time in maybe 30 minutes, and they should also be out of ammo save for maybe a few rounds. Except one mortar that I still expect to appear somewhere - this one should have the full allocation of 32 rounds. I am still careful, but maybe it is time to send someone with binoculars to the highlighted observation point - I have been keeping out of that place because Bulletpoint kept in under mortar fire.
 
1540 hrs, Turn 40. The bocage square guarding the access to Hill 312 is now under fire by tanks and mortars. A HMG team seems to have been largely eliminated with tank fire. German infantry attempts a smoke screen using smoke grenades - to cover withdrawal? Difficult to say, because an infantry team is seen moving in from the Hill. Reinforcements to beef up the defenses? Or again, a covering force for a withdrawal?

Looks more like Bulletpoint wants to abandon this bocage feature and save as many men as he can. This will be difficult for him since I cover the exit with a Sherman. But the smoke screen and the dust from explosions can join to give the defenders a chance. We'll see.

040_Hill312.jpg
 
1541 hrs, Turn 41. There is a lot of movement on the German side of the bocage square. Looks like my opponent wants to establish a second defensive line on the rear side of the box. He moved in the second HMG that was guarding the southern edge of the map, the fresh infantry team and some more surviving infantry. At the same time, 2 volunteers reach Hill 312 north of the objective zone. They won't live long.

041_Hill312.jpg

Emboldened by the apparent success on the left flank, I moved many things on the right flank as well. Too many things in fact. I wanted to test if the ATG is still alive (the one I did believe was still alive - but I did not want to use more mortar ammo on it in case it wasn't). So I rushed and armored car forward, hoping that it would pass the kill zone owing to its high speed. It did not pass, and I paid for the confirmation of the gun's survival with an armored car. That would be ok, it was the risk I was taking (and my men eagerly accepted). But, in addition, I was moving a scout detachment behind the car. The AP shell, after passing through the car, exploded on a hedge next to them, and because it is an APHE, its effect was devastating - a HE would not have done a better job. 2 men lost, a third lightly wounded. This adds up to the losses this scout section has already taken - now the whole section is nearly wiped out, with only 4 men surviving, of those 2 lightly wounded.

The right flank is not ready for advance. Until the gun is destroyed, we are stuck here.

041_Humber.jpg
 
1542 hrs, Turn 42. Four mortar rounds fall around the key ATG position on Bulletpoint Ridge, which must be destroyed before I can do anything. One falls close enough to cause damage, but that's not enough. 10 more should hit the position in the next 1-2 minutes. I intend to spend this mortar on it. And then another. And another.

Meanwhile, scouts are closing in on Hill 312, with German defenses on the eastern slope under heavy shelling from tanks and mortars. I want to wipe them out, but I really do not want to go across the hill. Anything that appears on the crest will quickly die as the defenses on the other side are intact.

042_Hill312.jpg
 
1543 hrs, Turn 43. Scouts reach the perimeter of the bocage square and find German forces mostly in disarray after the shelling. One infantry team fights back, but the rest are mainly concerned with their own survival. My opponent defended the box with an infantry squad and a Platoon HQ (probably also the HQ of the two squads that held the frontline) and a HMG team. Another squad attempted to join from the west side of the hill but was driven away with mortar and tank fire; this supports my suspicion than the western side of the hill is hiding an infantry position.

043_Hill312.jpg

The remainder of the attack on the AT gun on Bulletpoint Ridge is, again, disappointing. Two mortars spent 24 rounds and perhaps 2-3 hit the action tile of the gun. I'm moving another mortar to attack and also two tanks that will again try some area fire, regardless of the terrain wave that shields the gun so well. I am getting desperate about this gun: this gun alone can hold off the entire attack and seems to have a forcefield around it that deflects mortar rounds.
 
1544 hrs, Turn 44. Excellent news - a Firefly that I sent forward to engage the suppressed AT gun with area fire got hit with an AP round in turret face and was knocked out. Three crew killed, one survivor.

044_Ffly.jpg

Why is this excellent news? Because the shot was not fired by the immortal, forcefield-protected AT gun the Firefly was going to engage, but by another, third AT gun from the southern side of Bulletpoint Ridge. The existence and location of this gun are no surprise, and if I am right, this is the last gun my opponent has available.

It was an excellent shot - I think the gun could only see the turret but killed the tank with just one shot from 800-850 meters. But this tank has been up front fighting for a long time, has already dodged three 75mm HC and six AP rounds fired by different guns and tank destroyers, had its optics and radio damaged from a HE hit, and spent over 2/3 of its HE ammo. I can't complain about bad luck with this tank! Of course, all this changes nothing about the fact that Bulletpoint has just got a chunk of victory points for this high-value unit. This is a probe battle, casualties are as important as objectives.

Another piece of excellent news: the second Sherman that shelled the immortal AT gun position scored a nearly perfect hit - a 75mm HE explodes about 2 meters from the foxhole at which the gun is situated. Should easily knock out the gun and kill the entire crew. If this didn't kill the gun, I don't know what will...

044_ATG.jpg

Meanwhile, a Humber IV joins the scouts to provide direct support of their attack on the bocage square at Hill 312. Its MG fire is effective and breaks the will of the last infantry team that resisted. I must watch out though - there is a panzerschreck in the bocage, I have seen it. It is probably dead or suppressed, but I am pulling the armored car out again at the start of the next turn.

044_Hill312.jpg
 
1545 hrs, Turn 45. I let the Sherman pound the position of the AT gun for 15 more seconds because it seems to be well ranged in on the target. It achieves one more perfect hit just like the one above. I am confident now that the AT gun is no longer a threat. Phew!

German resistance stops in the bocage square on the eastern slope of Hill 312 - the surviving soldiers are left to the scouts to mop up. I spot another panzerschreck there - every squad of this one platoon that I have dealt with so far had one.

A mortar and a tank is moving into position to attack the remaining AT gun in the southern part of Bulletpoint Ridge.

Situation update, 1545 hrs. 45 minutes have passed, 3/8 of the allocated time for this battle. I have advanced 580 meters from the starting line - not much ground gained since the last update, although some scouts got close to the top of Hill 312, some 660 meters from the start - but they do not hold on to anything there. No German infantry in sight poses resistance. Known German units in front of me include one Marder (probably) far back, one 75mm AT gun and a Sniper, plus a few empty mortars.

My assessment of the opponent's forces remains at a Panzergrenadier Battalion (infantry only) with 12x HMG, 6x 81mm Mtr, 2x 75mm IG, 3x 75mm ATG, supplemented with 4 Marders. Three Marders, both 75mm IG, one mortar, one HMG are confirmed as destroyed. About one Panzergrenadier platoon has been eliminated. In addition, two antitank guns have probably been destroyed. The defenders have taken at least 66 casualties. Enemy mortars are probably empty with the exception of one, which has not been located yet and which should have all 32 rounds available. The third AT gun has been spotted and I am moving in to engage.

My side has taken 49 casualties. One Sherman Firefly and 5 armored cars (3x Humber III, 2x Humber IV) have been lost. I have spent 65% of my mortar ammunition, leaving 167 rounds. Man, they go quickly! From now on I must weigh every round before it is fired. I estimate the current score as 186:520 for Bulletpoint. For me, 50 for objectives + 136 for casualties. For Bulletpoint, 450+70.

045_Overview.jpg

Right now I will secure my position on the eastern slopes of Hill 312 but will not proceed further, as on the other slope I would not have any support. I must flank Hill 312 from the north with the force that has been fighting German long range weapons to open the way to the fields ahead. For this, I must deal with the three known German units on this flank (plus anything that appears later). First, the AT gun on the southern side of Bulletpoint Ridge. I wanted to attack with mortars, but I think I found a way to area-fire it with a tank without the gun being able to fire back (risky if I am wrong, but I will give it a try - saving mortar ammo is paramount). Then I will be able to move a tank to kill or drive out that sniper.

The Marder can wait for now. It controls the northern edge of the map and the fields west of the Harfleur-Hill 312 line. It is in a bocage patch that almost completely blocks the view - it cannot be spotted and targeted. I think my opponent placed it on the steep slope that supports tall bocage: you can do that in the setup phase but once you leave it, the tank cannot crawl back. So I think he will not want to move it until he has to. When he does, I have reasonable control of its exit route. If he does not, I can attack it with a mortar - it is sitting on a TRP so the fire could be quite accurate. But I would prefer to do it at close range if I can, for a better chance of scoring a direct hit.
 
1546 hrs, Turn 46. An expensive turn that widened the gap that separates me from victory. The third AT gun, which knocked out the Firefly, turned it attention to a Sherman further afield and set it on fire with two shots. Fortunately the crew (minus the commander, who was killed) bailed out before the tank blew up, but two infantry were lost to "APHE" and fragments. I did not think the gun could see the Sherman because it had been sitting there for 2 or 3 minutes, but eventually they caught a glimpse of it through all the foliage. 31 valuable HE rounds are now gone and become a threat to my own troops because the burning Sherman sits near several key openings that I need to pass through. The right flank is turning into a wreck yard.

046_RightFlank.jpg

On the left flank I also added one wreck - 1 Troop HQ Humber IV was taken out by a fourth AT gun. No survivors. That's fine - I sent it there to see if this flank is covered. It is. I have no contact, but I traced its position back using sound and the tracer path. It could also be a Marder but I assume an ATG as a Marder would probably have been spotted by now. An ATG would be less of a trouble because it has a fairly narrow field of fire that includes just the southern edge of the map and the western slopes of Hill 312. I can ignore it for now.

046_ATG4.jpg

In the bocage square at Hill 312, scouts continue to eliminate German infantry. They all chose death over surrender - maybe I did not get close enough. Both Panzerschrecks have been eliminated. My opponent is trying to sneak another Panzerschreck through the woods on Hill 312. That's the fourth schreck I've seen in this battle.

This all shows how cautious the attacker must be when trying to defeat a well-prepared defense. I've heard the opinion that assault is too difficult for the defender because of the large difference in points, but there is a good reason for the difference. The defender's job is to sit, observe and kill anything that moves. The attacker first pays with blood for information about the defender's positions, and then again with more blood for assaulting them. Good that I brought those armored cars - they haven't done much fighting but they have done a lot of dying for the valuable tanks.
 
The defender's job is to sit, observe and kill anything that moves.

If the defender only has to do that, either the attacker screwed up or the map heavily favours them. In this case it's certainly the latter. Doubly so as a bocage map. You are forced to advance on a narrow front where the defender, despite inferior numbers, can concentrate his firepower. Remember 300? Same thing.

Consider that if you turned this map 90 degrees the defender would have such a wide expanse of land to cover that it would be virtually impossible. A square map is fair for all, the attacker has room to maneuver, the defender has a decent chance of winning if he has selected the right force and is flexible enough to adapt to what the attacker is doing. To quote General Patton: static fortifications are monuments to mans stupidity.
Makes sense. The ease with which the defender can hold the line depends on whether he has enough forces to cover the width of the map - which, in this case, he has, at least twice over. I don't have any option to go around - I only have one direction available: to crash right through.

But I don't want to blame the map for my trouble - that's not the right mindset right now, I need to win :) The fact is that I screwed up in various minor ways, Bulletpoint didn't, and it has cost me time and casualties. One thing on the map that I will blame though is that the defender holds 225 points' worth of objectives that cannot be contested, protected by their distance from my starting line. I don't want to say there is no way to ever reach them in 2 hours, but for that my opponent would have to be much less competent (or me much more competent than I am). The map is both too narrow and too deep - but it is an interesting exercise about how far I can advance in the time available, with unlimited upside if I do well.
 
1547hrs, Turn 47. I wasted this one. The game crashed when saving the file. I reloaded the turn and carefully issued all orders again, but forgot the most important one - for the Sherman to go forward and attack ATG 3 with area fire.

One thing I did achieve is to get visual confirmation of the fourth Marder. Not that I needed it - I know well where it is - but I also want to know in case my opponent decides to pull it out of that position and do something else with it. It is rested against the bocage, in a way that can only be done in setup, and controls the northern edge of the map as well as the space between Harfleur and Hill 312. I don't have a good way of attacking it yet.

047_Marder.jpg
 
1548 hrs, Turn 48. The Sherman begins shelling ATG 3. None of the three shells fired so far comes close, but the last one at least obscures the view from the gun to the tank, which can increase my chances of survival.

Meanwhile, scouts make themselves comfortable in the bocage box among the pile of dead panzergrenadiers, maintaining a respectful distance from the burning Marder - these things tend to explode. They engage some troops Bulletpoint has left behind to keep watch on me. I drop one mortar shell on them using "target briefly". Some scouts are running low on ammo and since I don't plan to move them for a while, I could as well send a jeep over for replenishment.

048_Hill312.jpg

1549 hrs, Turn 49. Two good hits near ATG 3, but not enough. A deployed HMG - looks like only two men remaining - is spotted and fired upon in the woods in the southern part of Hill 312. I am sending scouts out towards Harfleur, sweeping the field for Panzerschrecks. In Harfleur, enemy mortar team (presumed empty) is seen pulling back towards the river.

1550 hrs, Turn 50. Two more good hits and one excellent hit on the suspected ATG position. I will keep firing for one more turn. Low intensity firefight continues on Hill 312 between scouts and several panzergrenadiers. Supported with low-intensity 3in mortar fire (1 round per minute), I am closing in on the sniper position, which I expect to be empty by now.
 
Last edited:
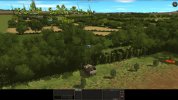
1551 hrs, Turn 51. Main developments of this turn:
  • I proclaim ATG 3 as probably destroyed and stop firing at its position.
  • The sniper position is not empty - another scout is taken down on Hill 312.
  • German HMG (MG34, judging by the sound of it) is heard from a three-story farm building in Harfleur. Rifle sounds are heard from one of the buildings.
  • A fifth Marder is spotted far back in a waiting position that has some sketchy observation of the northern flank. This (plus ATG 4) means that Bulletpoint cannot have a full Panzergrenadier Battalion - he had to delete at least a platoon and possibly as much as a company of infantry. It means more Marders to destroy, which is good. It means less infantry to kill, which is sad :)
  • German infantry holding the south of Hill 312 - parts of two panzergrenadier squads and two men remaining from a HMG team - are pulling back from the hill.
The arrows below show roughly where I think my opponent's AT assets can see.

051_Overview.jpg
 
1552 hrs, Turn 52. Although I have made a big dent in Bulletpoint's AT defenses, the rest - or at least what I can see - still poses a tough puzzle for me to solve. If a place is high enough to place a tank to shell Harfleur, it is potentially also in sight of one of the two Marders. Potentially - just barely - but with enough time, they might spot my tank. So, one way or another, I have to deal with the Marders. I will deploy a mortar against Marder 4 - as close as safely possible, but still, at range over 800 meters a direct hit is unlikely. At least it could convince Bulletpoint to move it. I will try attack Marder 5 by area firing the hill behind which it is hiding. That's a risky job, so I will use a tank that is low on HE ammo. The terrain is complex and redeploying the tanks takes time. Meanwhile I am using the few blind spots I can find (I hope) to cover my advance towards Harfleur.

052_Shermans.jpg

My opponent targets my observation post - now packed with mortars and HQ units - with mortar fire. For a moment I freeze in terror, then it turns out it is just smoke...
 
1553 hrs, Turn 53. Developments:
  • Two Humber IV armored cars are deployed to support the advance on Harfleur. With their low profile they are less likely to be spotted by Marders and I also want to spend their 37mm ammo before they die.
  • Contact ATG 4 is redesignated as Marder 6.
  • The sniper position between Harfleur and Hill 312 received good hits by 3in and 2in mortars. I hope the sniper team is gone. Two volunteers from the 2 Troop will check on them in the next turn.
  • An infantry contact is registered approaching the bridge across the river from Harfleur - probably the empty mortar team my opponent wants to pull out.
053_Overview.jpg
 
1554 hrs, Turn 54. A lot of things are moving on my side - I am making a move forward after a long static phase. Once again, I am having trouble with troops getting tired, but I guess this is a good sign. My opponent is pushing his men a lot harder though - the HMG team I fought on Hill 312 just a few minutes ago is spotted running along the river far back.

Developments:
  • Scouts on Hill 312 find a Panzerschreck team and hit the rifle man. The tube again escapes to haunt me later.
  • Another scout team on the Hill gets under rifle and MG fire from the other side. They go to ground as ordered.
  • Another scout team reaches the sniper position between the Hill and Harfleur. They find it empty. Bulltepoint again managed to pull them out before the mortar fire became accurate. They will come back to haunt me later, too.
  • In Harfleur, the infantry pulling back is the MG team I encountered earlier in the 3-story building. Bulletpoint has moved them out, to escape area fire from tanks, to a new position that covers the main street of Harfleur. However, I know where they deployed the gun and the new position looks vulnerable from Hill 312.
One thing about the map being "too deep" as I said: I think in many battles it makes little sense for the defender to pull back. You defend the objectives or die. Here, having 1+ km of depth behind the front line, Bulletpoint can withdraw. This and the fact that casualties are important (50% of the maximum points total) give the battle a more realistic feel - it is no longer an annihilation match. So I would keep the depth of the map, just make it wider. We want big maps!

054_Overview.jpg
 
  • Scouts on Hill 312 find a Panzerschreck team and hit the rifle man. The tube again escapes to haunt me later.

What the hell kind of sacrifices to what Gods did Bulletpoint make to have that happen? It's always, always the tube guy who gets hit. And if it's an infantry squad, it's either the leader or the Bren gunner.
 
Back
Top Bottom